Home Index Our Family Our Travels Our Cruises Our Images
 

Kitchen Remodel 2012 Carriage House-2013 Solar Project-2015 Rosalee's Crafts Web Cams

Carriage House - 2013


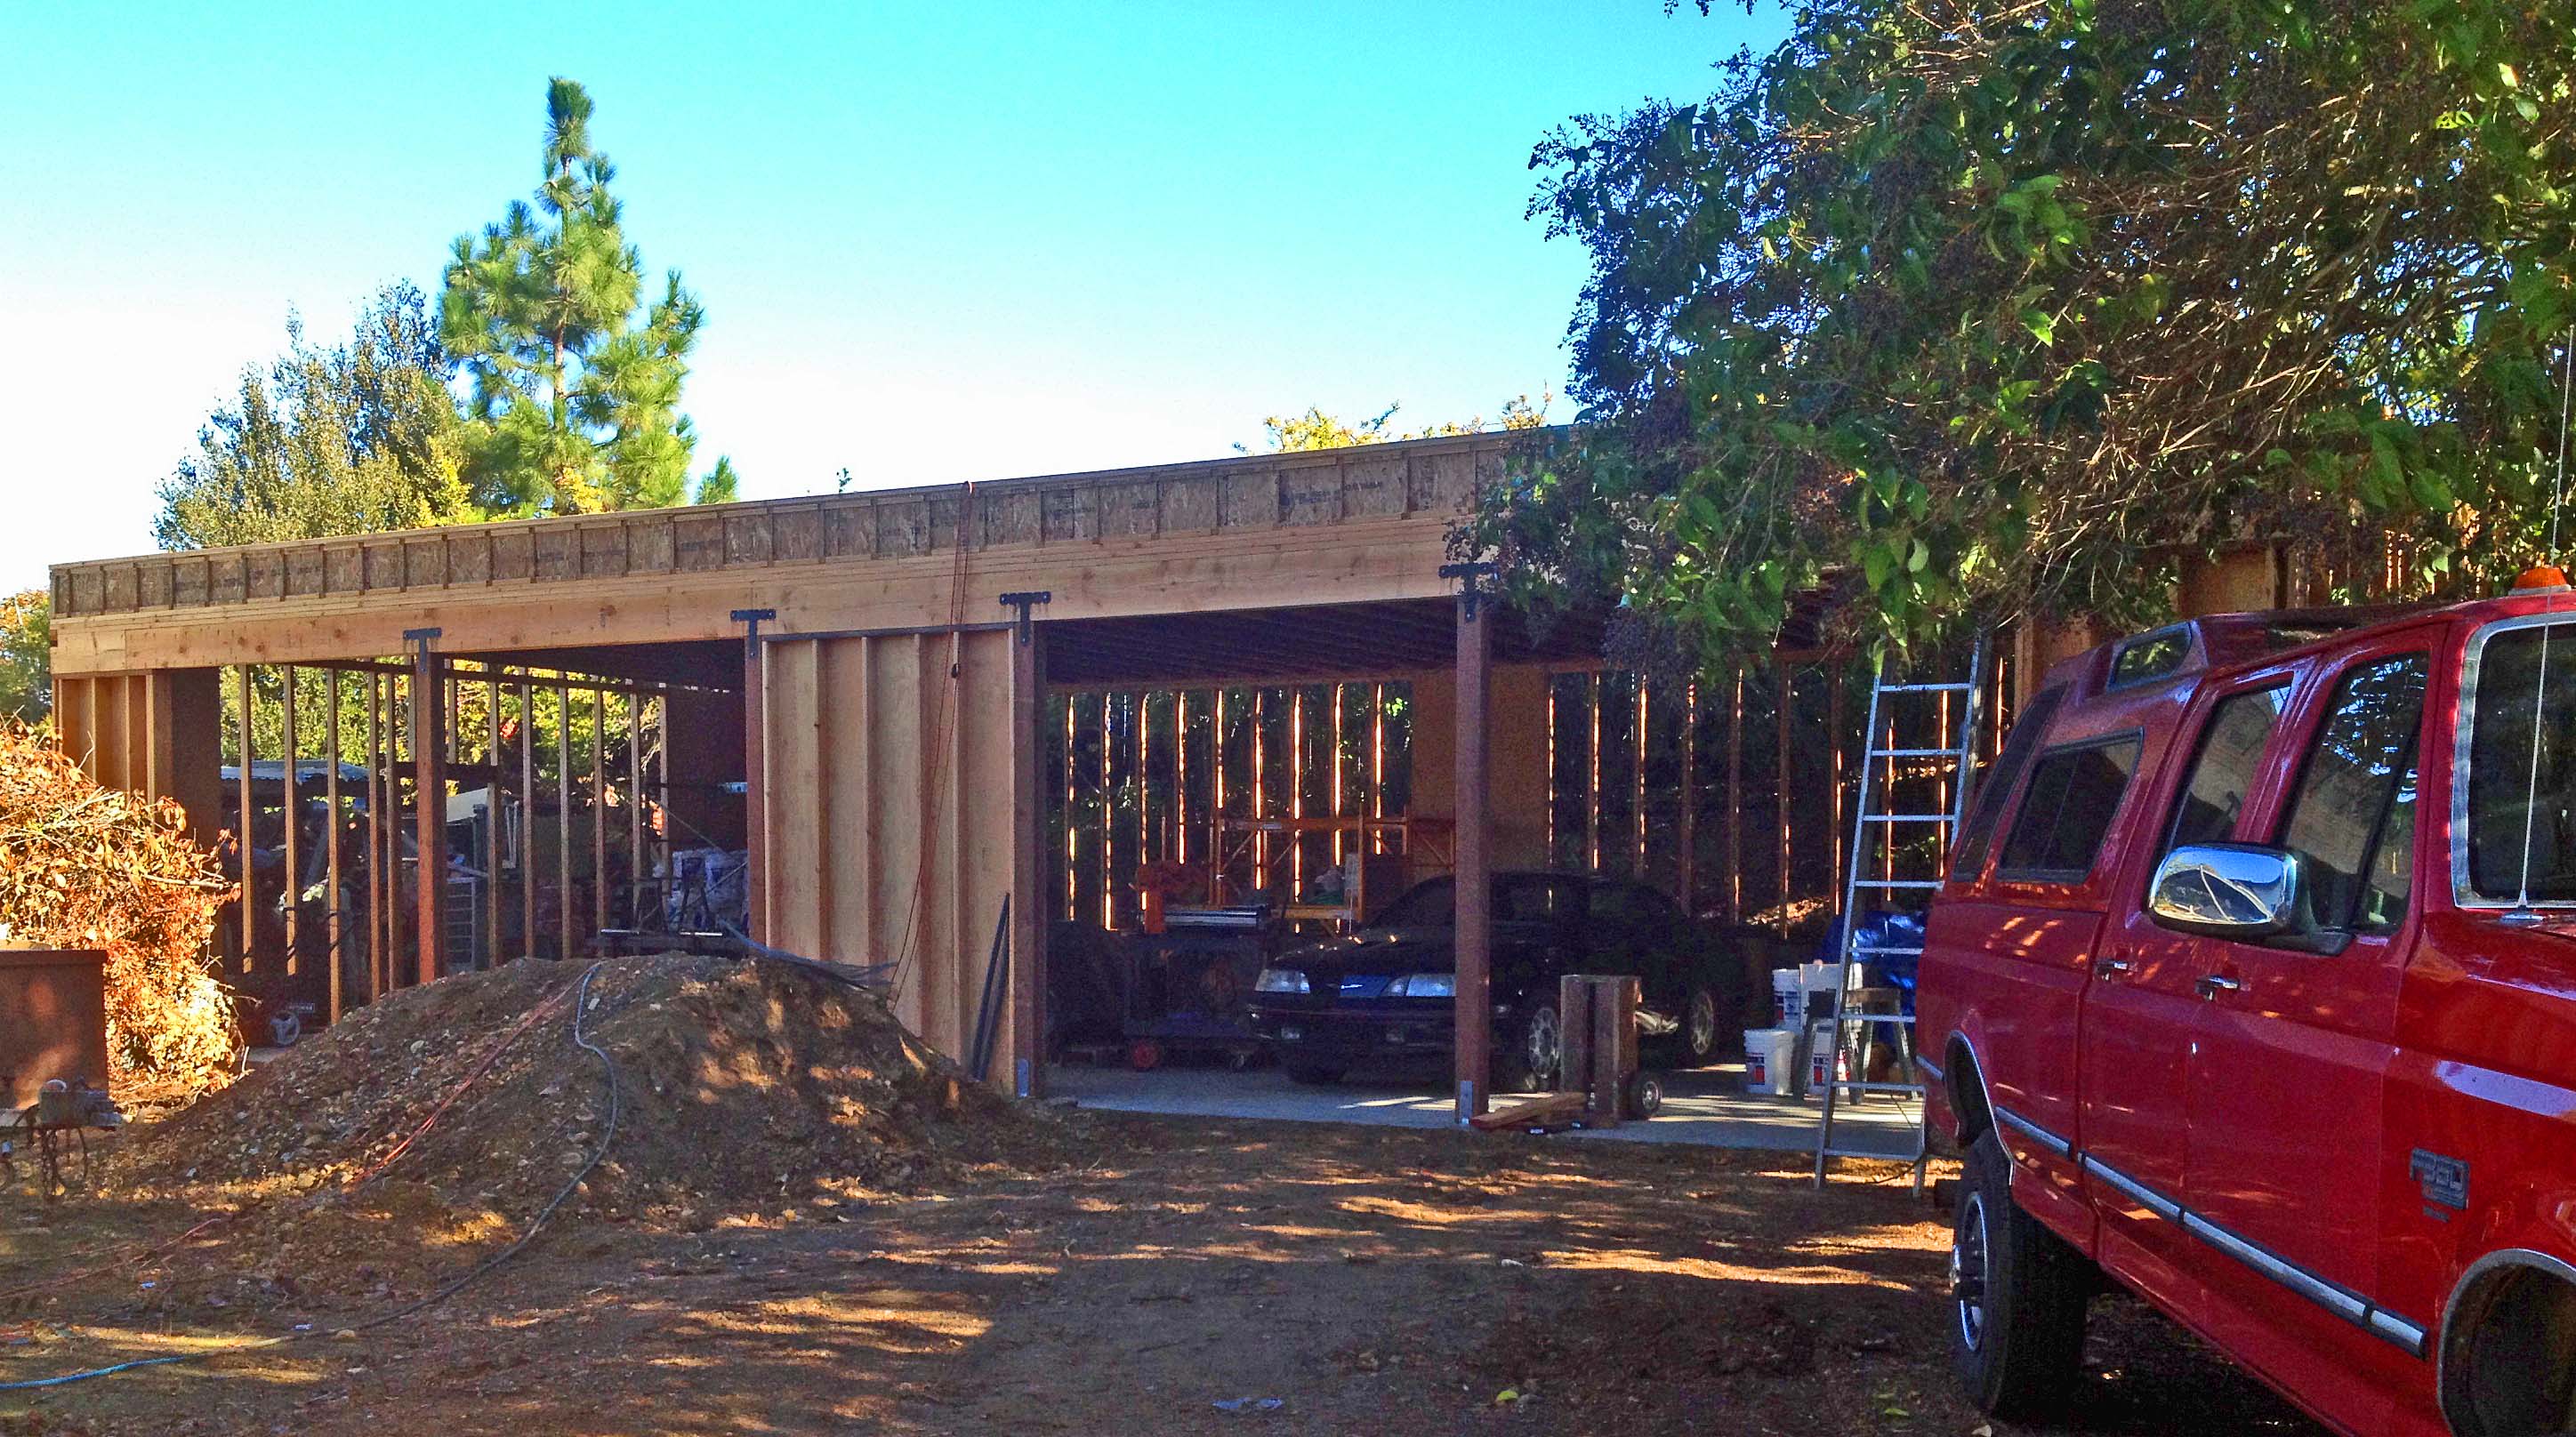
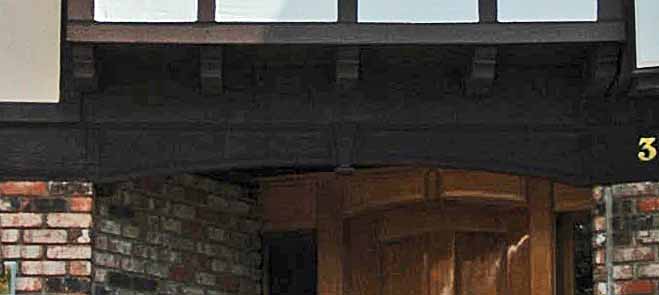
For all the years that I taught shop classes, I had complete automotive, wood, metal and electronic labs available to me with a wealth of tools... at school. There was never a reason for me to have my own shop at home. Since I have retired, those shops are no longer available to me. In some cases they do not even exist any more. I have been trying to accomplish all of my projects by working in our regular two-car garage in the house. But it also serves as excess storage space, and totally fills the garage. The cars have never been able to be in the garage.

We need not only some work space to do projects but we need to get the truck and extra car in out of the weather. They don't get used too often, so the weather treats them pretty badly. So this building will give us some storage space, a space for two vehicles, and a nice sized shop for the tools.

Both parents have passed away, and they were able to share a small amount of money with the family. My dad worked for many years to finally be able to build himself a shop on the ranch. Were he alive today, he would be most pleased to know that his hard-earned 'estate' that he left is being used to build our shop. With everything but the concrete slab being done by me, we should be able to keep the cost for this Carriage House low enough to be able to finally give me a place to work.

The name of Carriage House comes because it will eventually have the appearance of a Carriage House that sat behind any respectable English Tudor-styled home.


.


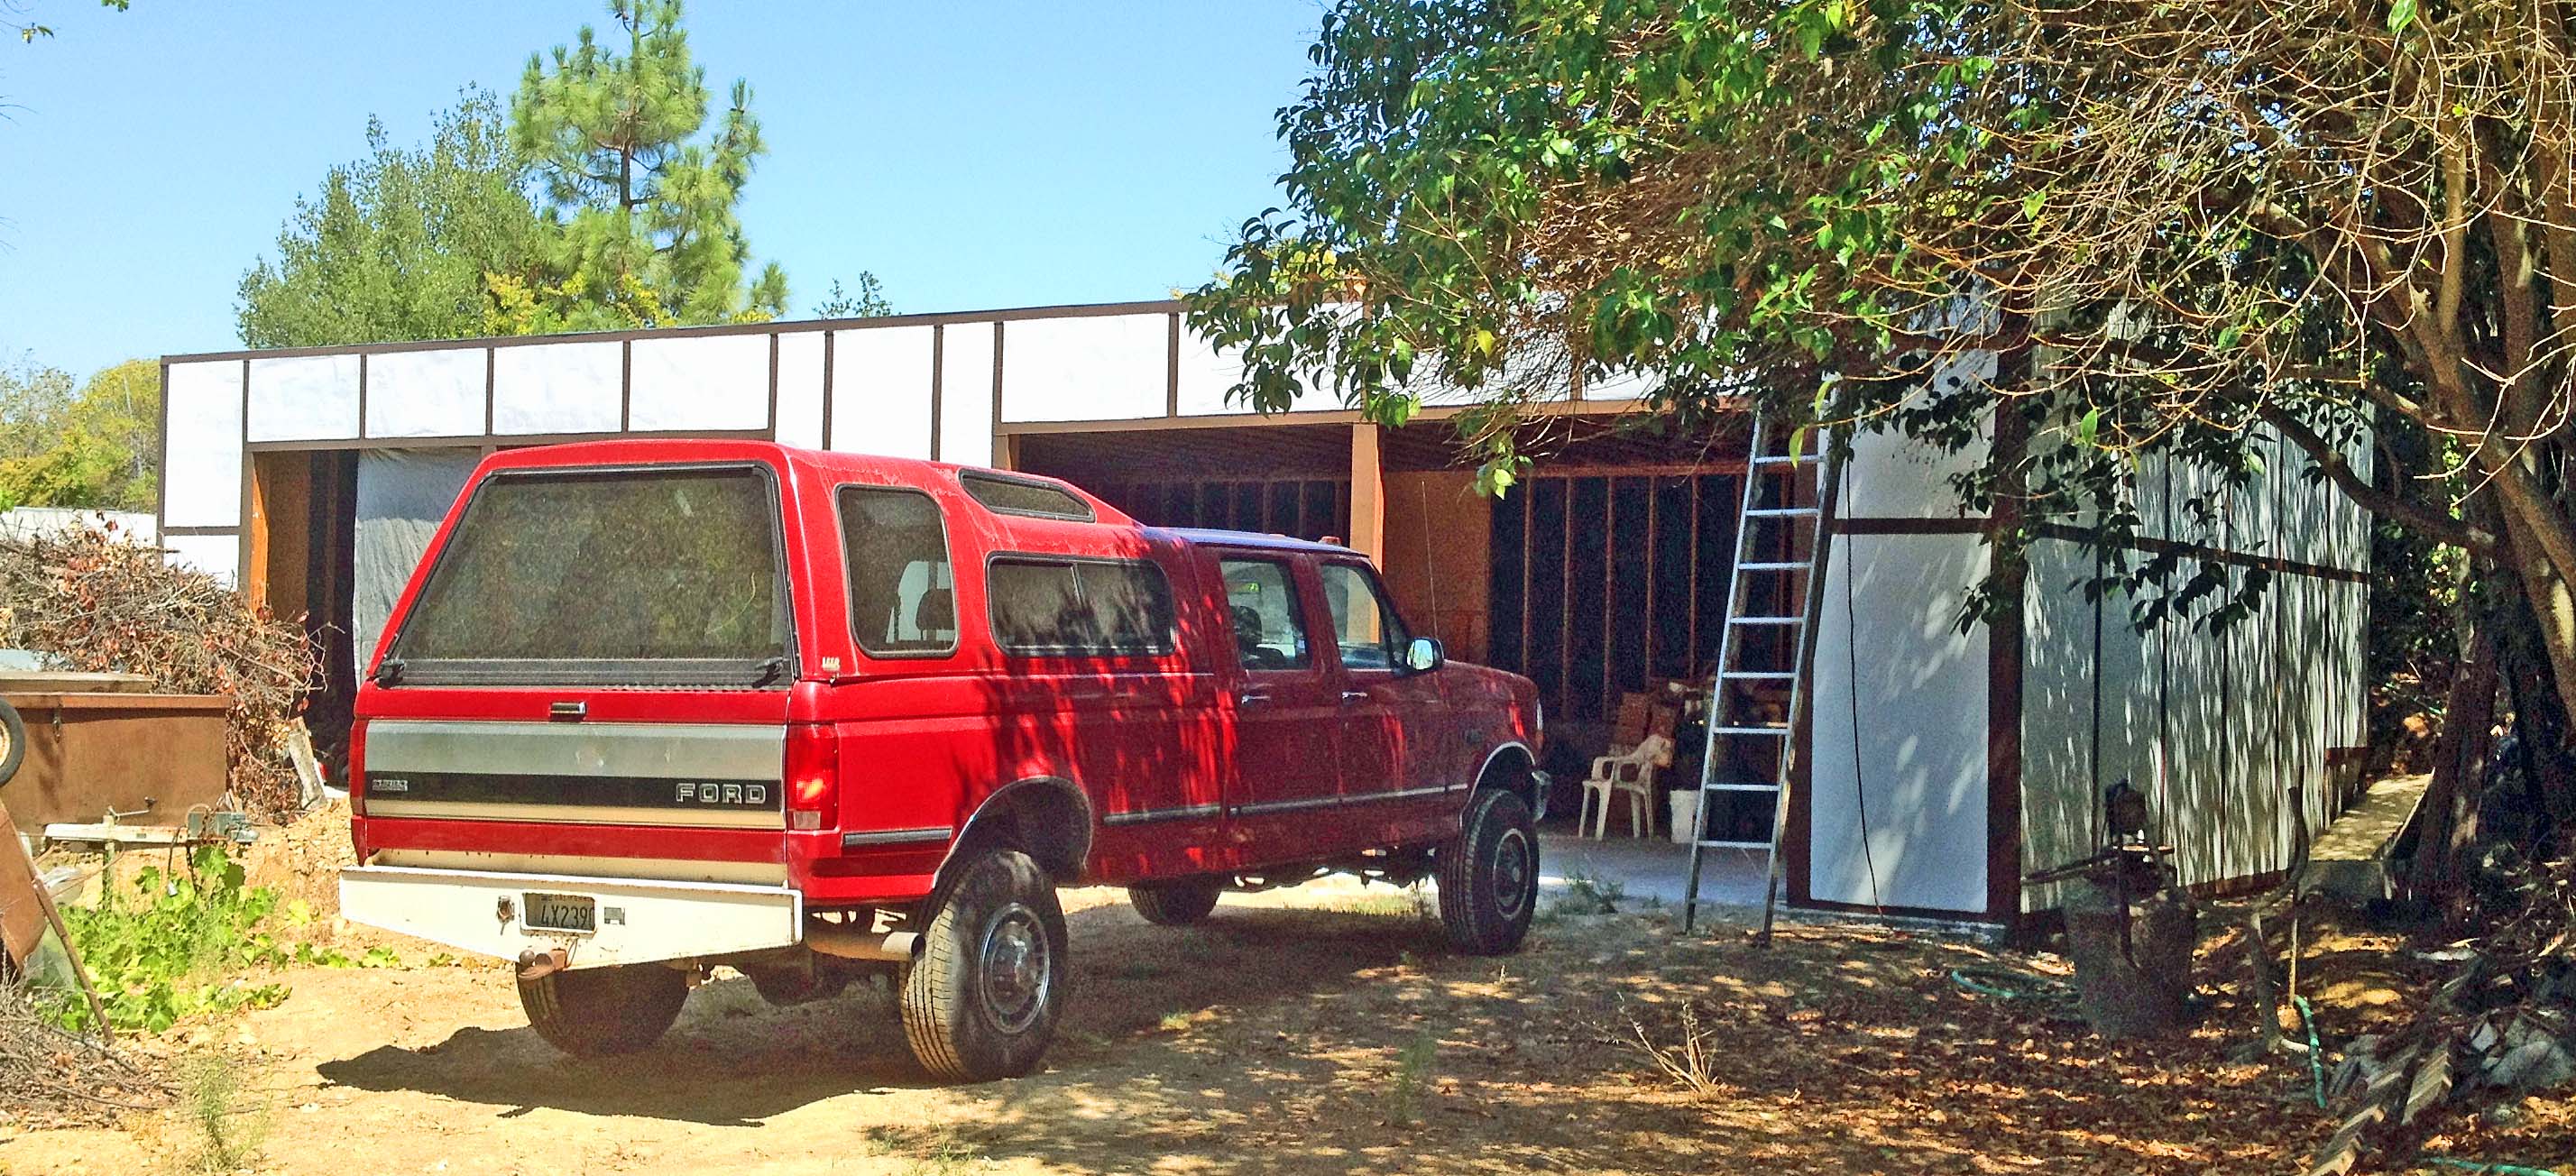
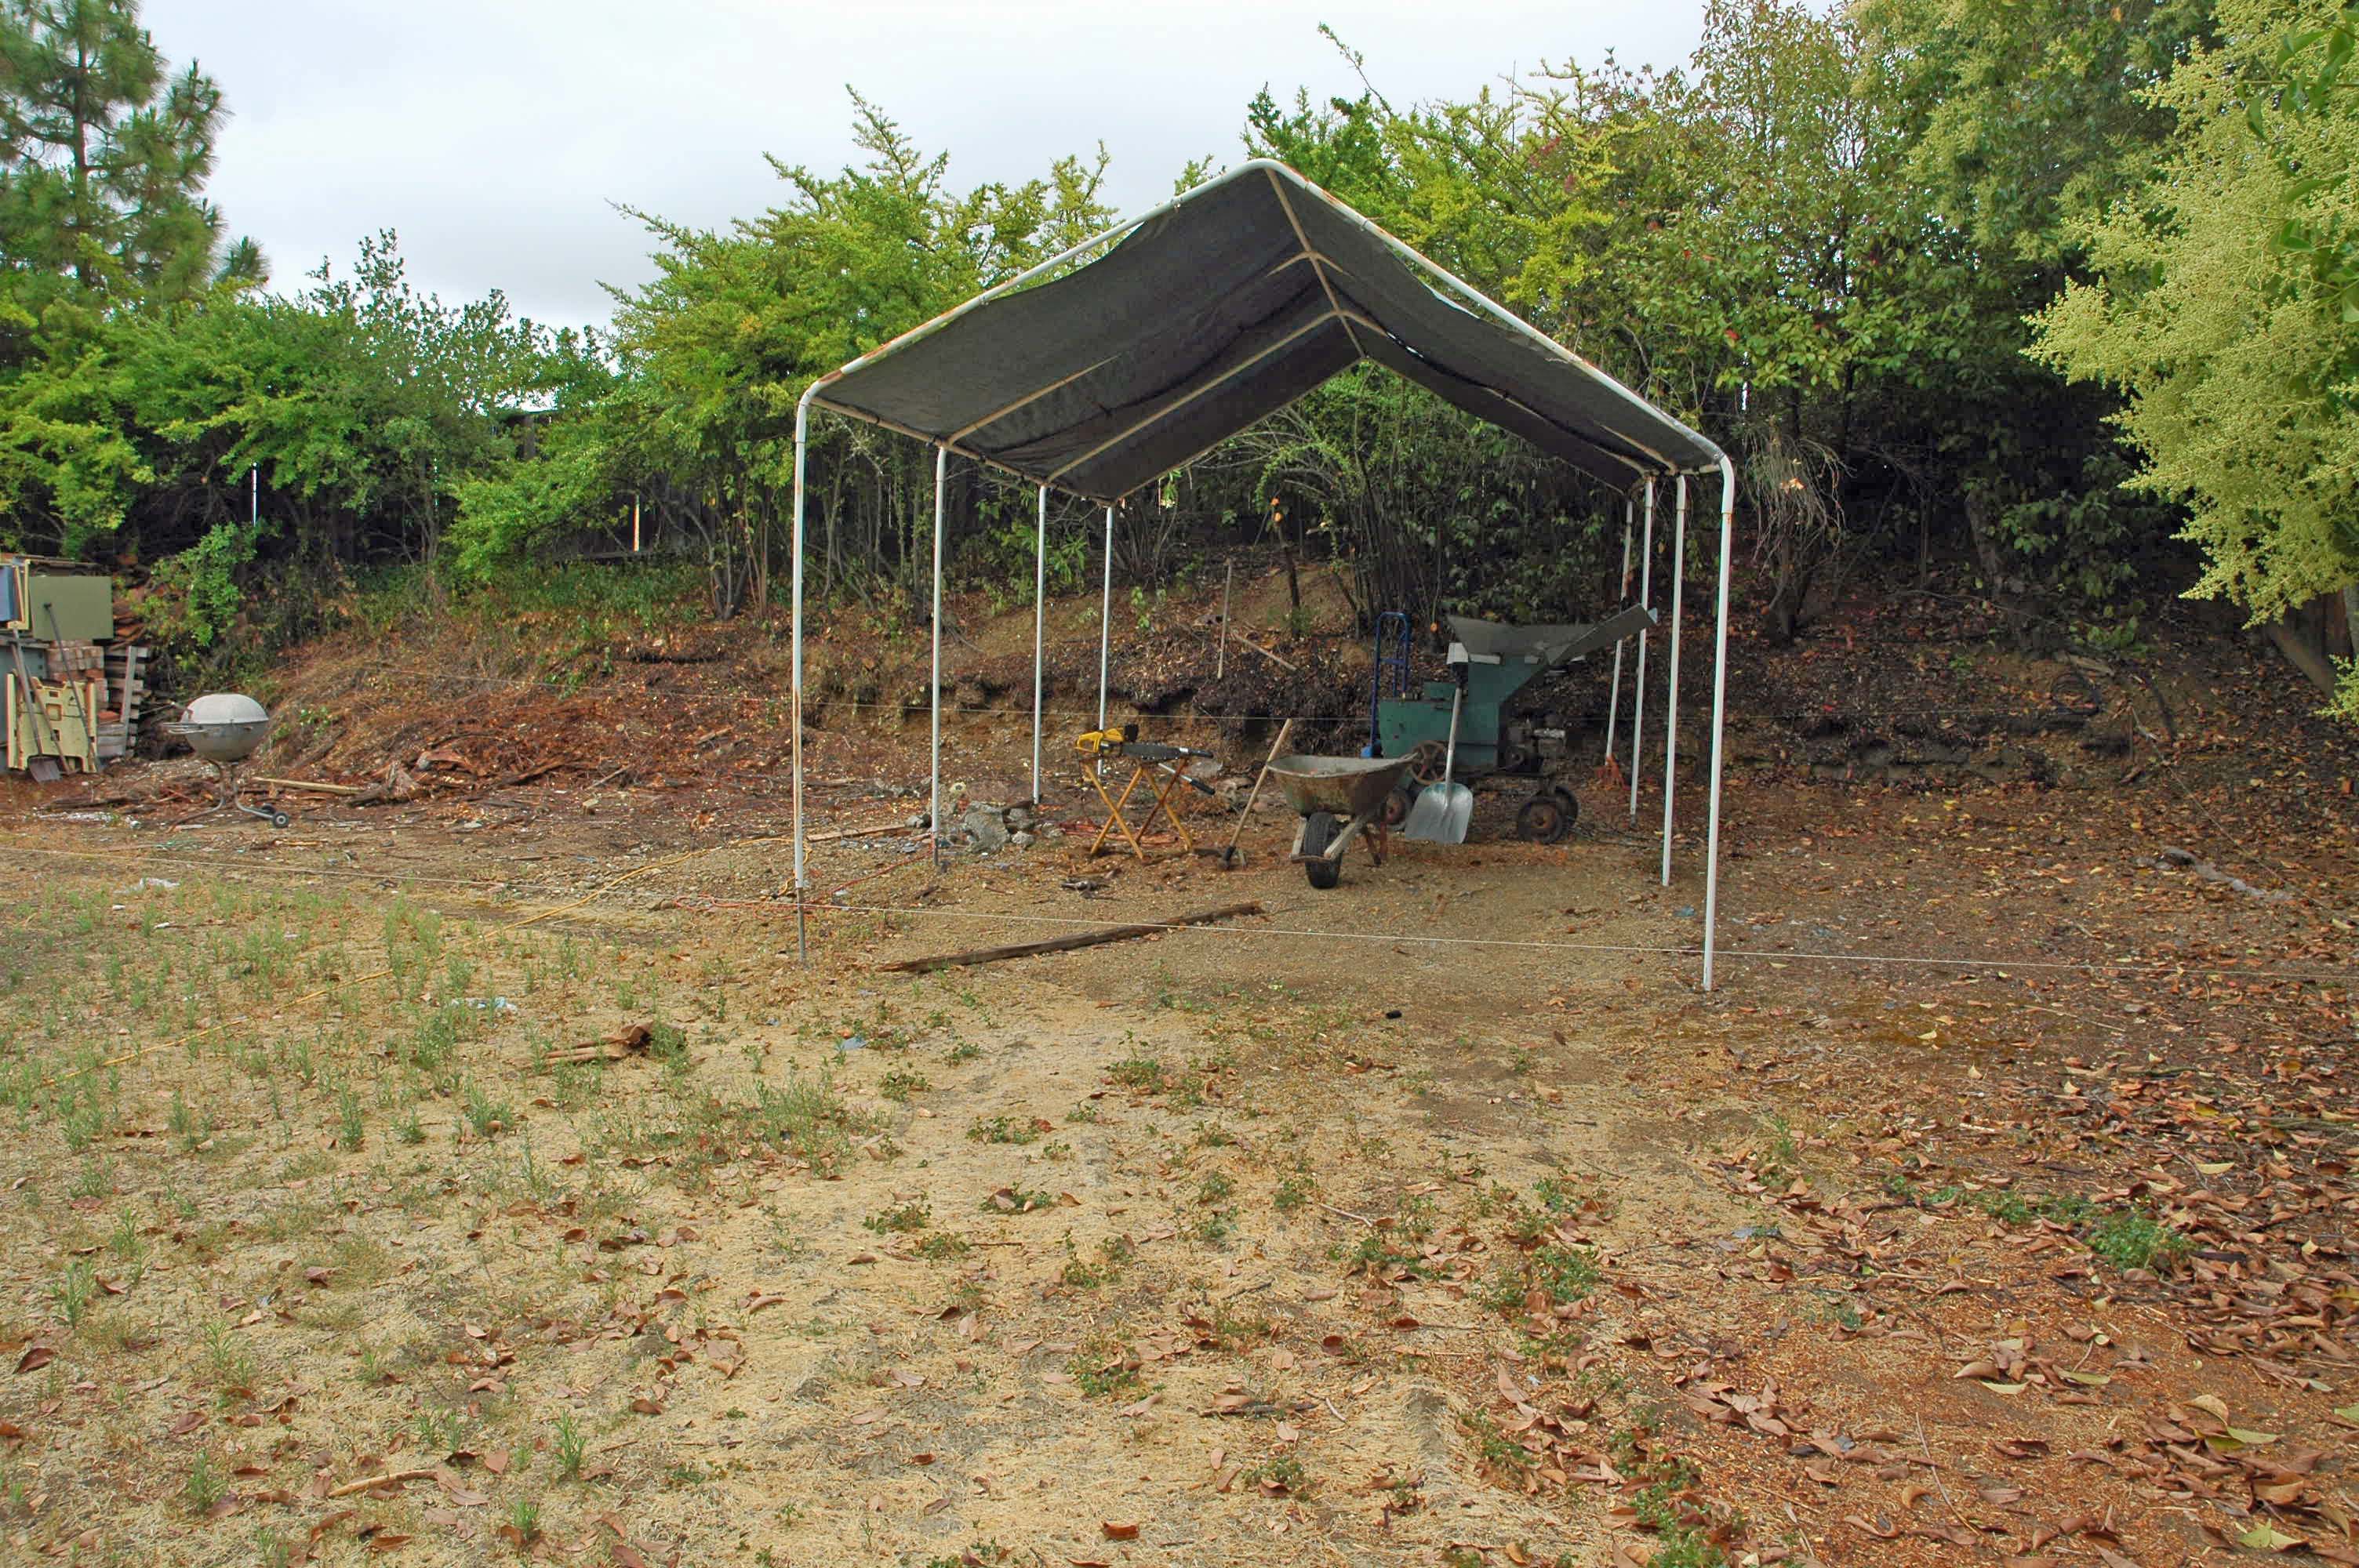
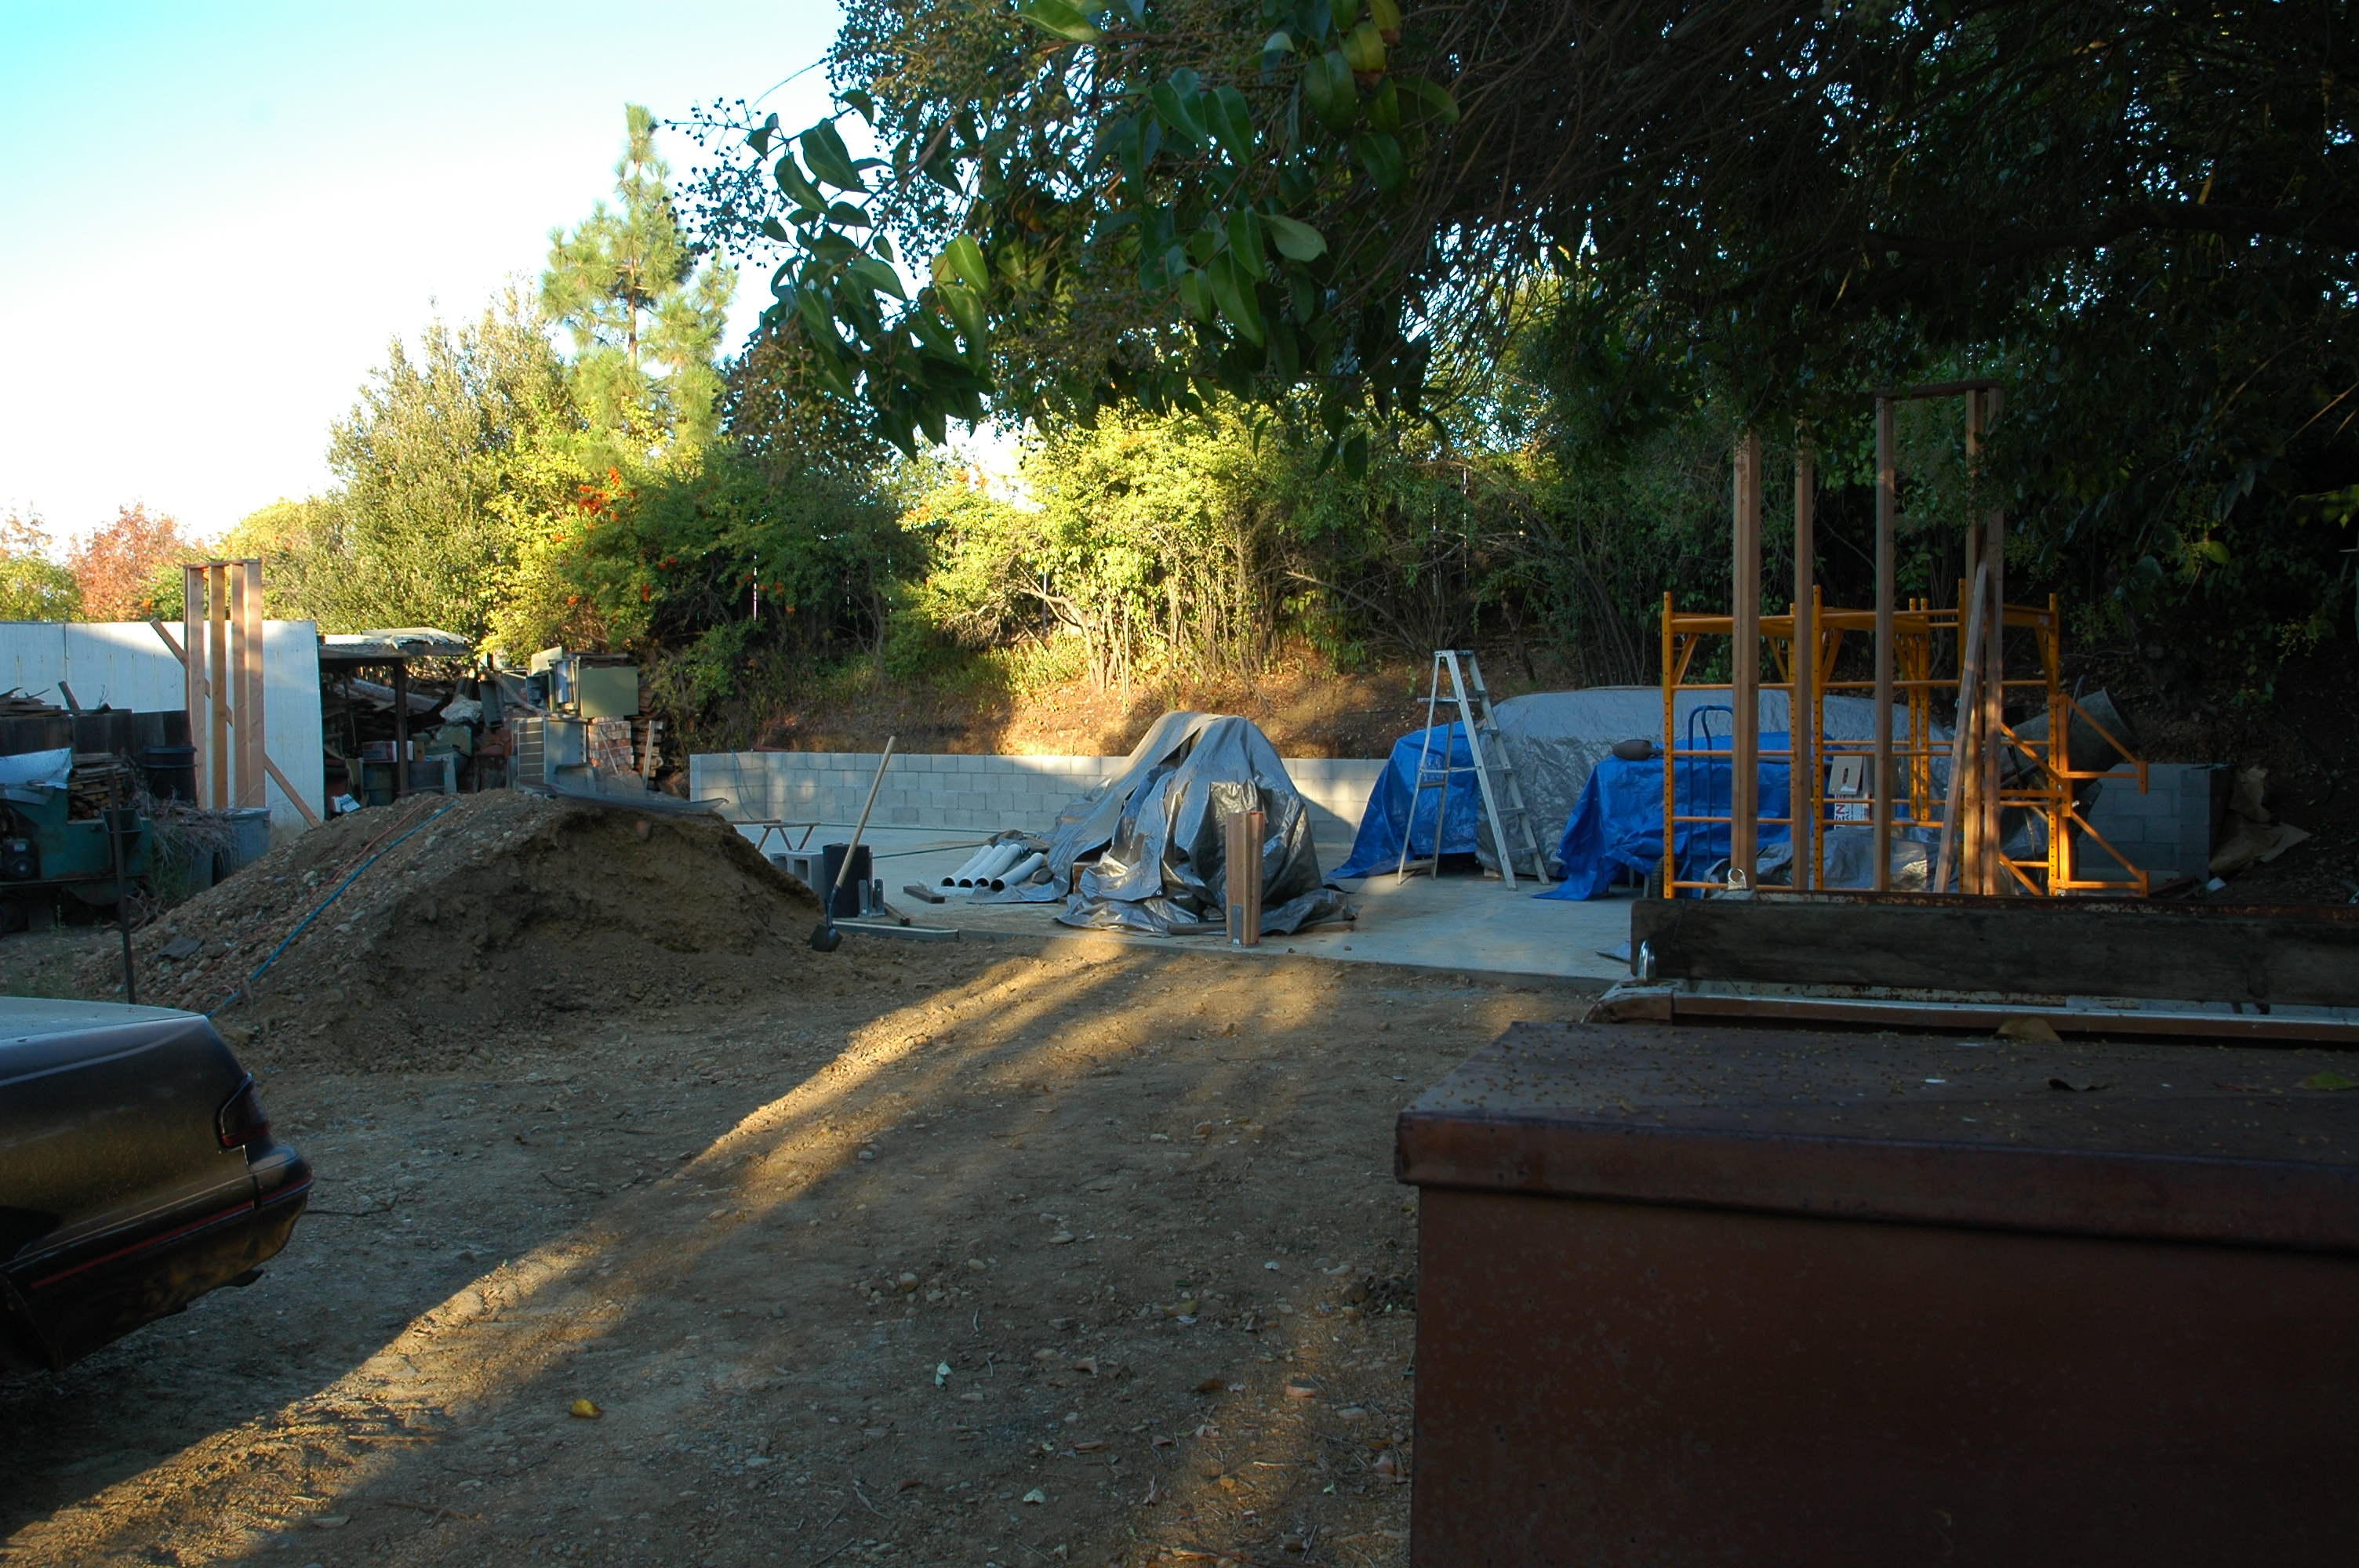
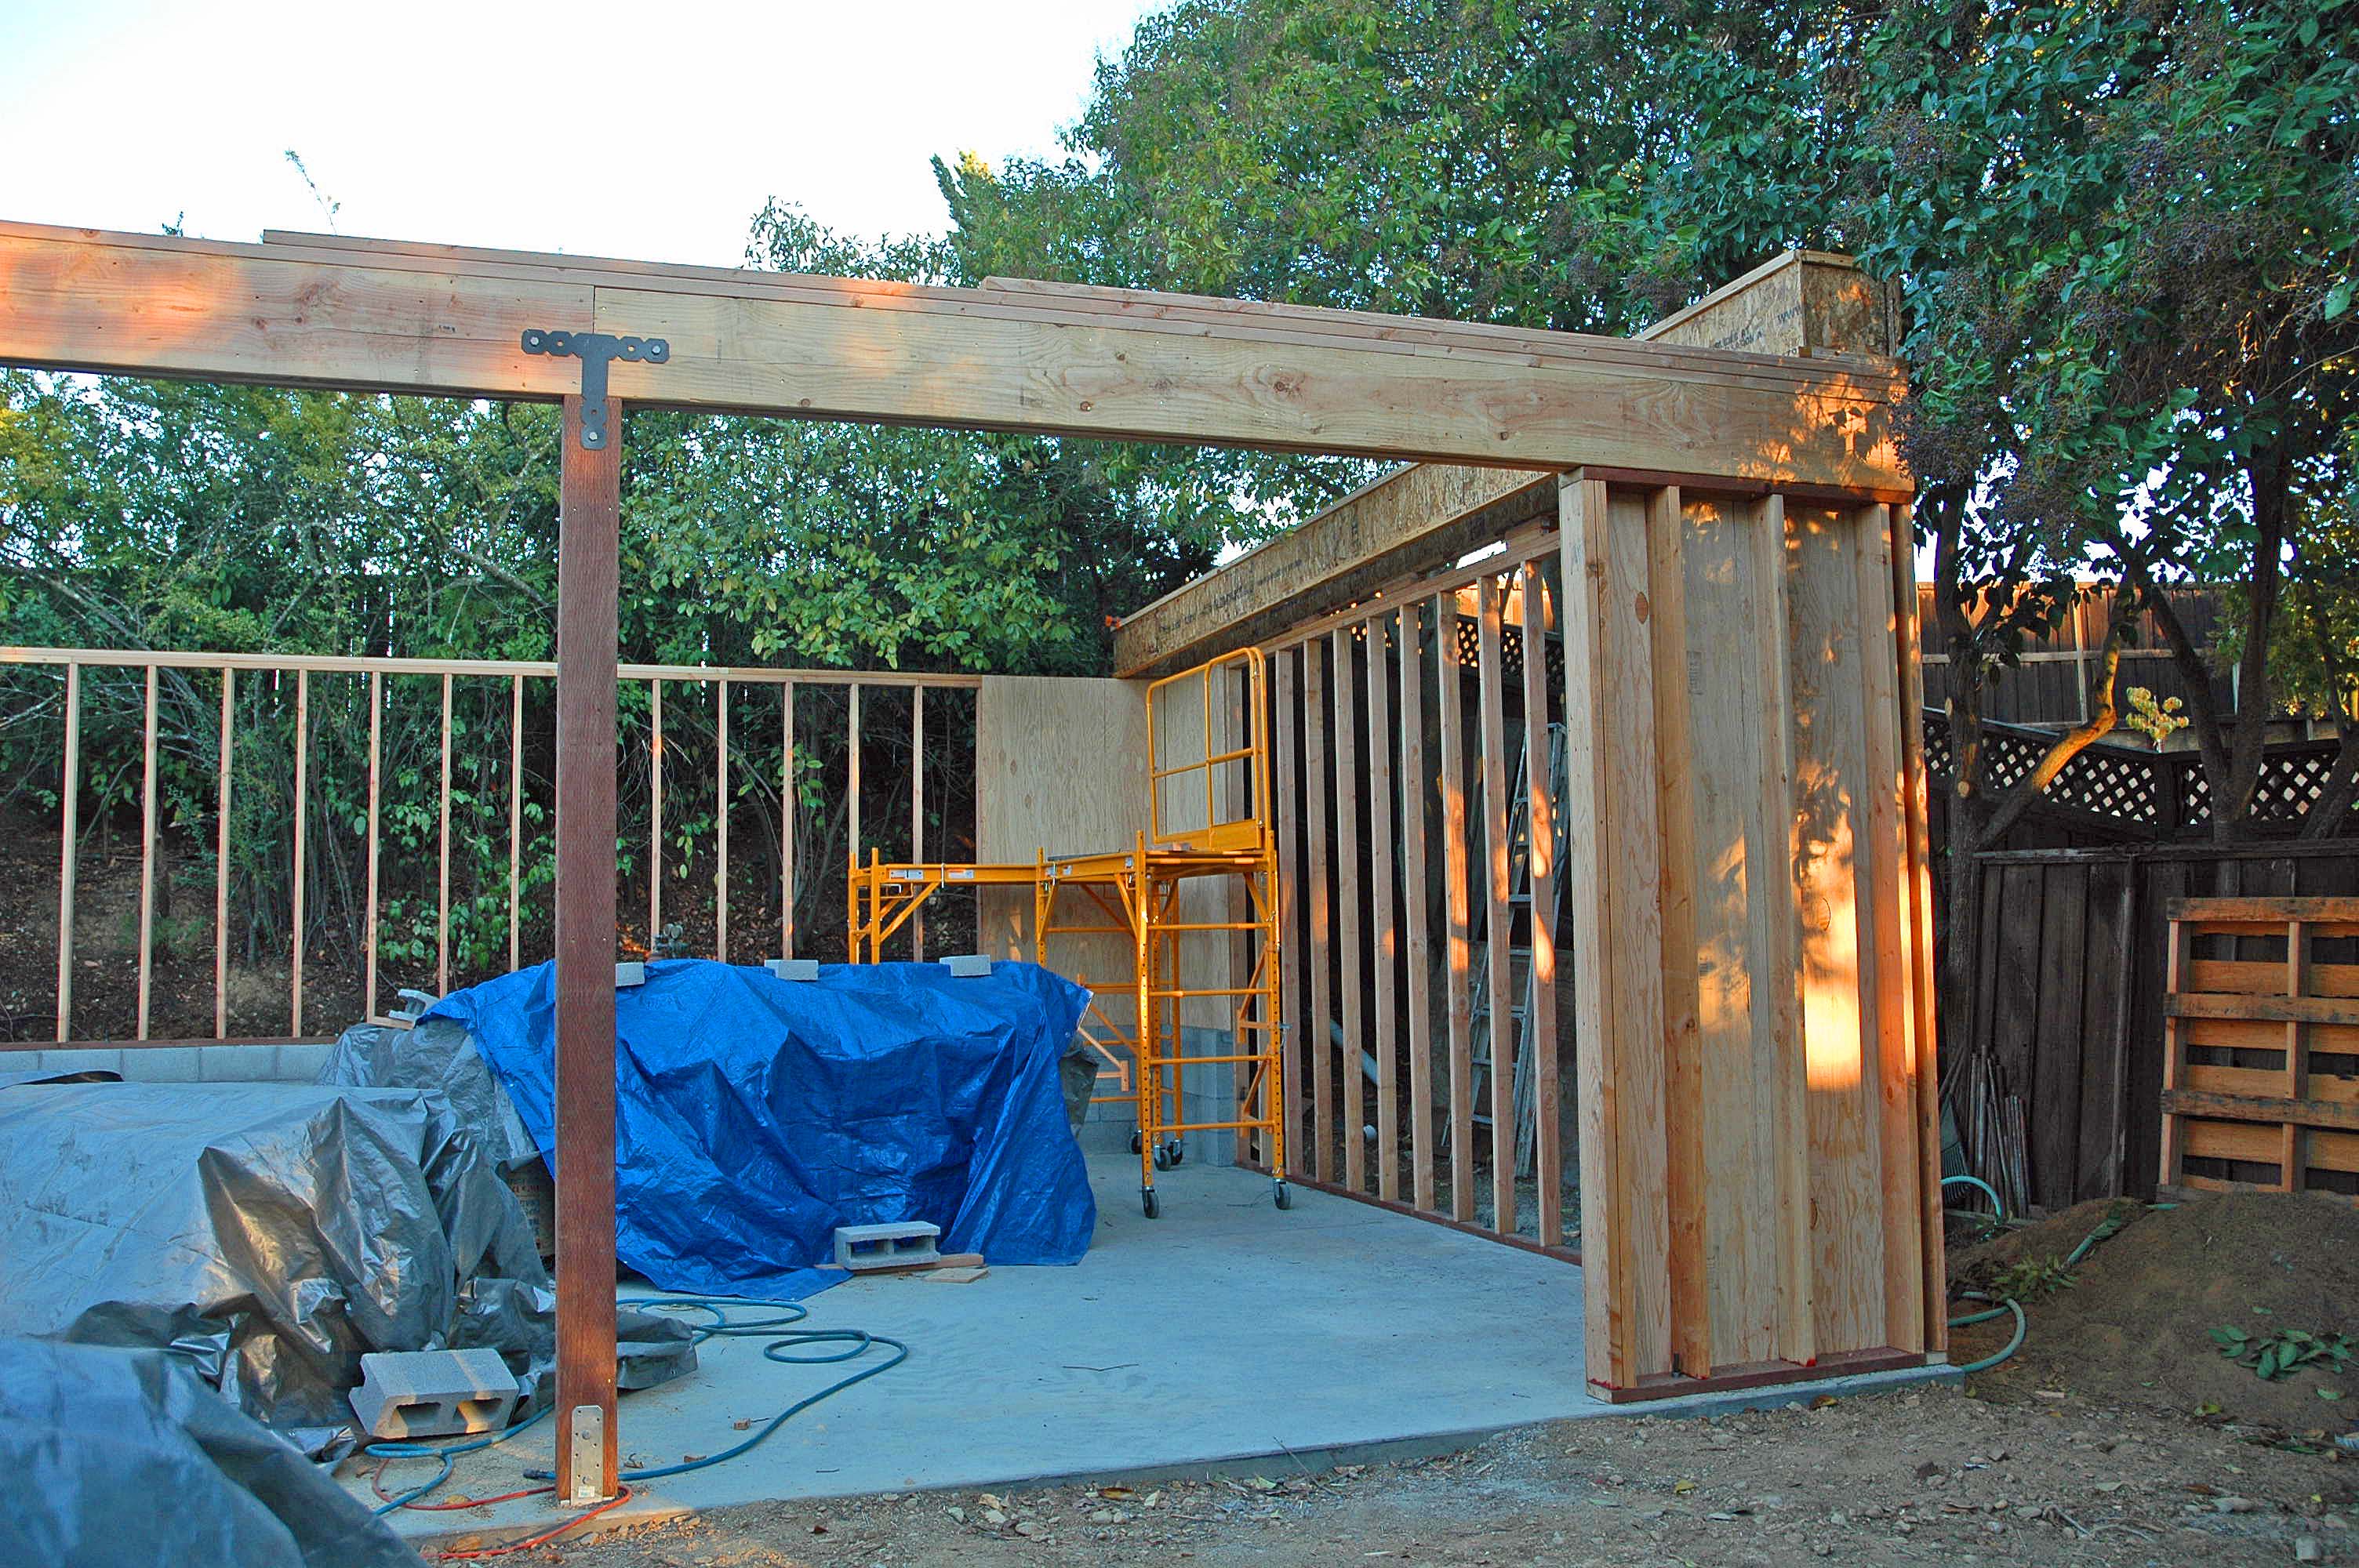
First... we had to find the land on which to build. The back of our lot was pretty much covered over with 'stuff'. This temporary carport structure has been where we have been parking Big Red, the truck. The canvas does not last more than a few months. To the left is where we have been storing 'stuff'. I called it my "corporation yard" and it was behind an 8 foot tall fence of solid plywood that we put up back when Kim held her wedding reception in the back yard. It stored concrete mixers, bricks, windows, steel, lumber, discarded appliances, etc., etc. The white string running across in front of the tent is a string marking the outline of the new building.


.


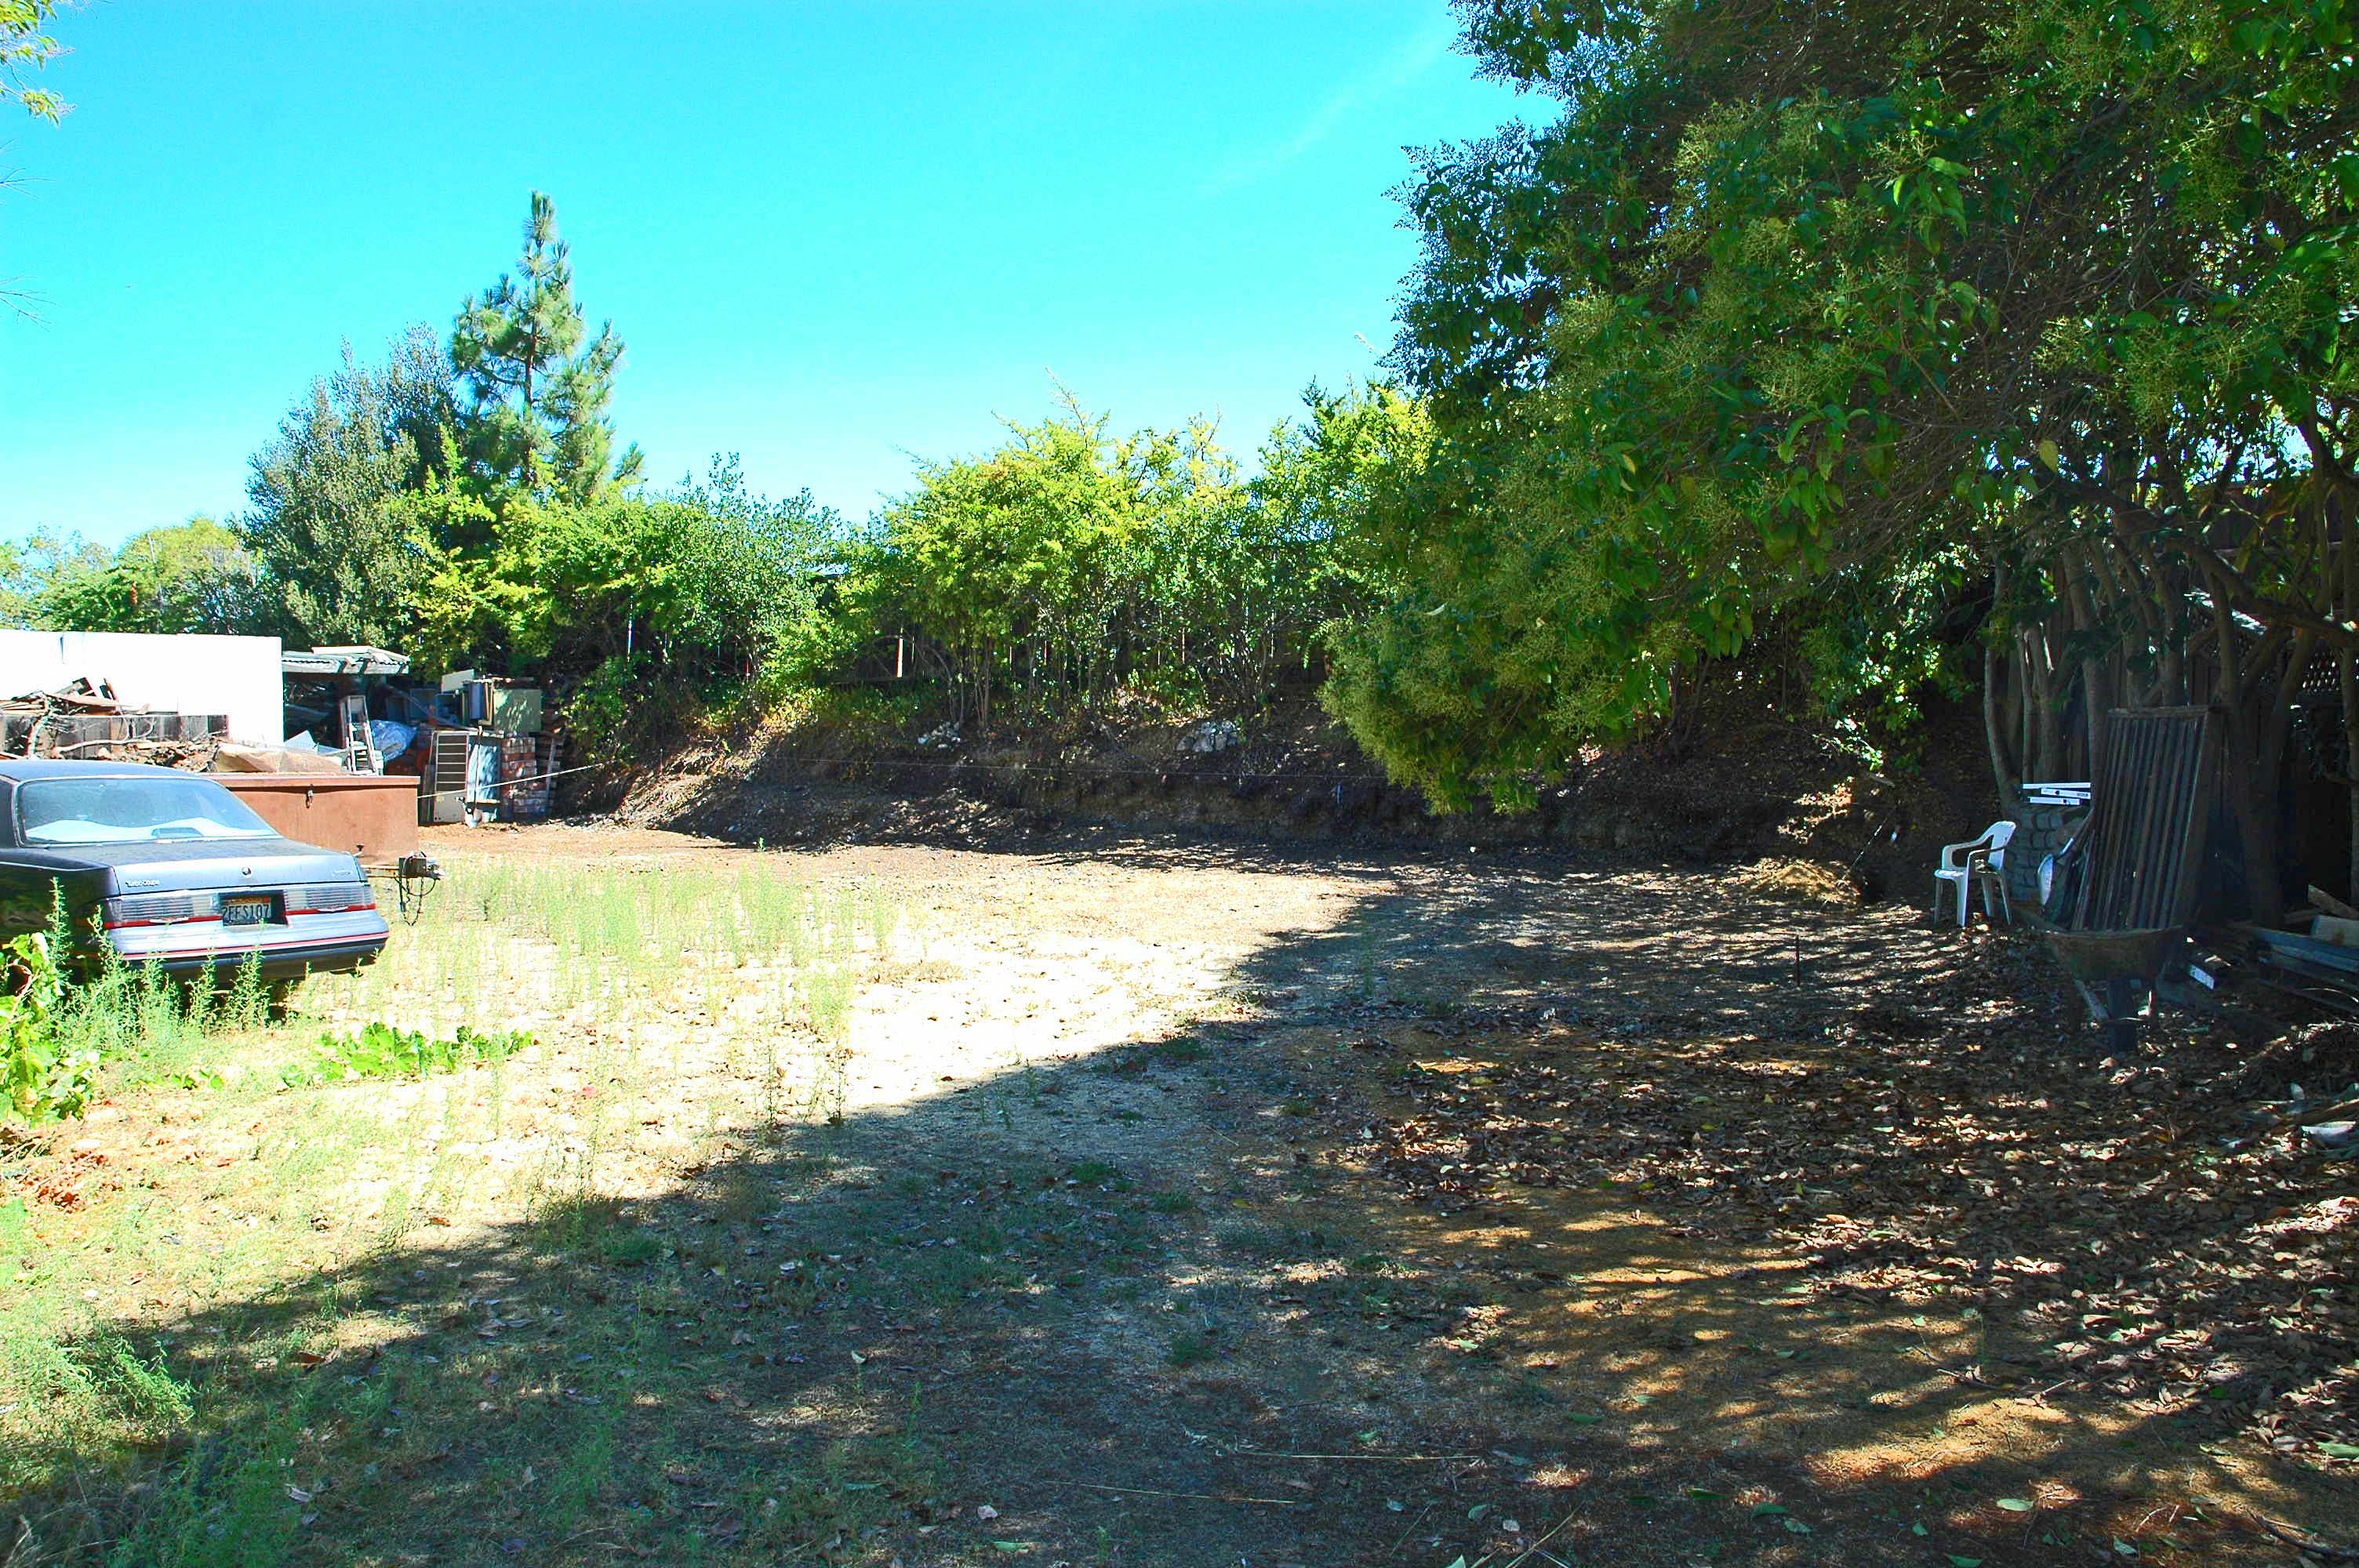
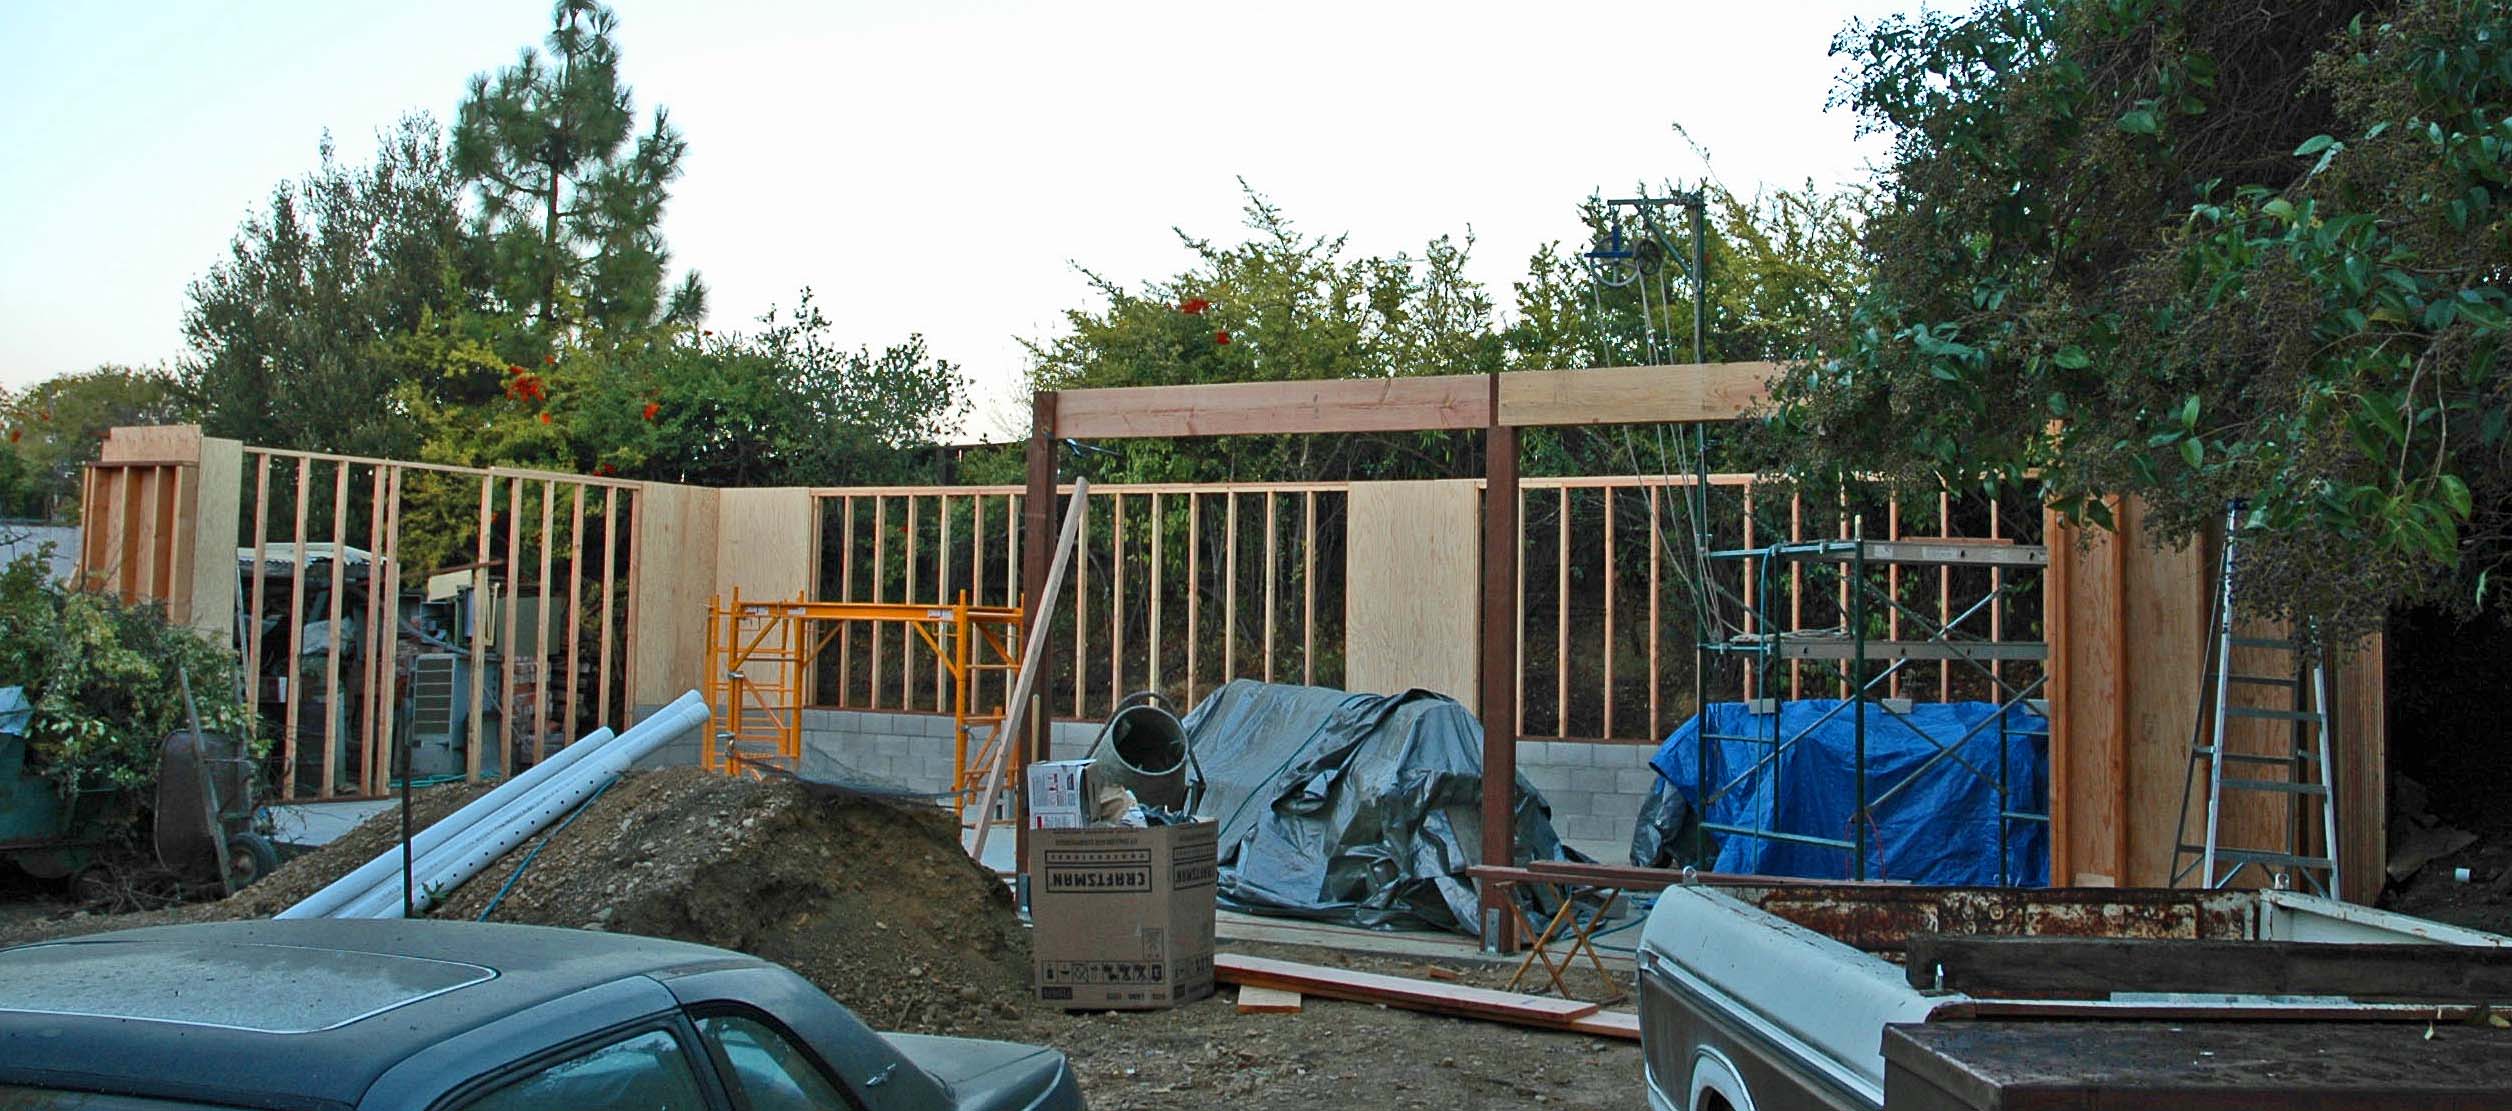
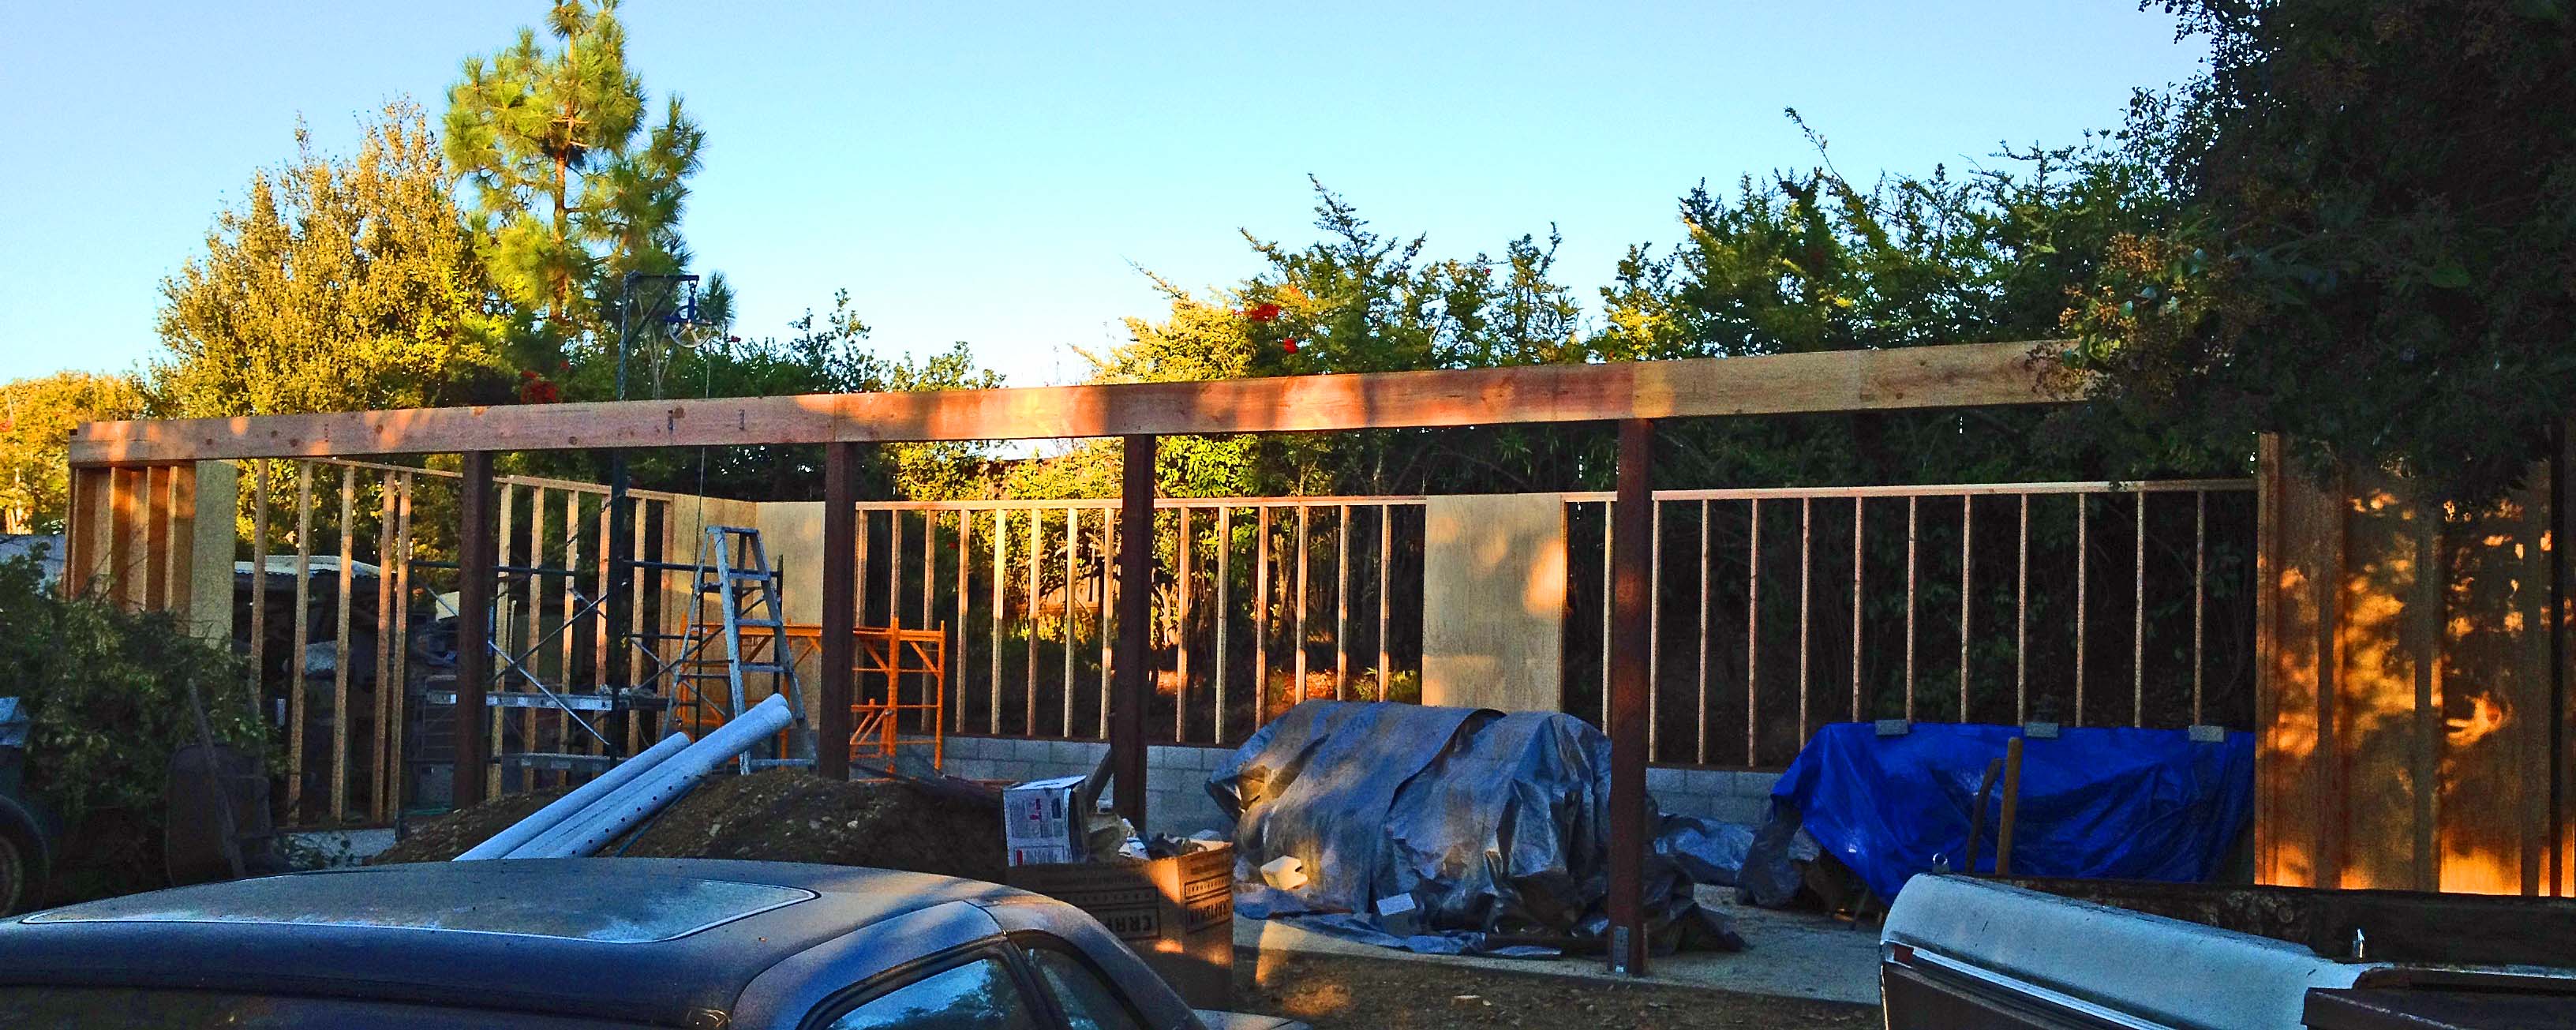
This is what we are starting with. The full property is just short of one-half acre in size. This is across the back of the lot. The fence to the right is the southern property line and the bushes across the back are the eastern property line.

.

.


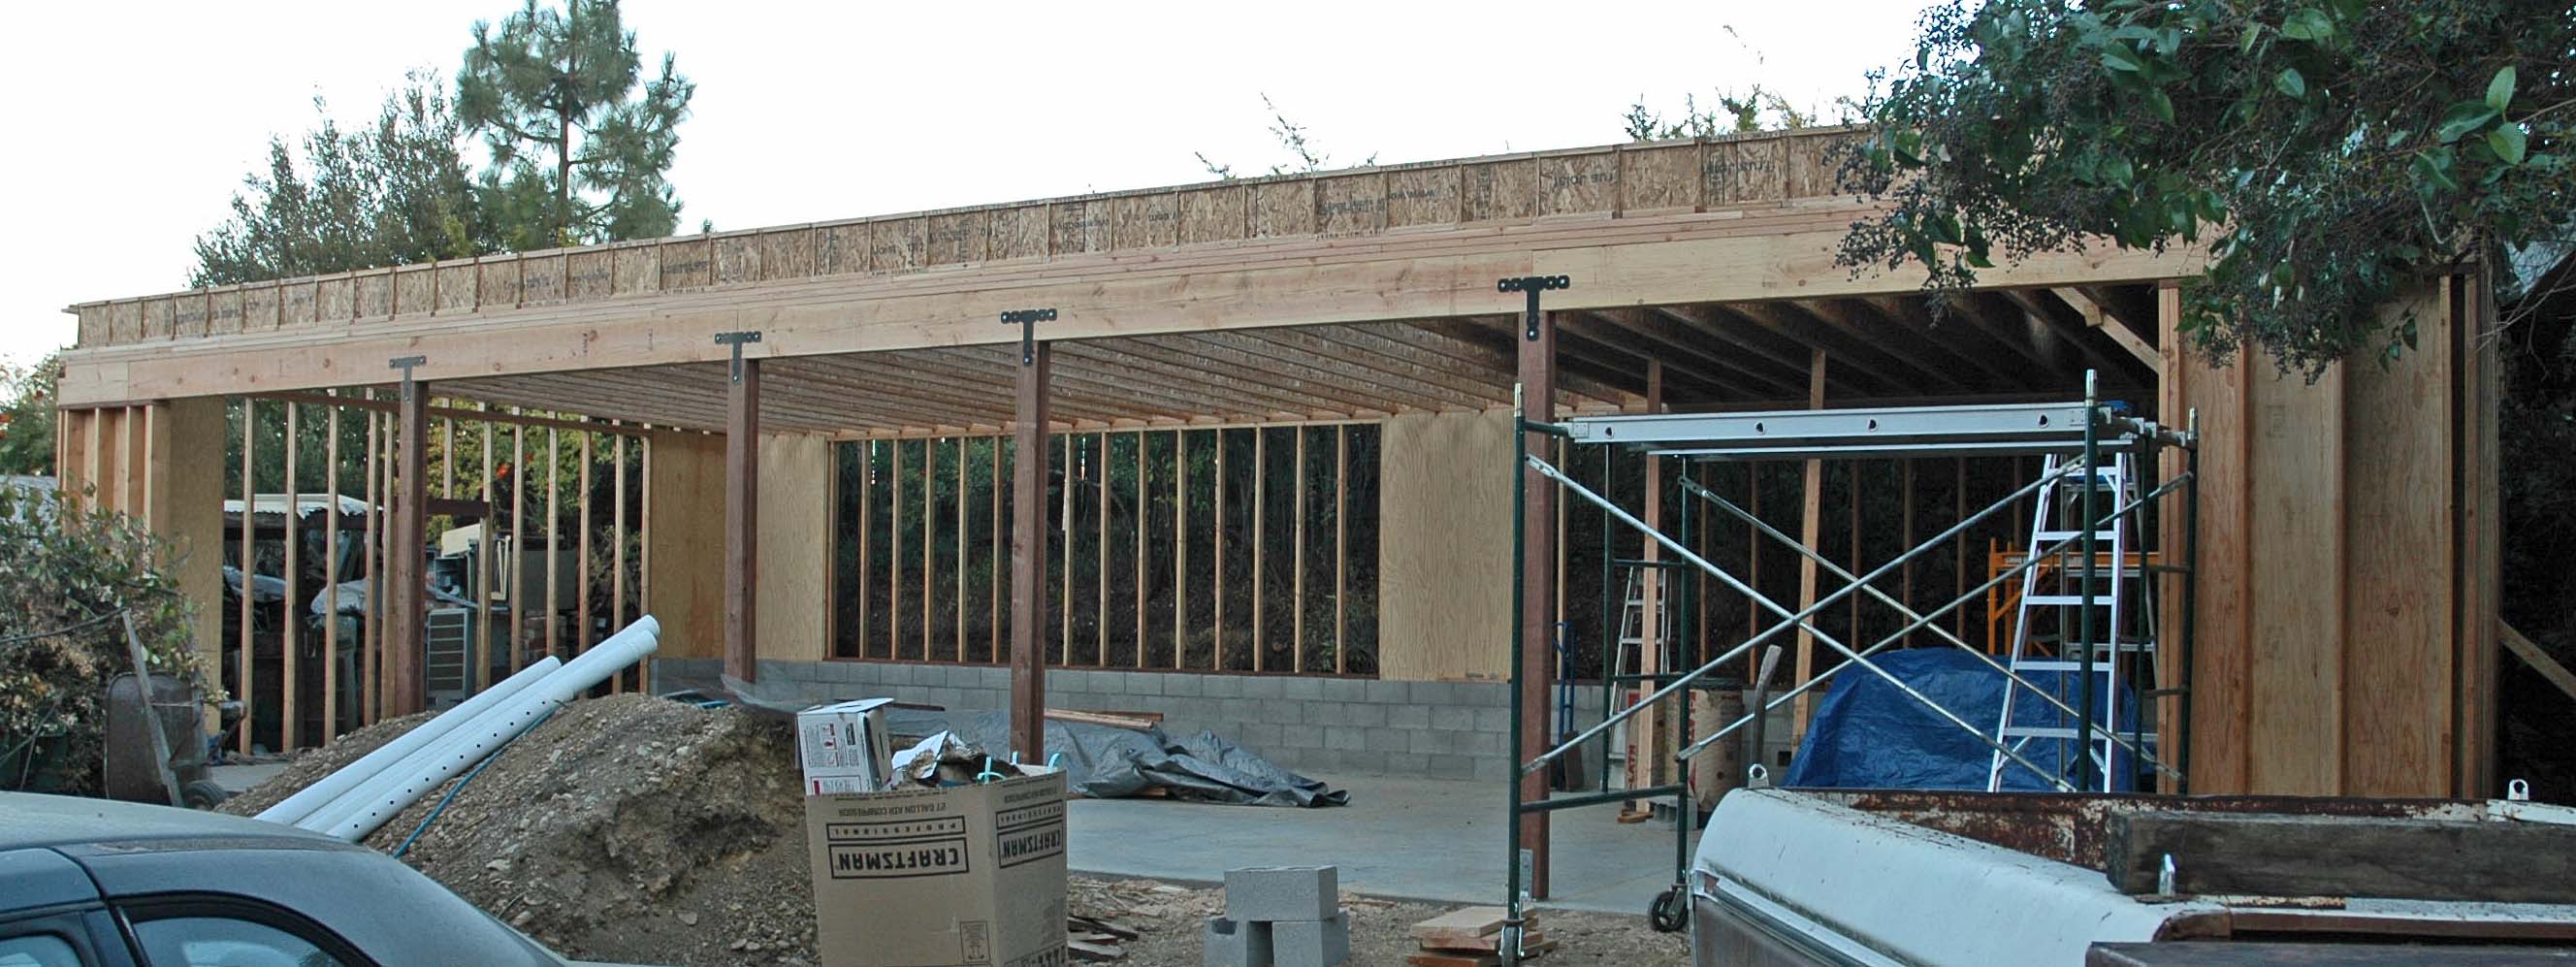
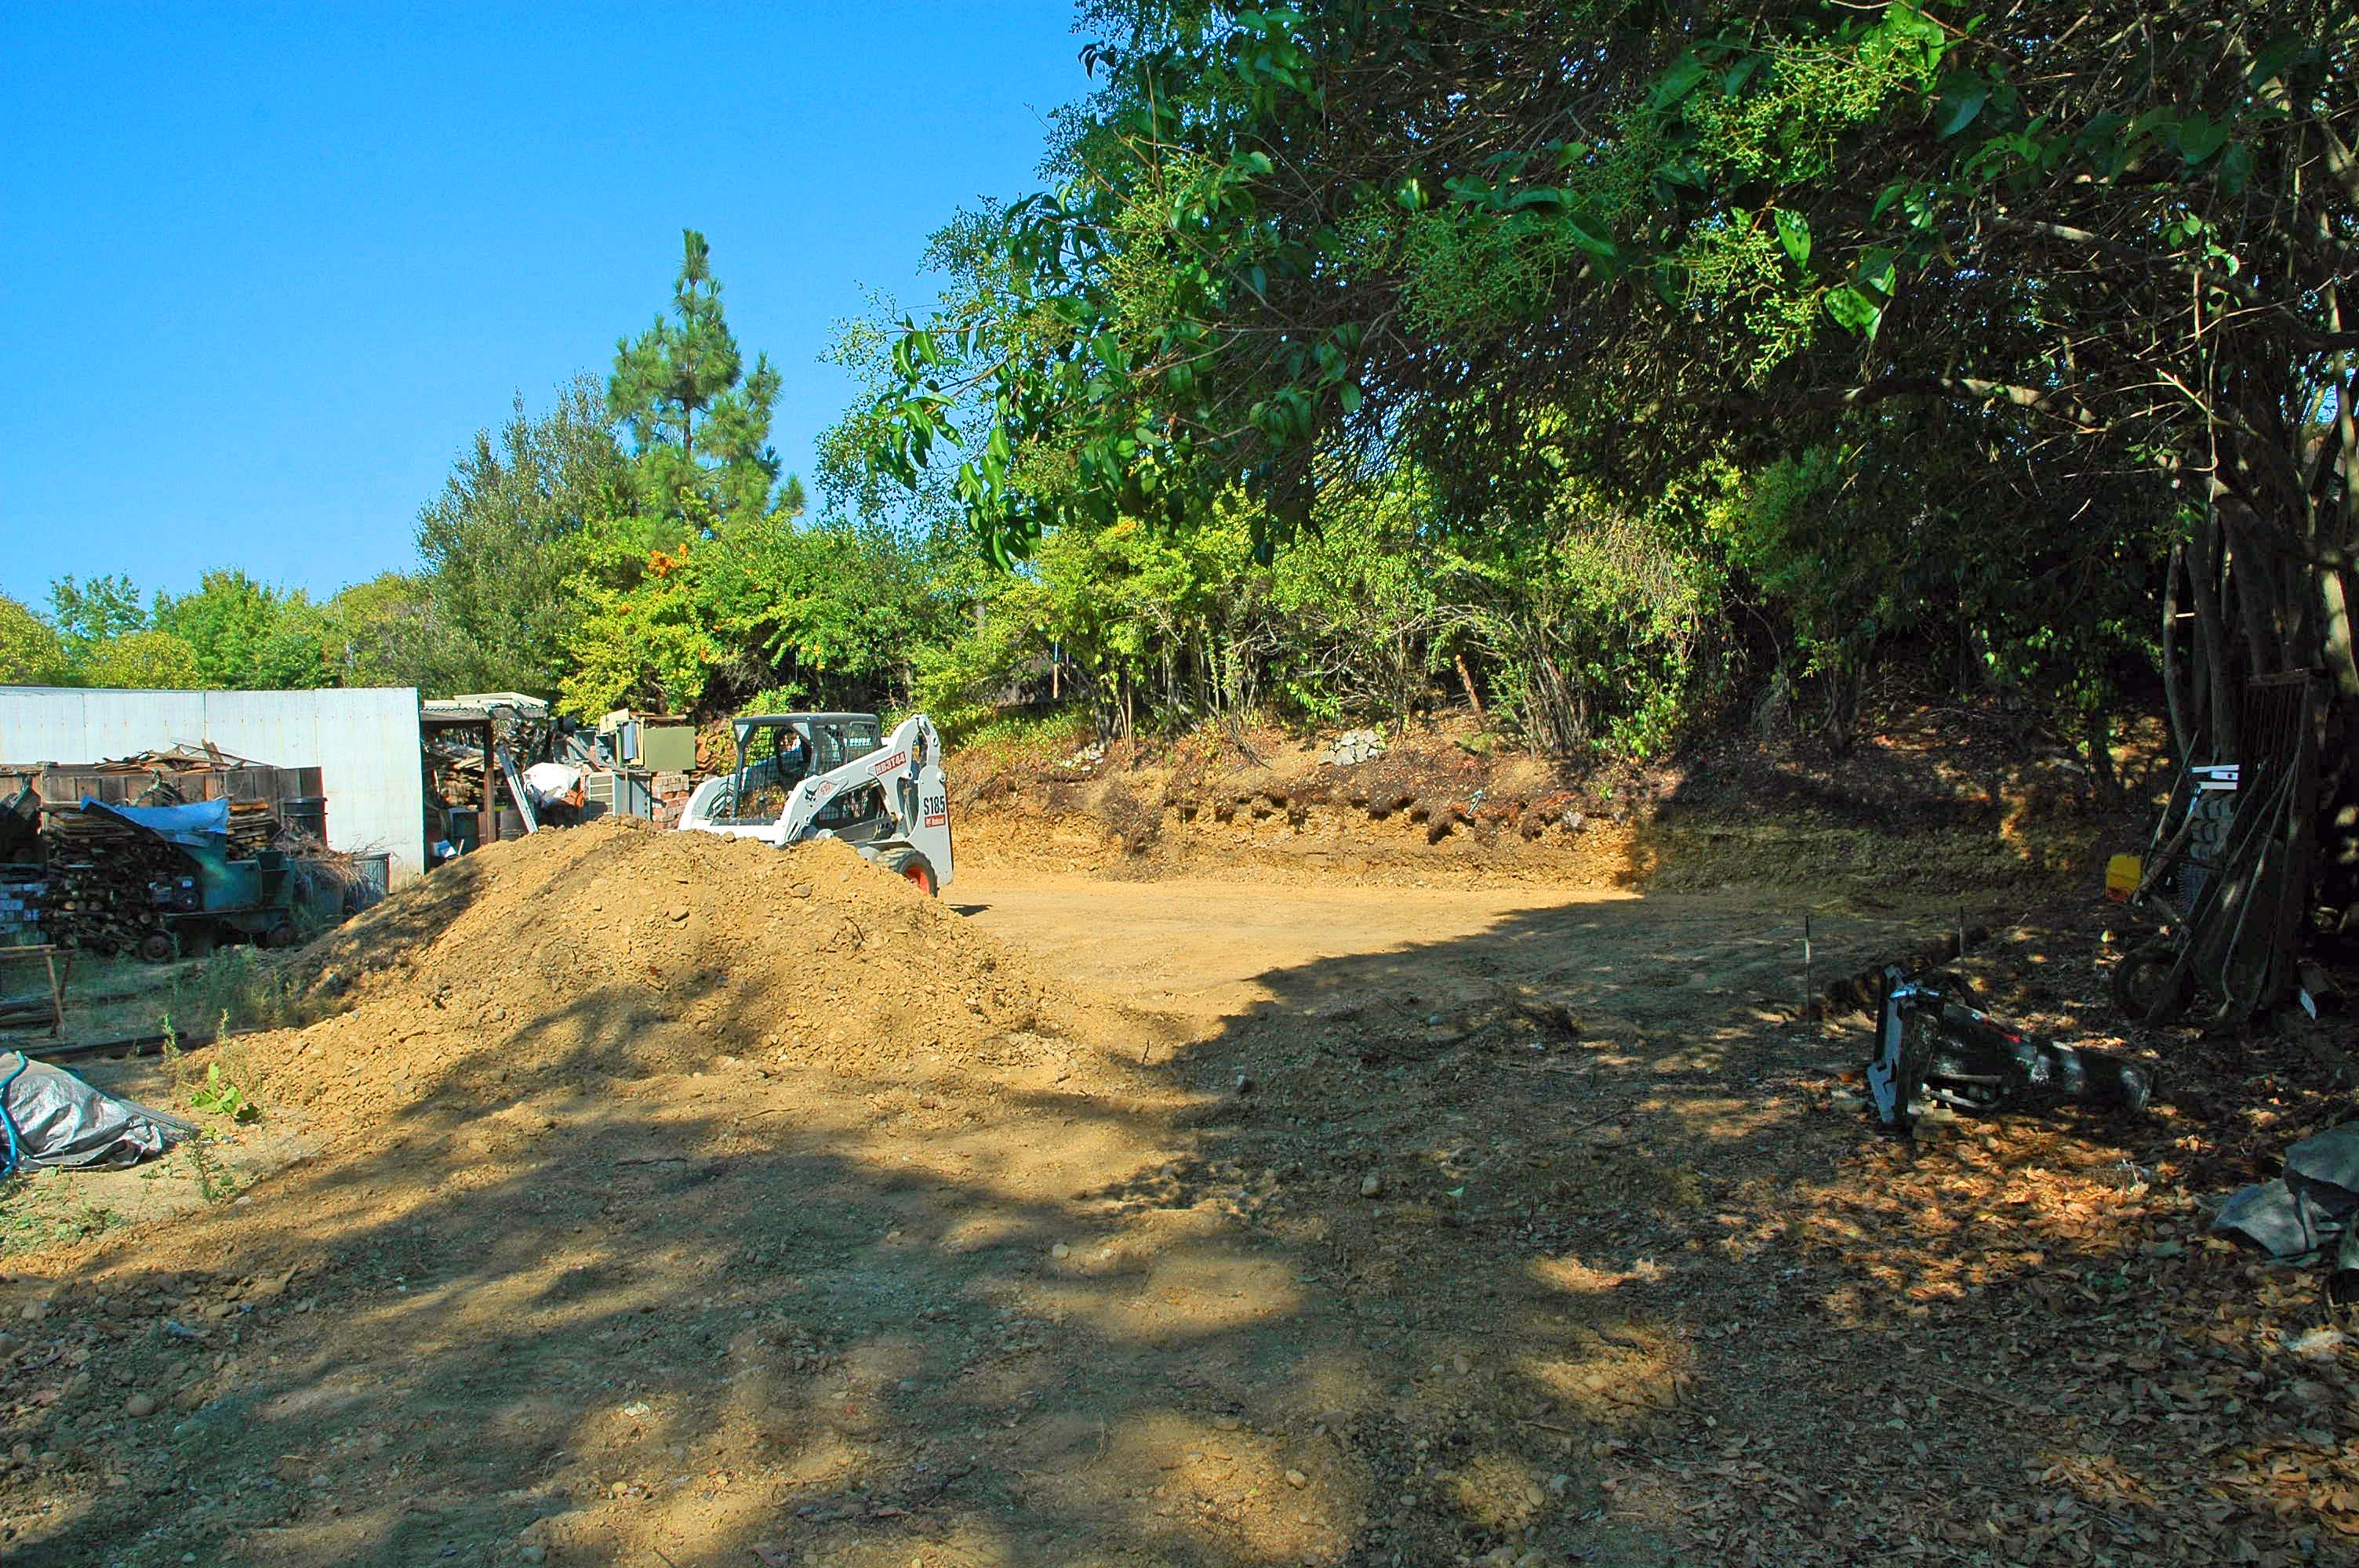
The concrete footings and slab will be at least 20 cubic yards of concrete, which is just a little more than I feel like I want to tackle. When we did the Living Room addition on the house I did the concrete work, and it was about 35 cubic yards of concrete, but I had the assistance of two healthy lads plus my two very helpful young'uns that I worked with and we were all thirty years younger then. This crew came in and trimmed the foot of the hill along the back so I can build a concrete wall that is three feet high along the hill. It will become the lower part of the Eastern wall of the building. The crew used the bobcat to do all of the leveling and cutting of the hill, and a portable jack hammer and shovels were used to cut the 12 inch by 12 inch footing around the perimeter of the floor. That little Bobcat had its work cut out for it because the dirt is so hard that you feel like the concrete is already laid. When they put the power roller on there to compact it the roller did not have much of an effect. Talk about tough stuff. The excess dirt pile will be hauled away when they do the final clean up after the concrete is poured.


.


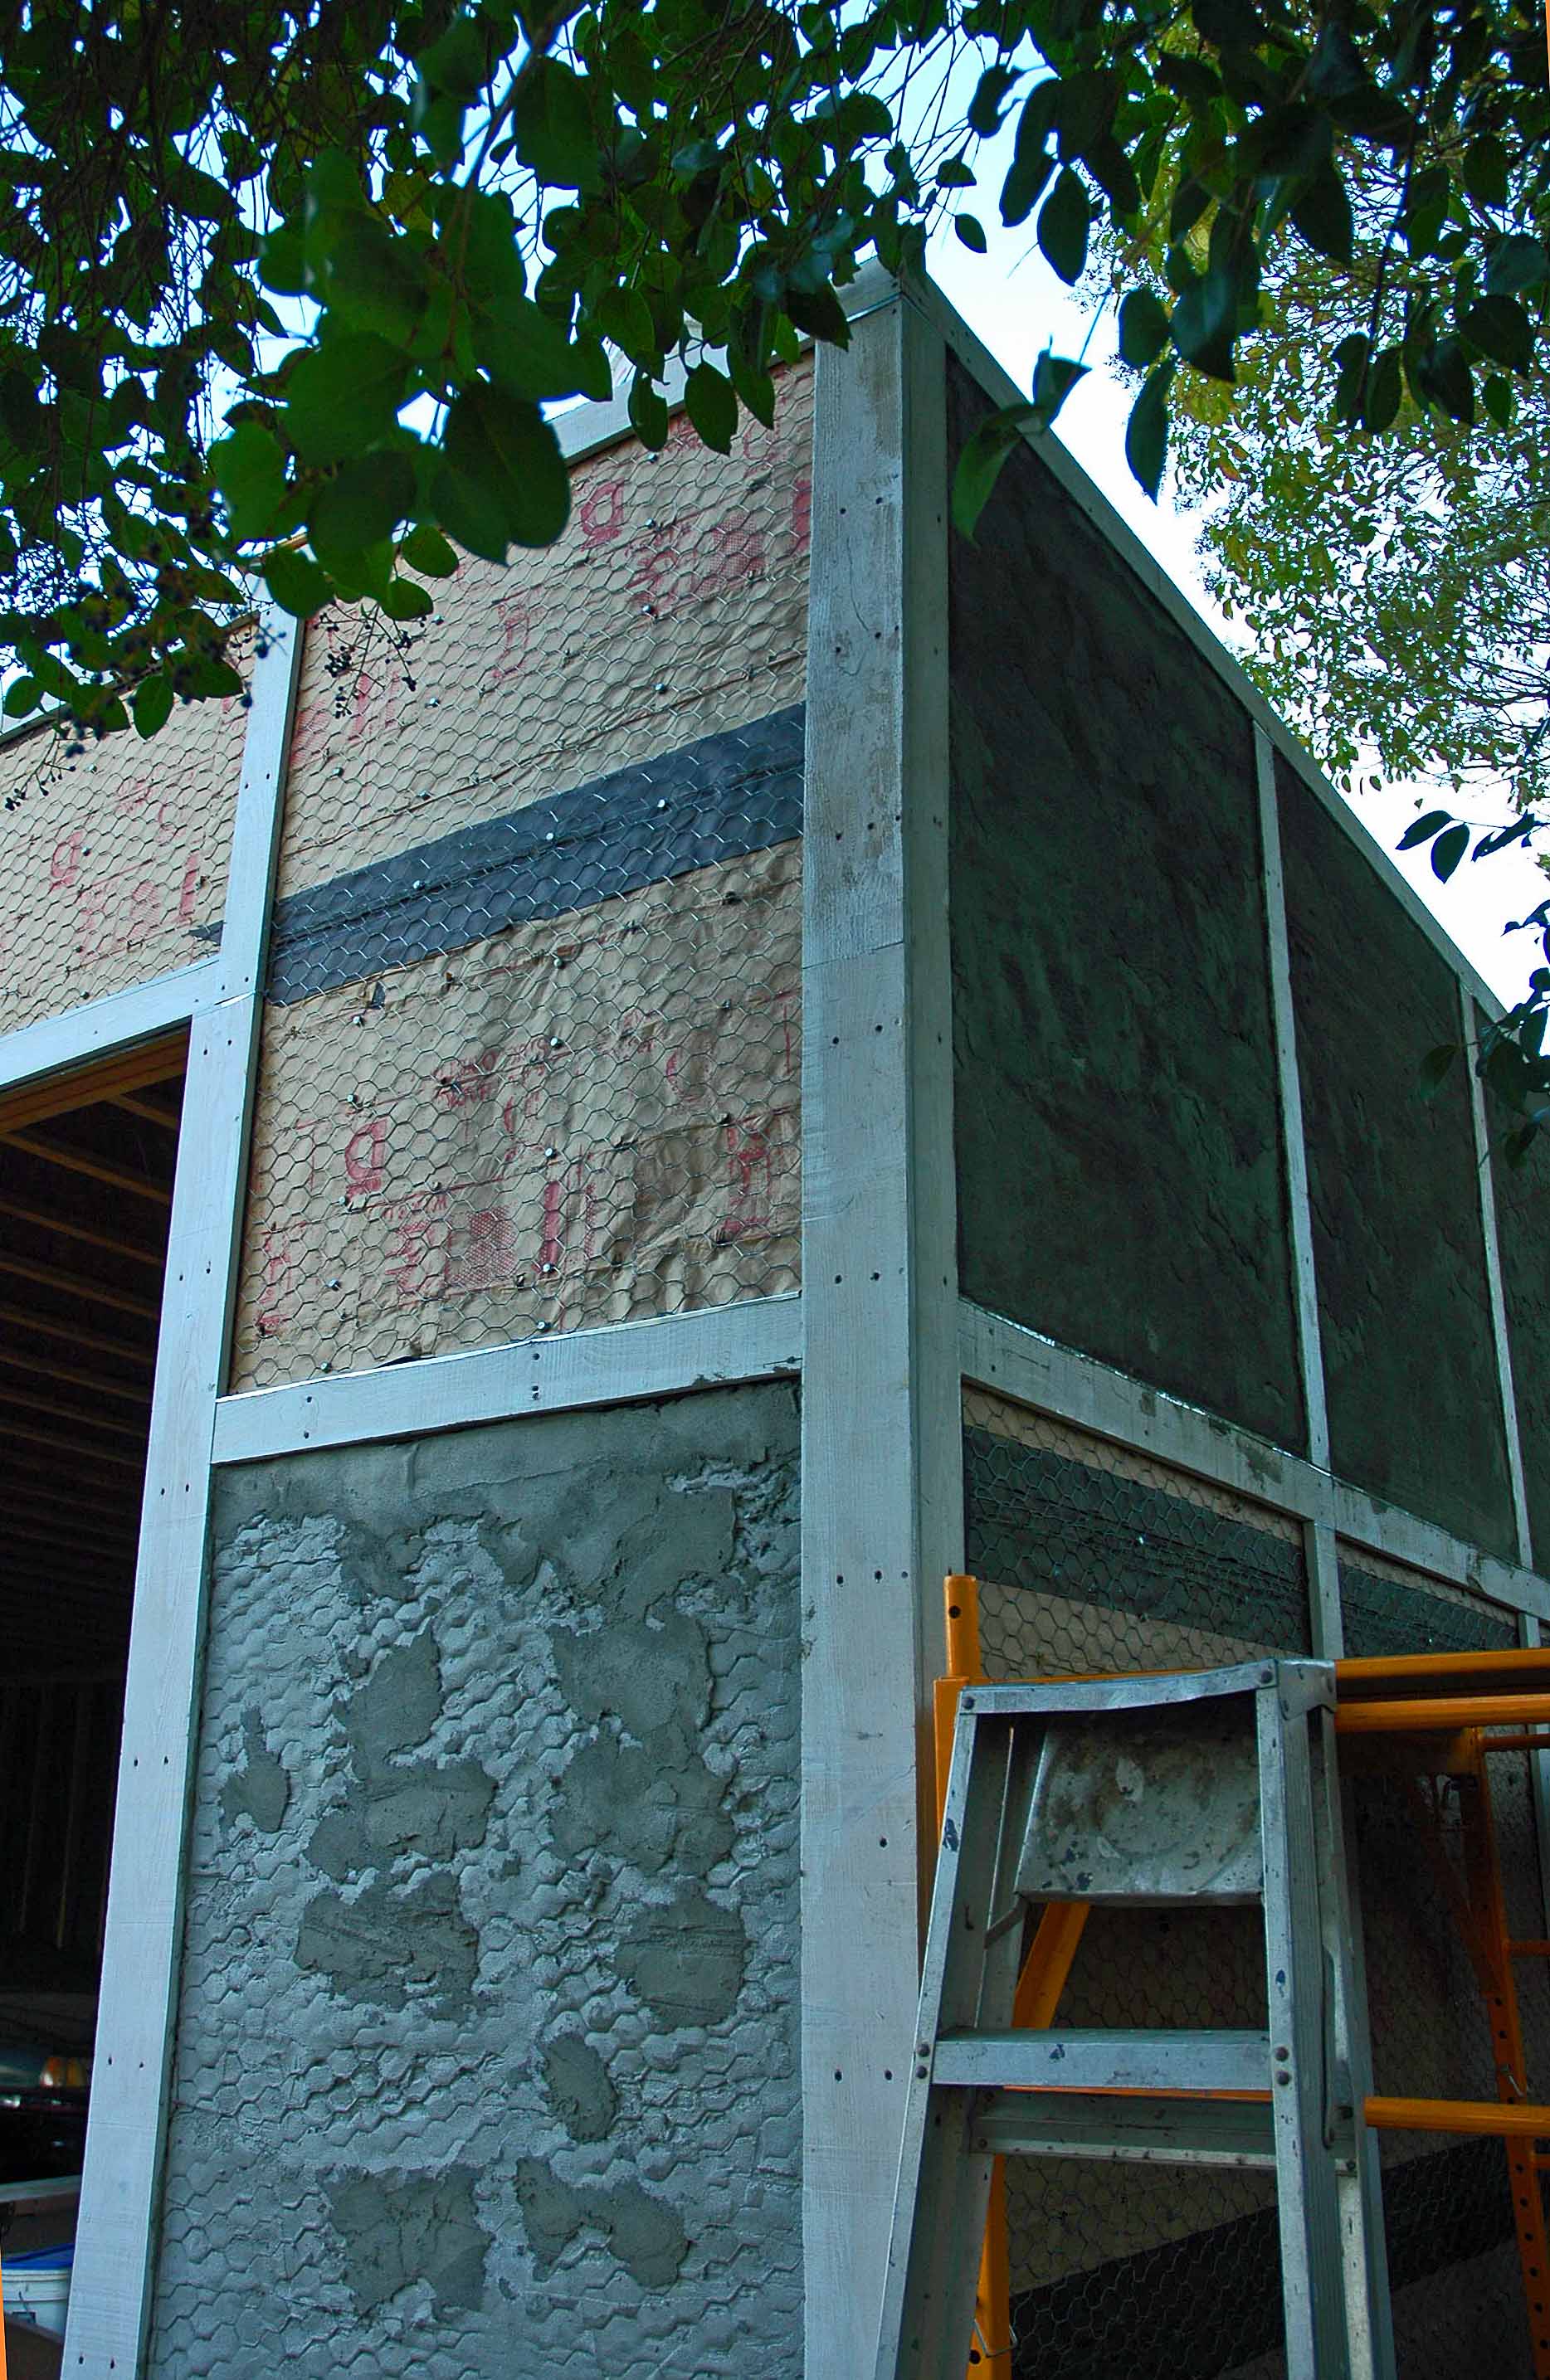
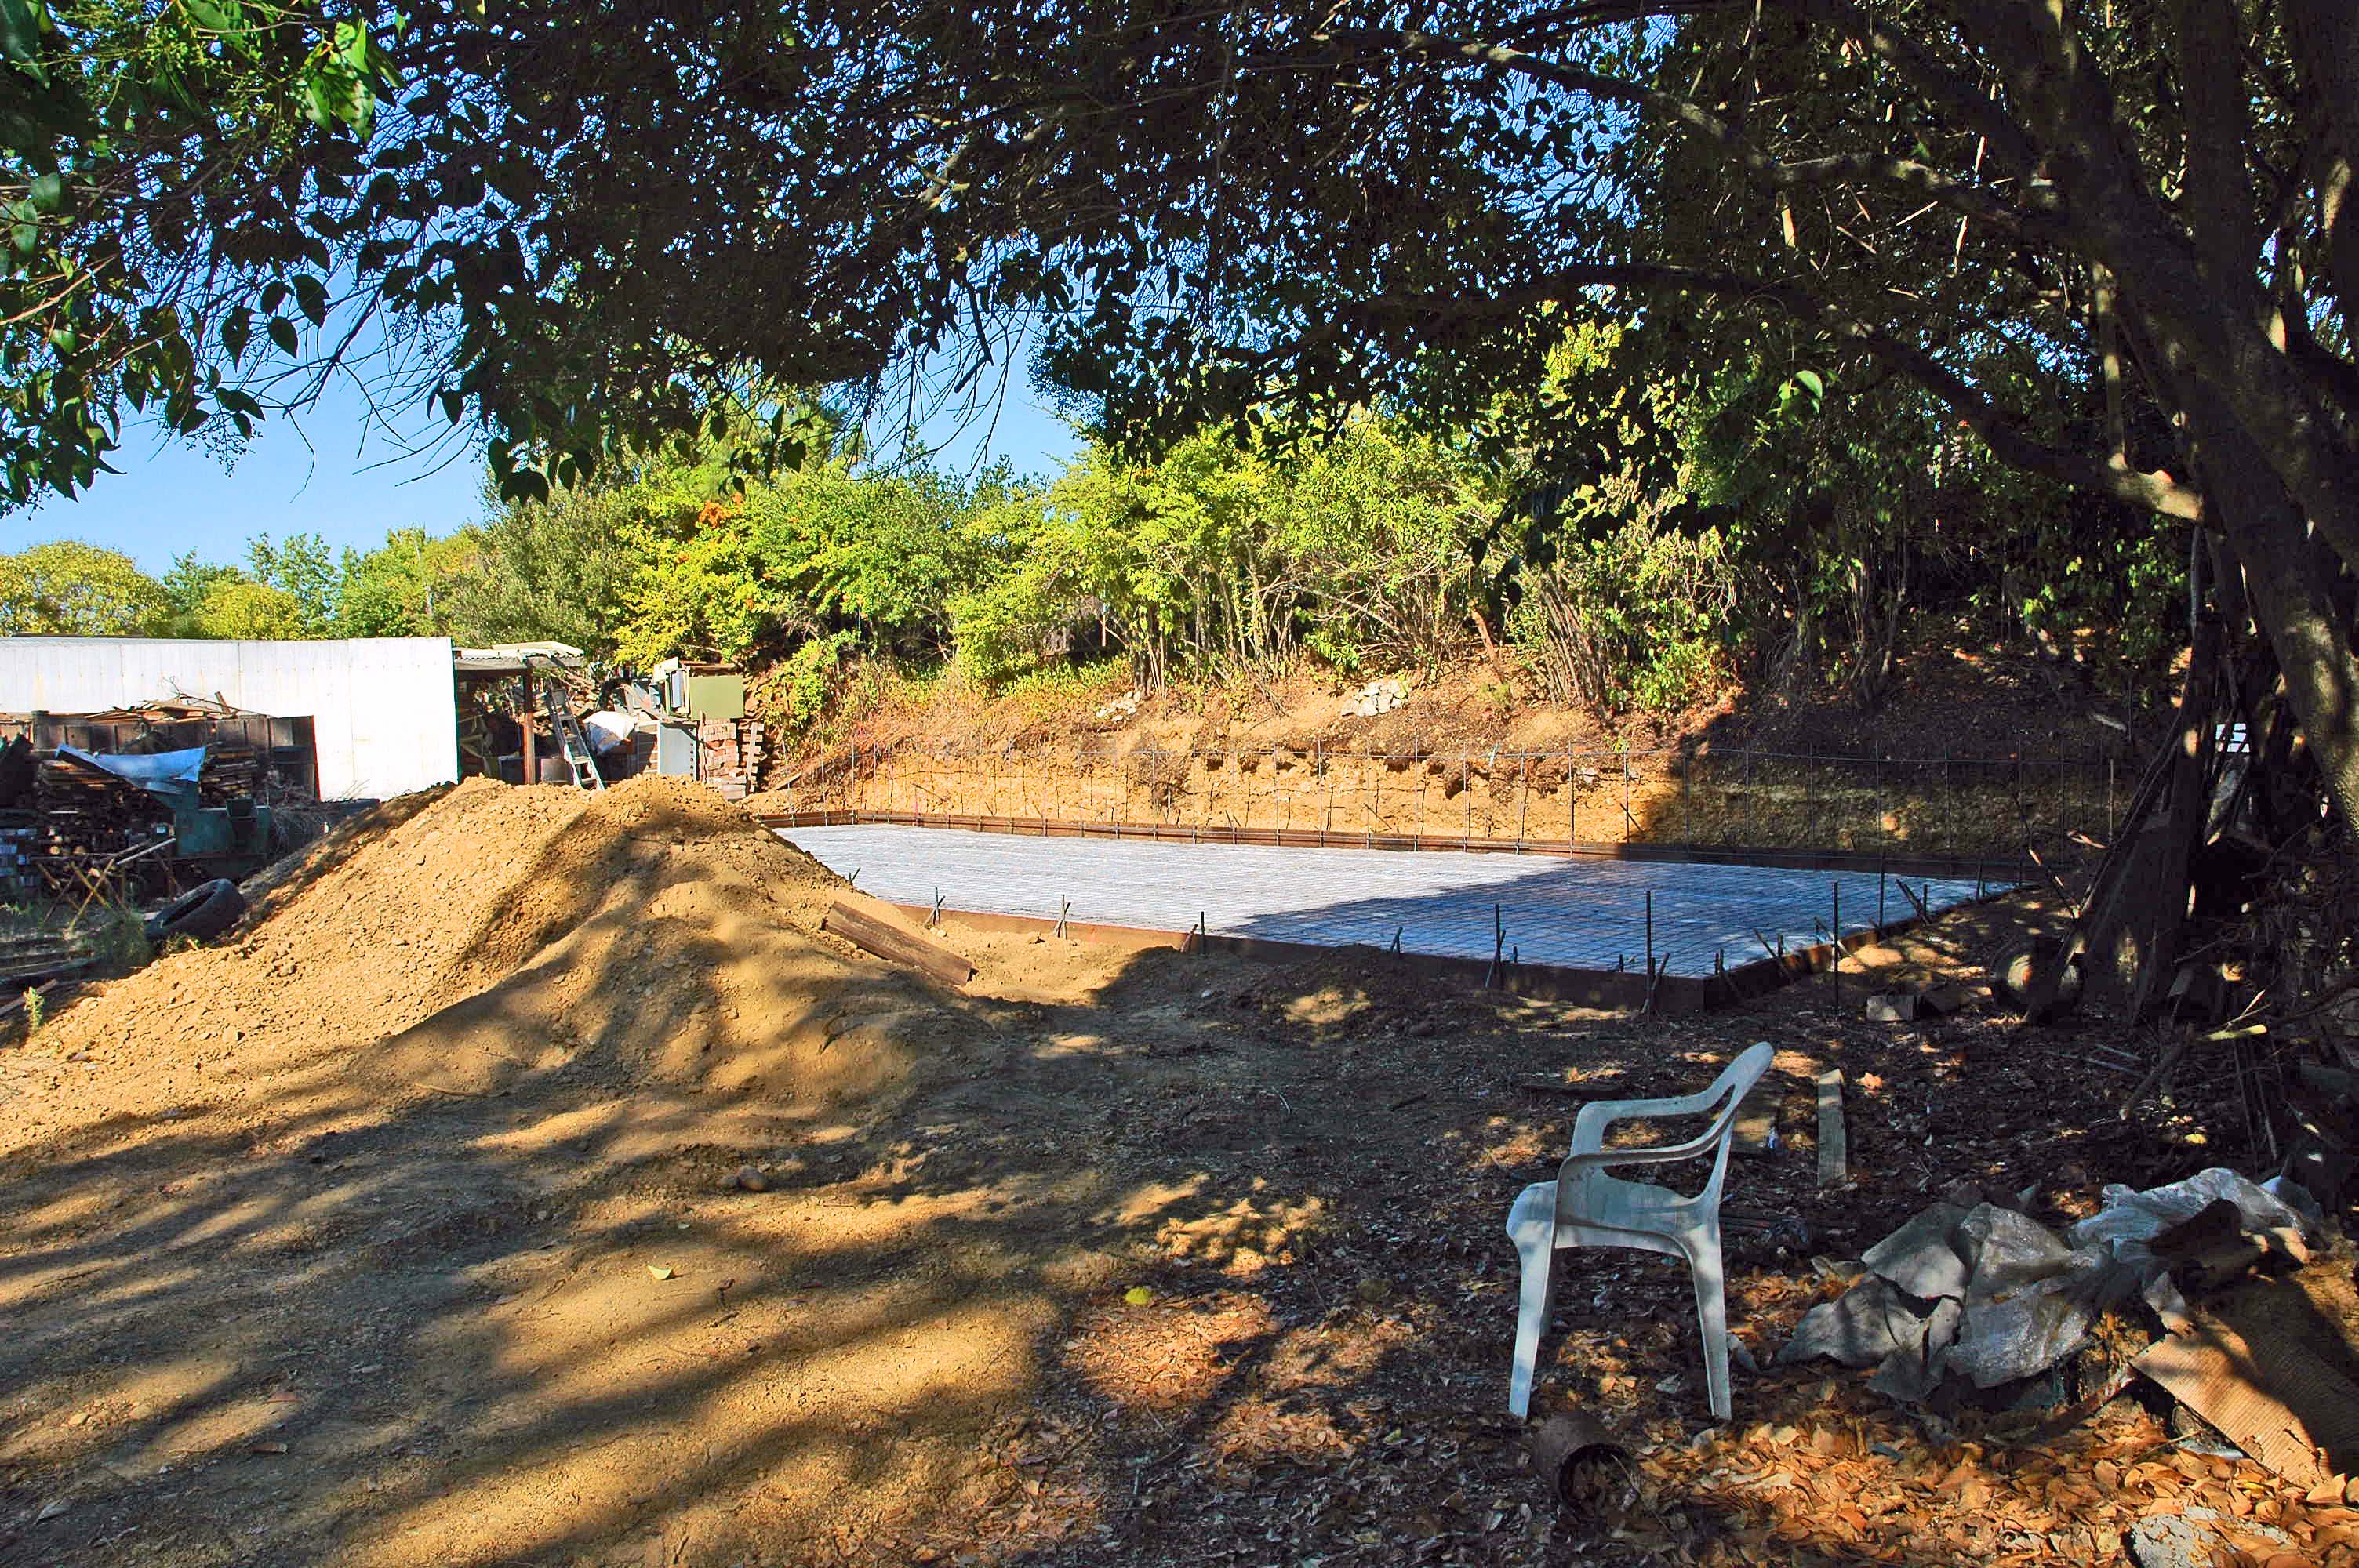
The land is leveled and compacted. The footings are dug completely. The form boards are all leveled and in place. The horizontal steel bars are in place around the perimeter. The vertical steel for the concrete block wall along the back of the building are in place. The double layer of 6 mil plastic vapor barrier is in place to prevent moisture from coming up into the concrete slab. The anchor bolts (sill bolts) are in place. The 10 Ga. wire mesh is in place over the vapor barrier to reinforce the slab. We are ready to pour.

Friday the 13th... a good day. City was here and gave us the Okie Dokie to pour. Concrete is scheduled to be here Tuesday.


.


Tha's a lotta concrete to pour. We calculate that it will take 20 cubic yards... that is two large mixer trucks. They will place a large concrete pump out at the curb and with a 200 foot long hose the concrete will be pushed all the way back to the far corner of the slab. The only bad thing about what we are looking at here is that someone is going to have to finish the surface of this slab. All 1,275 square feet. Ouch!


.


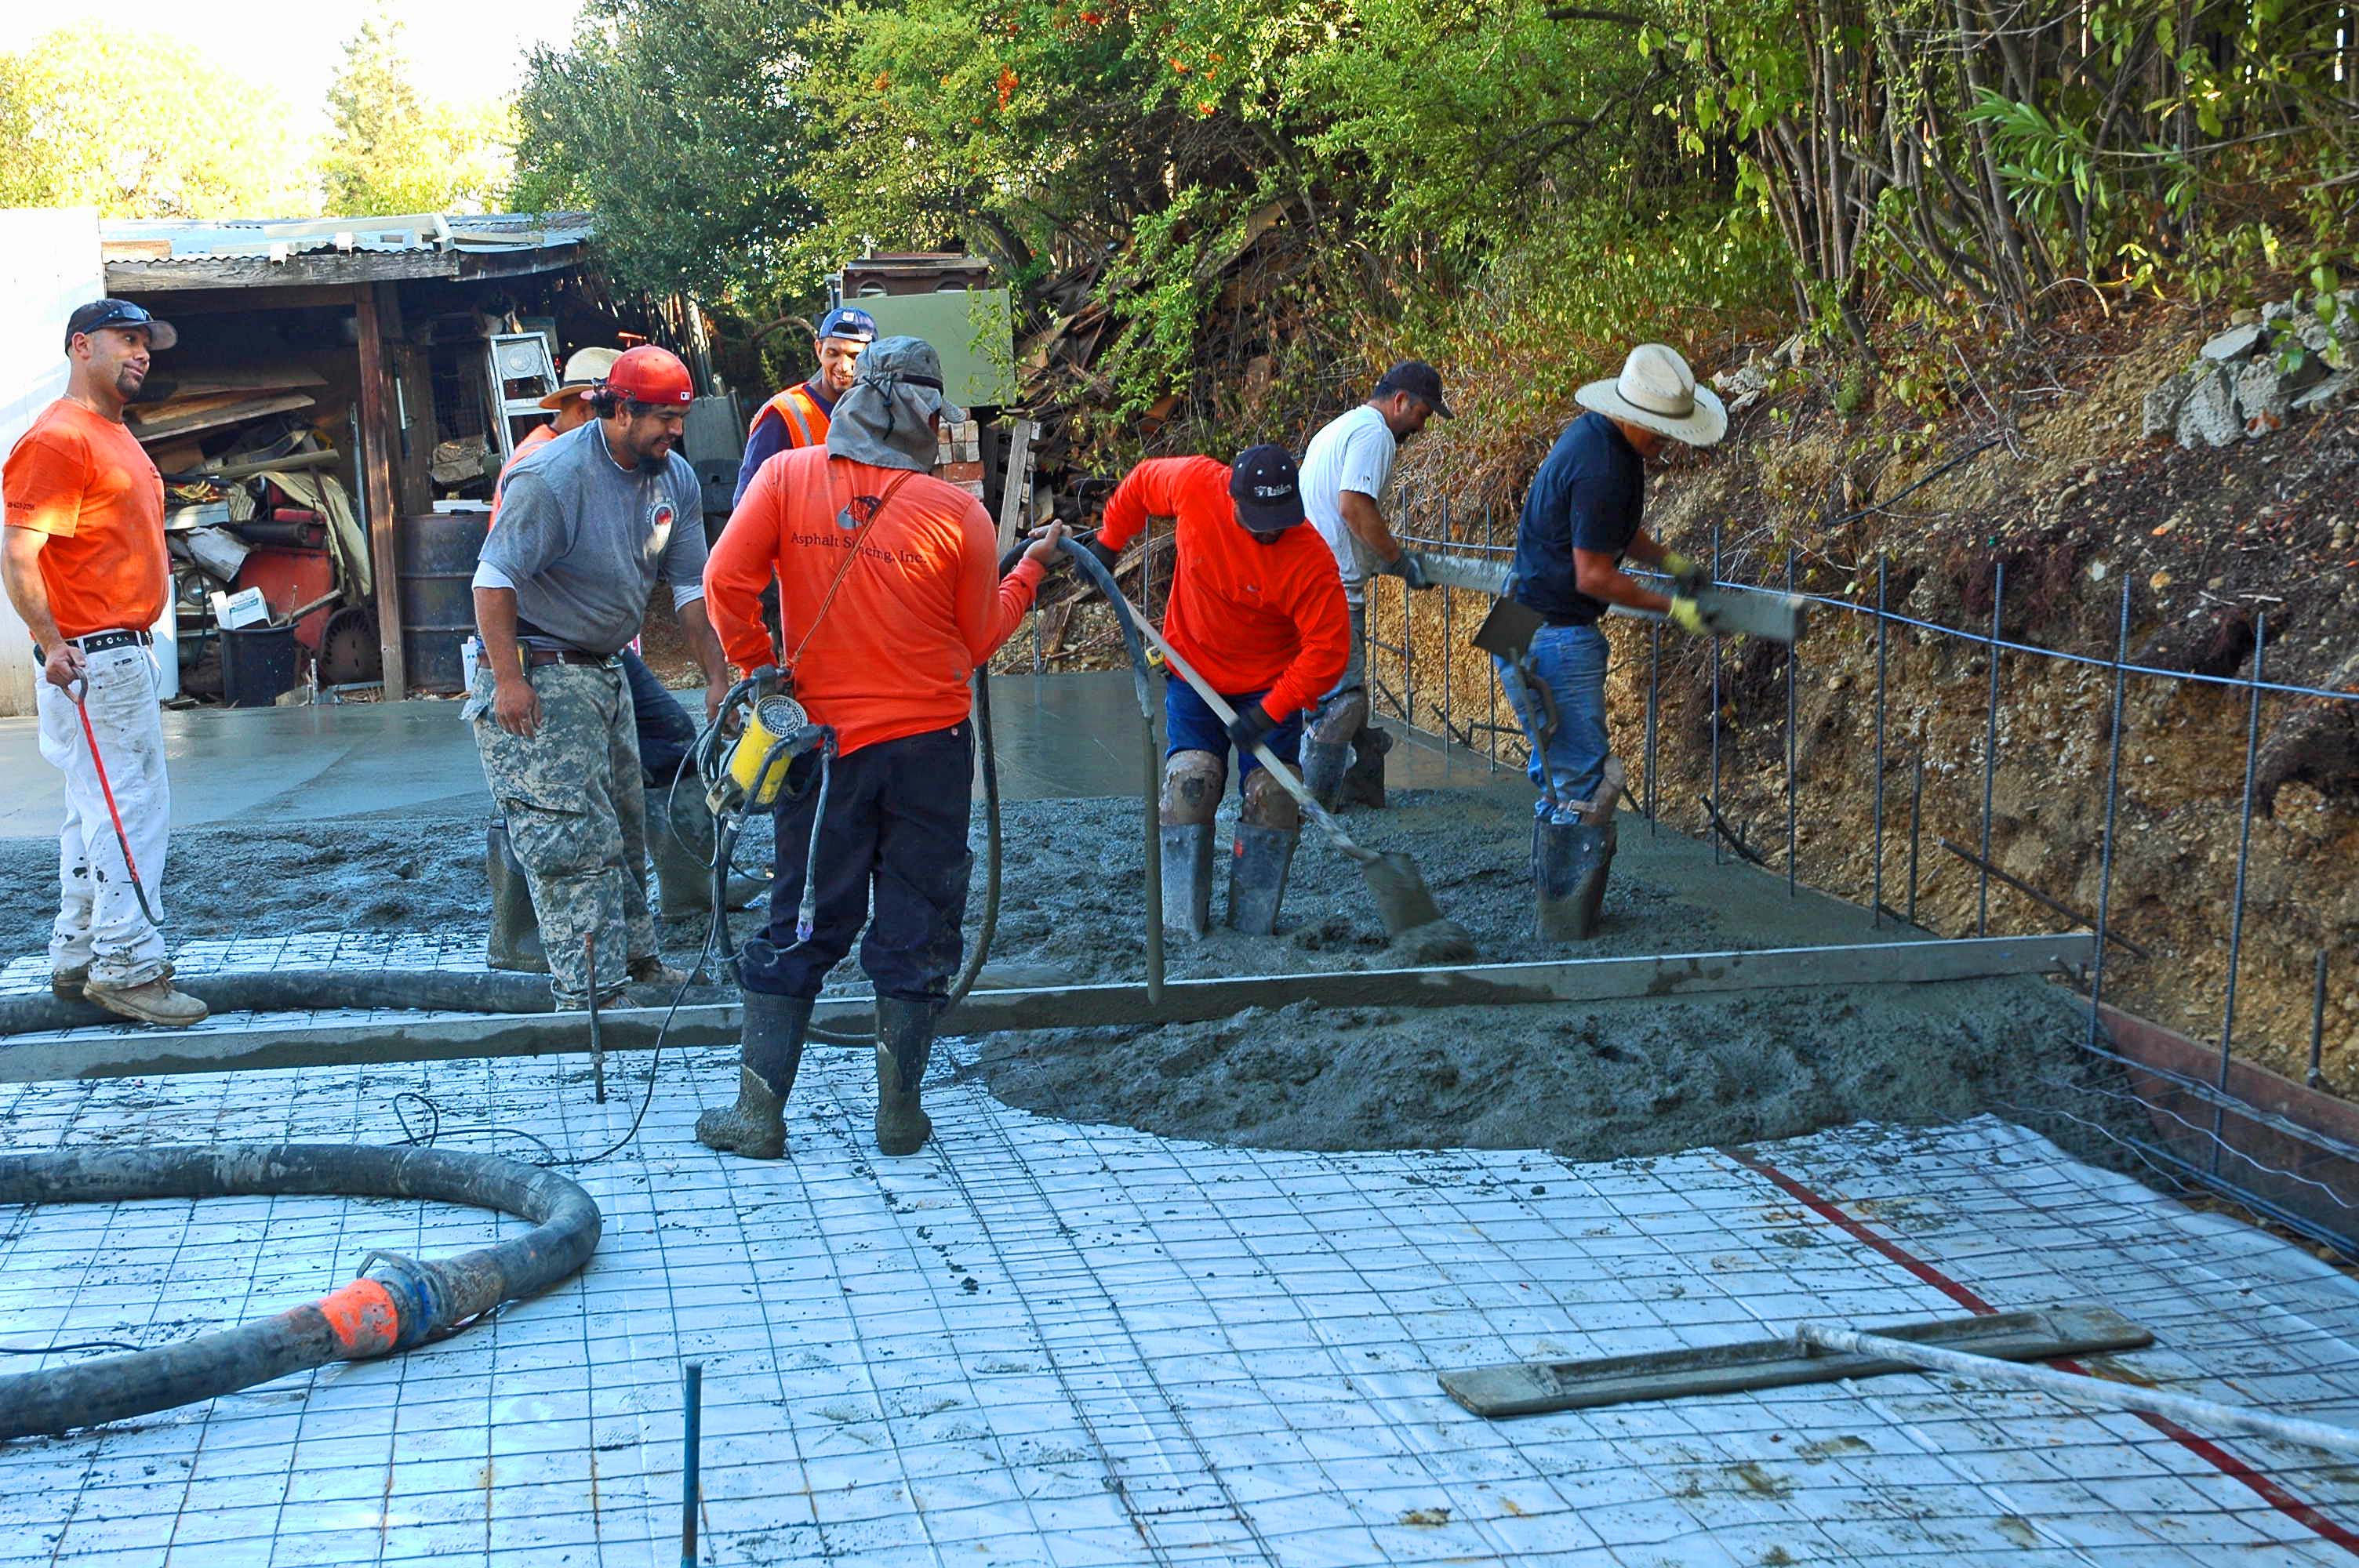
Tuesday... Pouring Day. The first mixer truck is dumping its load into the pumper and the concrete is being pushed through that large black hose to the back of the lot. This saves a who' lotta wheelin' of th' mud. We are using 200 feet of hose so that would have been a whole brigade of men to wheel that back there. And this way we don't have to try to get that mixer rig back into the back yard. And the truck can dump faster so we don't get charged for standby time.


.


Here is the other end of that hose. Eight men were working this pour, and every one of them were hustling... then waiting... then hustling... waiting for the next truck delivery. Blue shirt and white hat on the right was from El Salvador and we talked a lot about his home country, and how excited he was about being able to raise his family here. He works two jobs and is putting four kids through school. Red shirt, blue hat and shovel is the foreman and he grew up in East Palo Alto and has a great rapport with the crew. You can tell they really respect him and have a lot of fun. They all were in good spirits. Red shirt with his back to us was running the vibrator which is very important and was a run - stop - run type of job. Grey shirt and red hat came with the concrete pump and was running the machine out in the street with a remote control on his belt. Red shirt, light pants and blue hat holding the orange stick came with the pump also, and his job was keeping that very heavy hose out of the way, lifting the reinforcing wire up into the middle of the concrete mix, and a jillion other things... he was the best worker in the whole crew. The others spoke a lot of Spanish and a little English and were very respectful to the whole crew as well as me. Very nice crew.


.


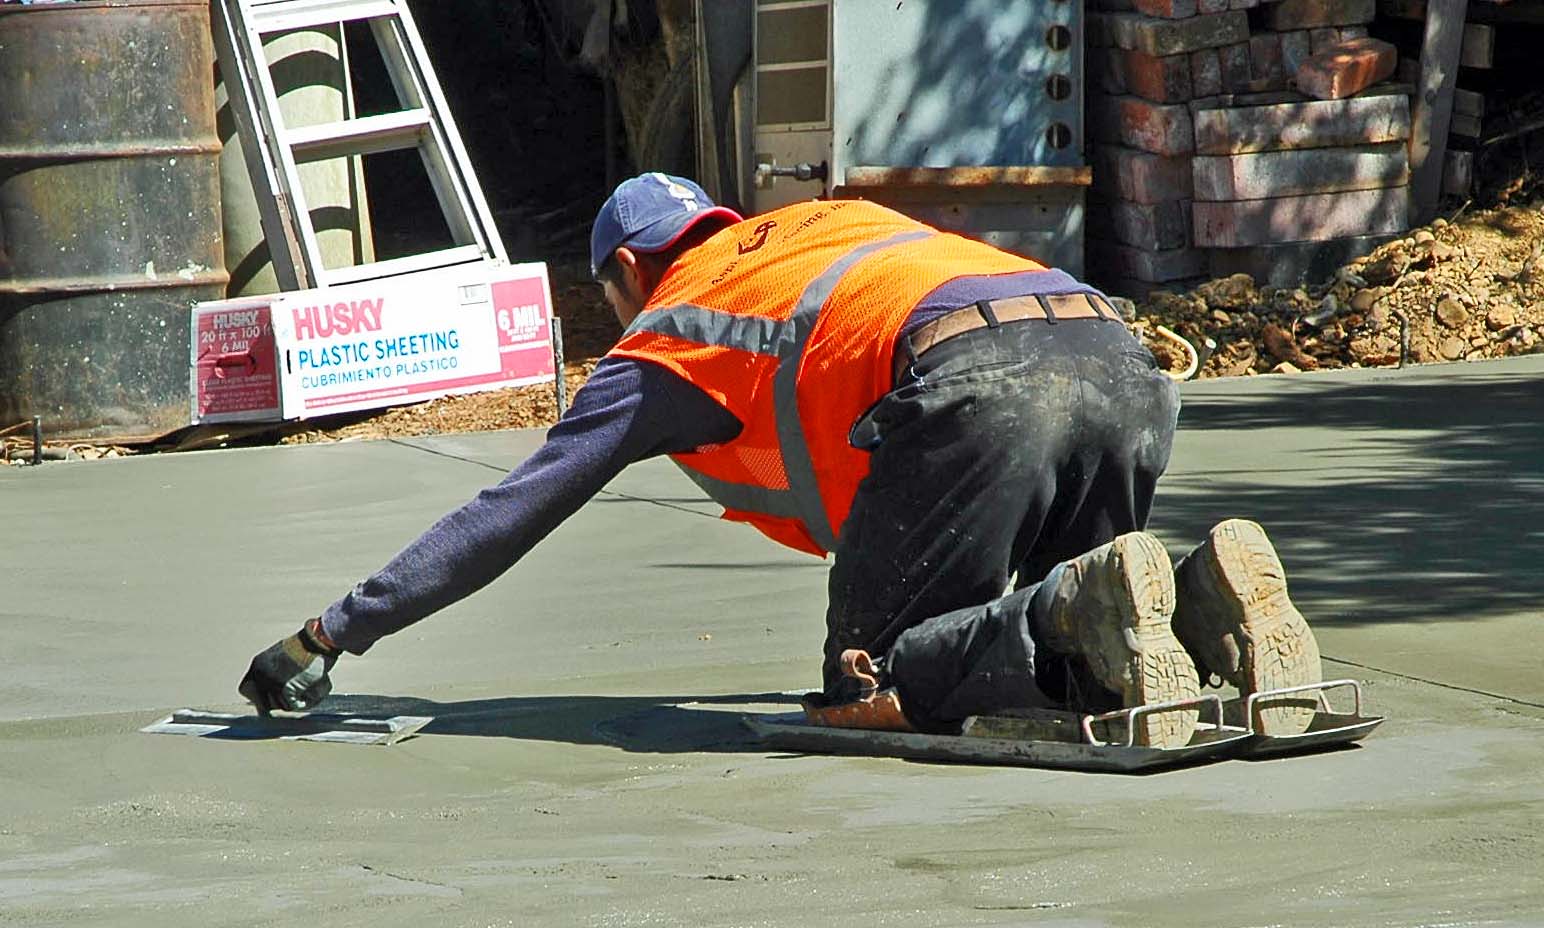
One of five finishers. A trowel in each hand (one a 'float' the other a 'finisher') and both of them moving. I liked the steel 'boards' under his feet. They acted as trowels as well, and allowed them to be on relatively wet concrete without depressing the surface. We ended up pouring more than we anticipated, and it took three truck deliveries to pour 27 cubic yards of concrete. The trucks hold 9 yards each and we ended up with one half a wheelbarrow of mud left over. Friday we will pull the forms and next week sometime I can get deliveries started. Lowe's has been holding the materials for me.

.

.


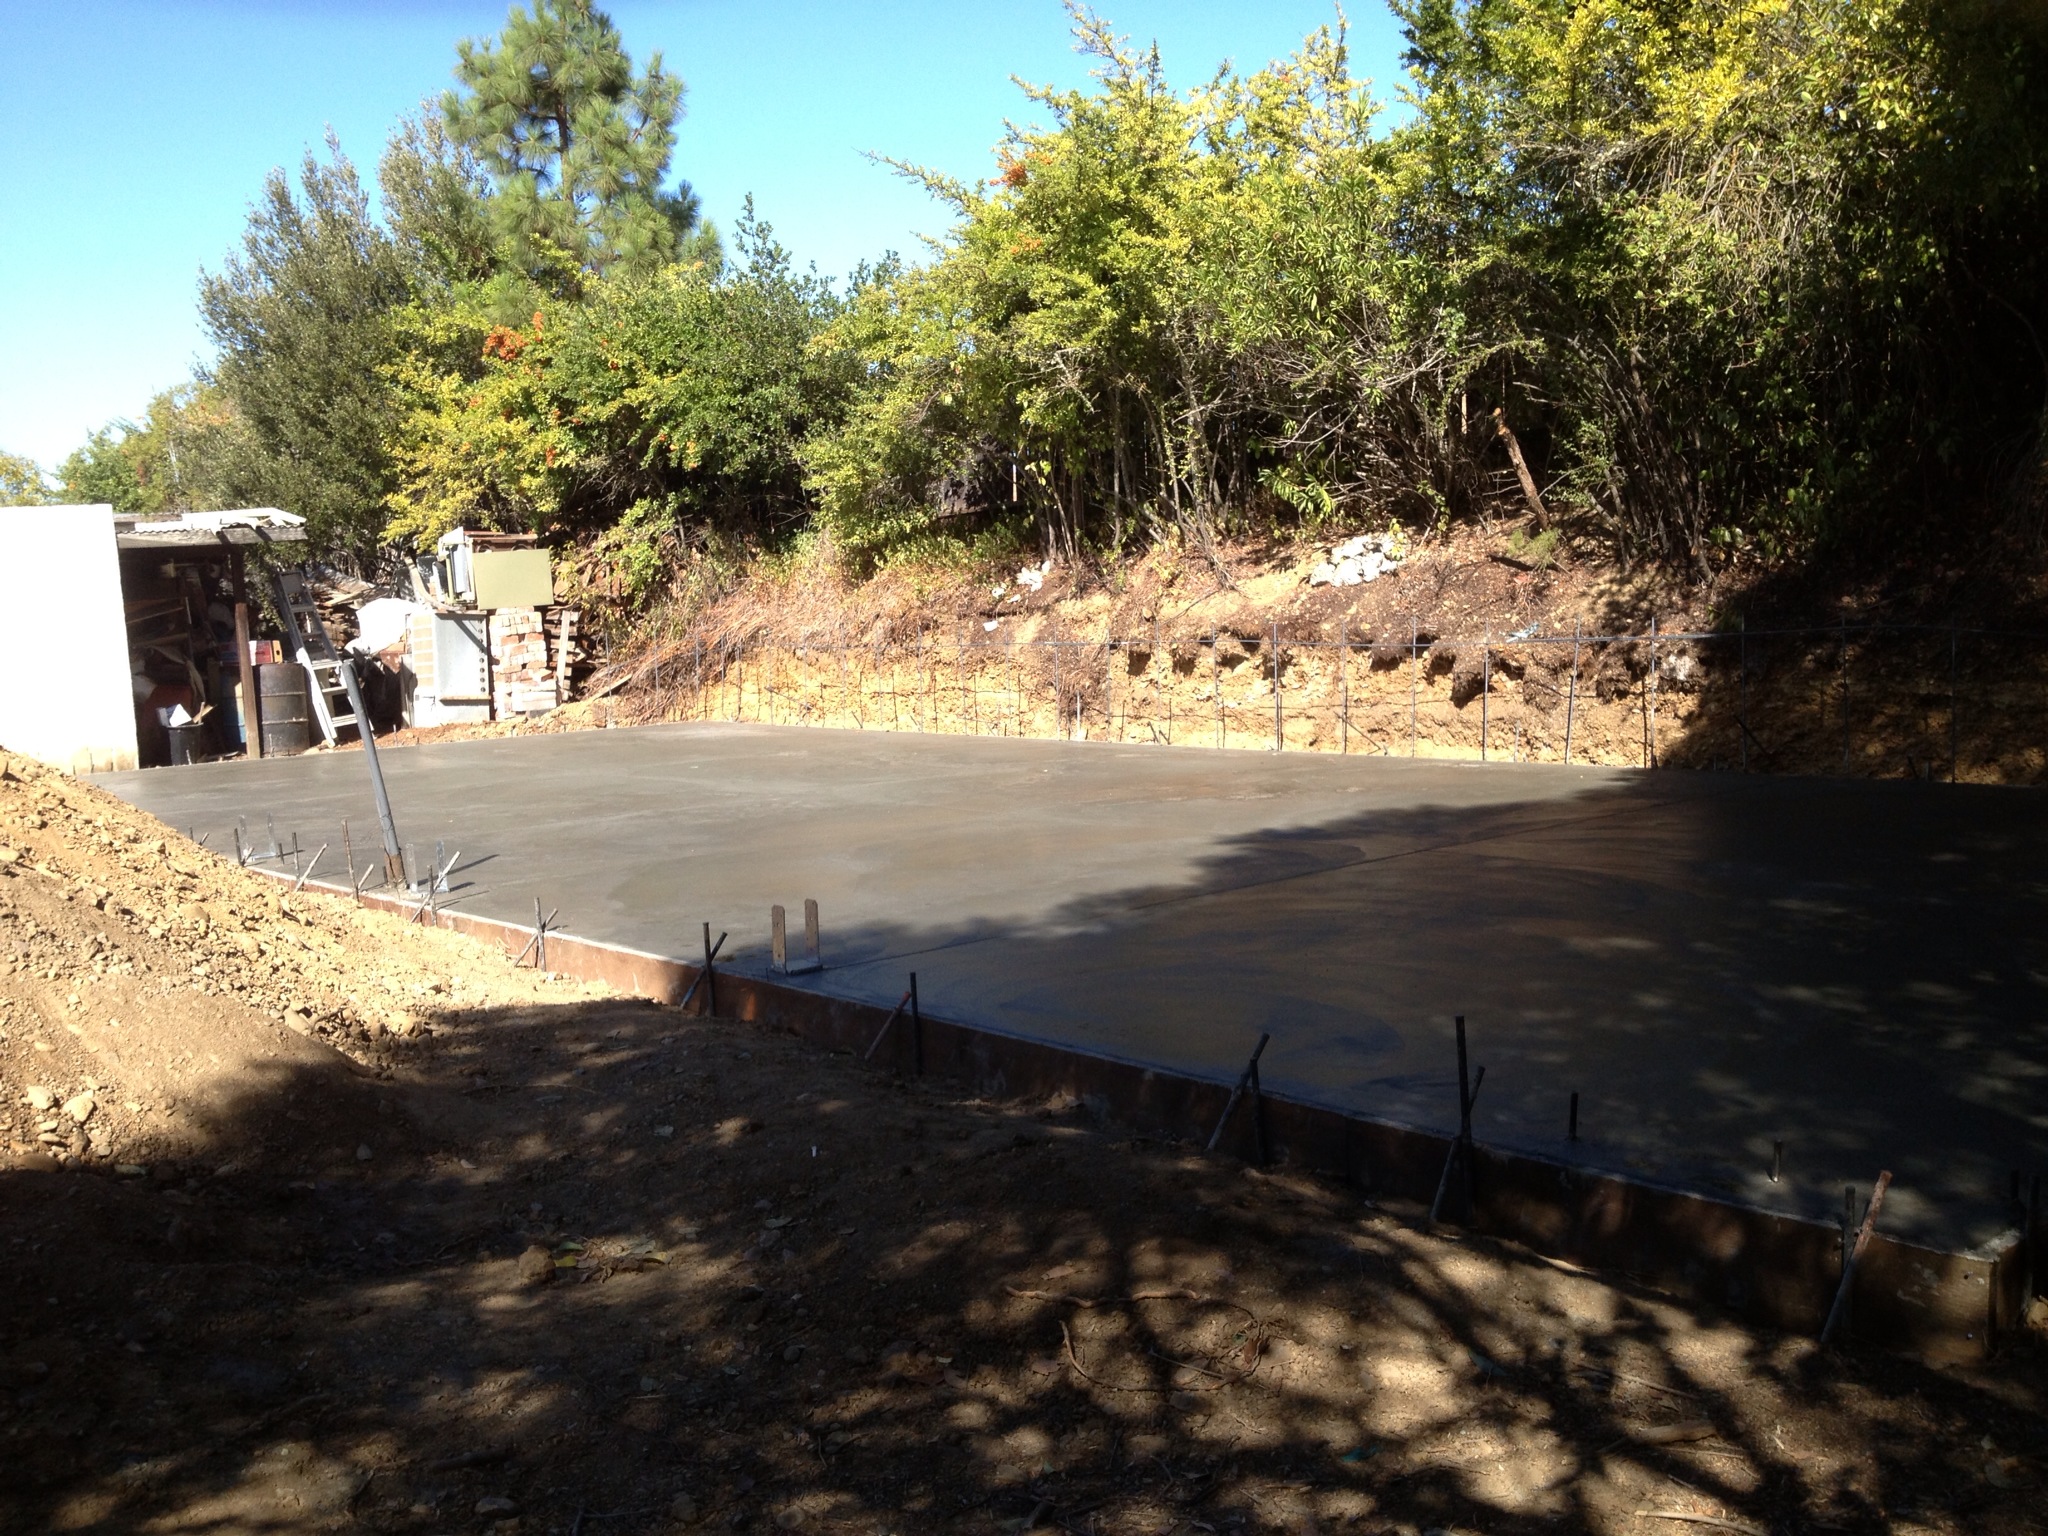
We have a slab. The crew did a very nice job of laying this concrete. Forms will be pulled off Friday, three days after the pour.


.

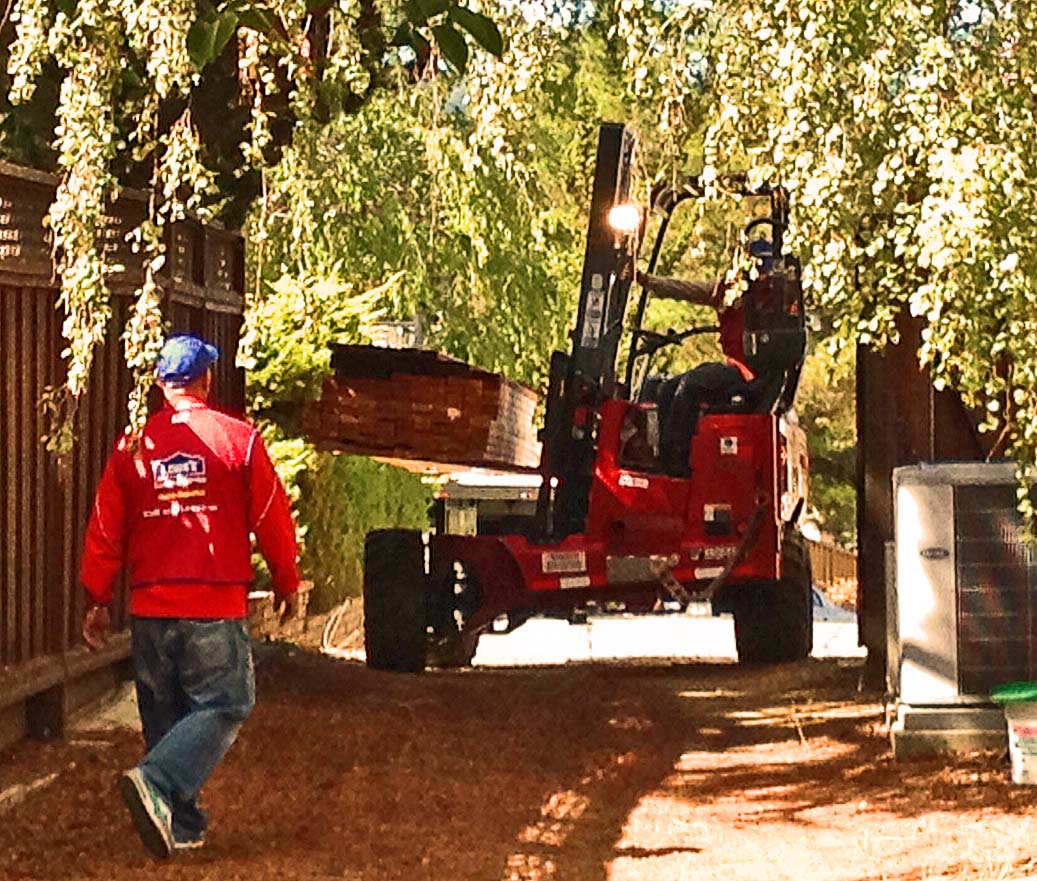
It is about a week after the slab was poured, and I am having most of the materials I ordered delivered. Looks like wall studs and sills coming in on this load.


.

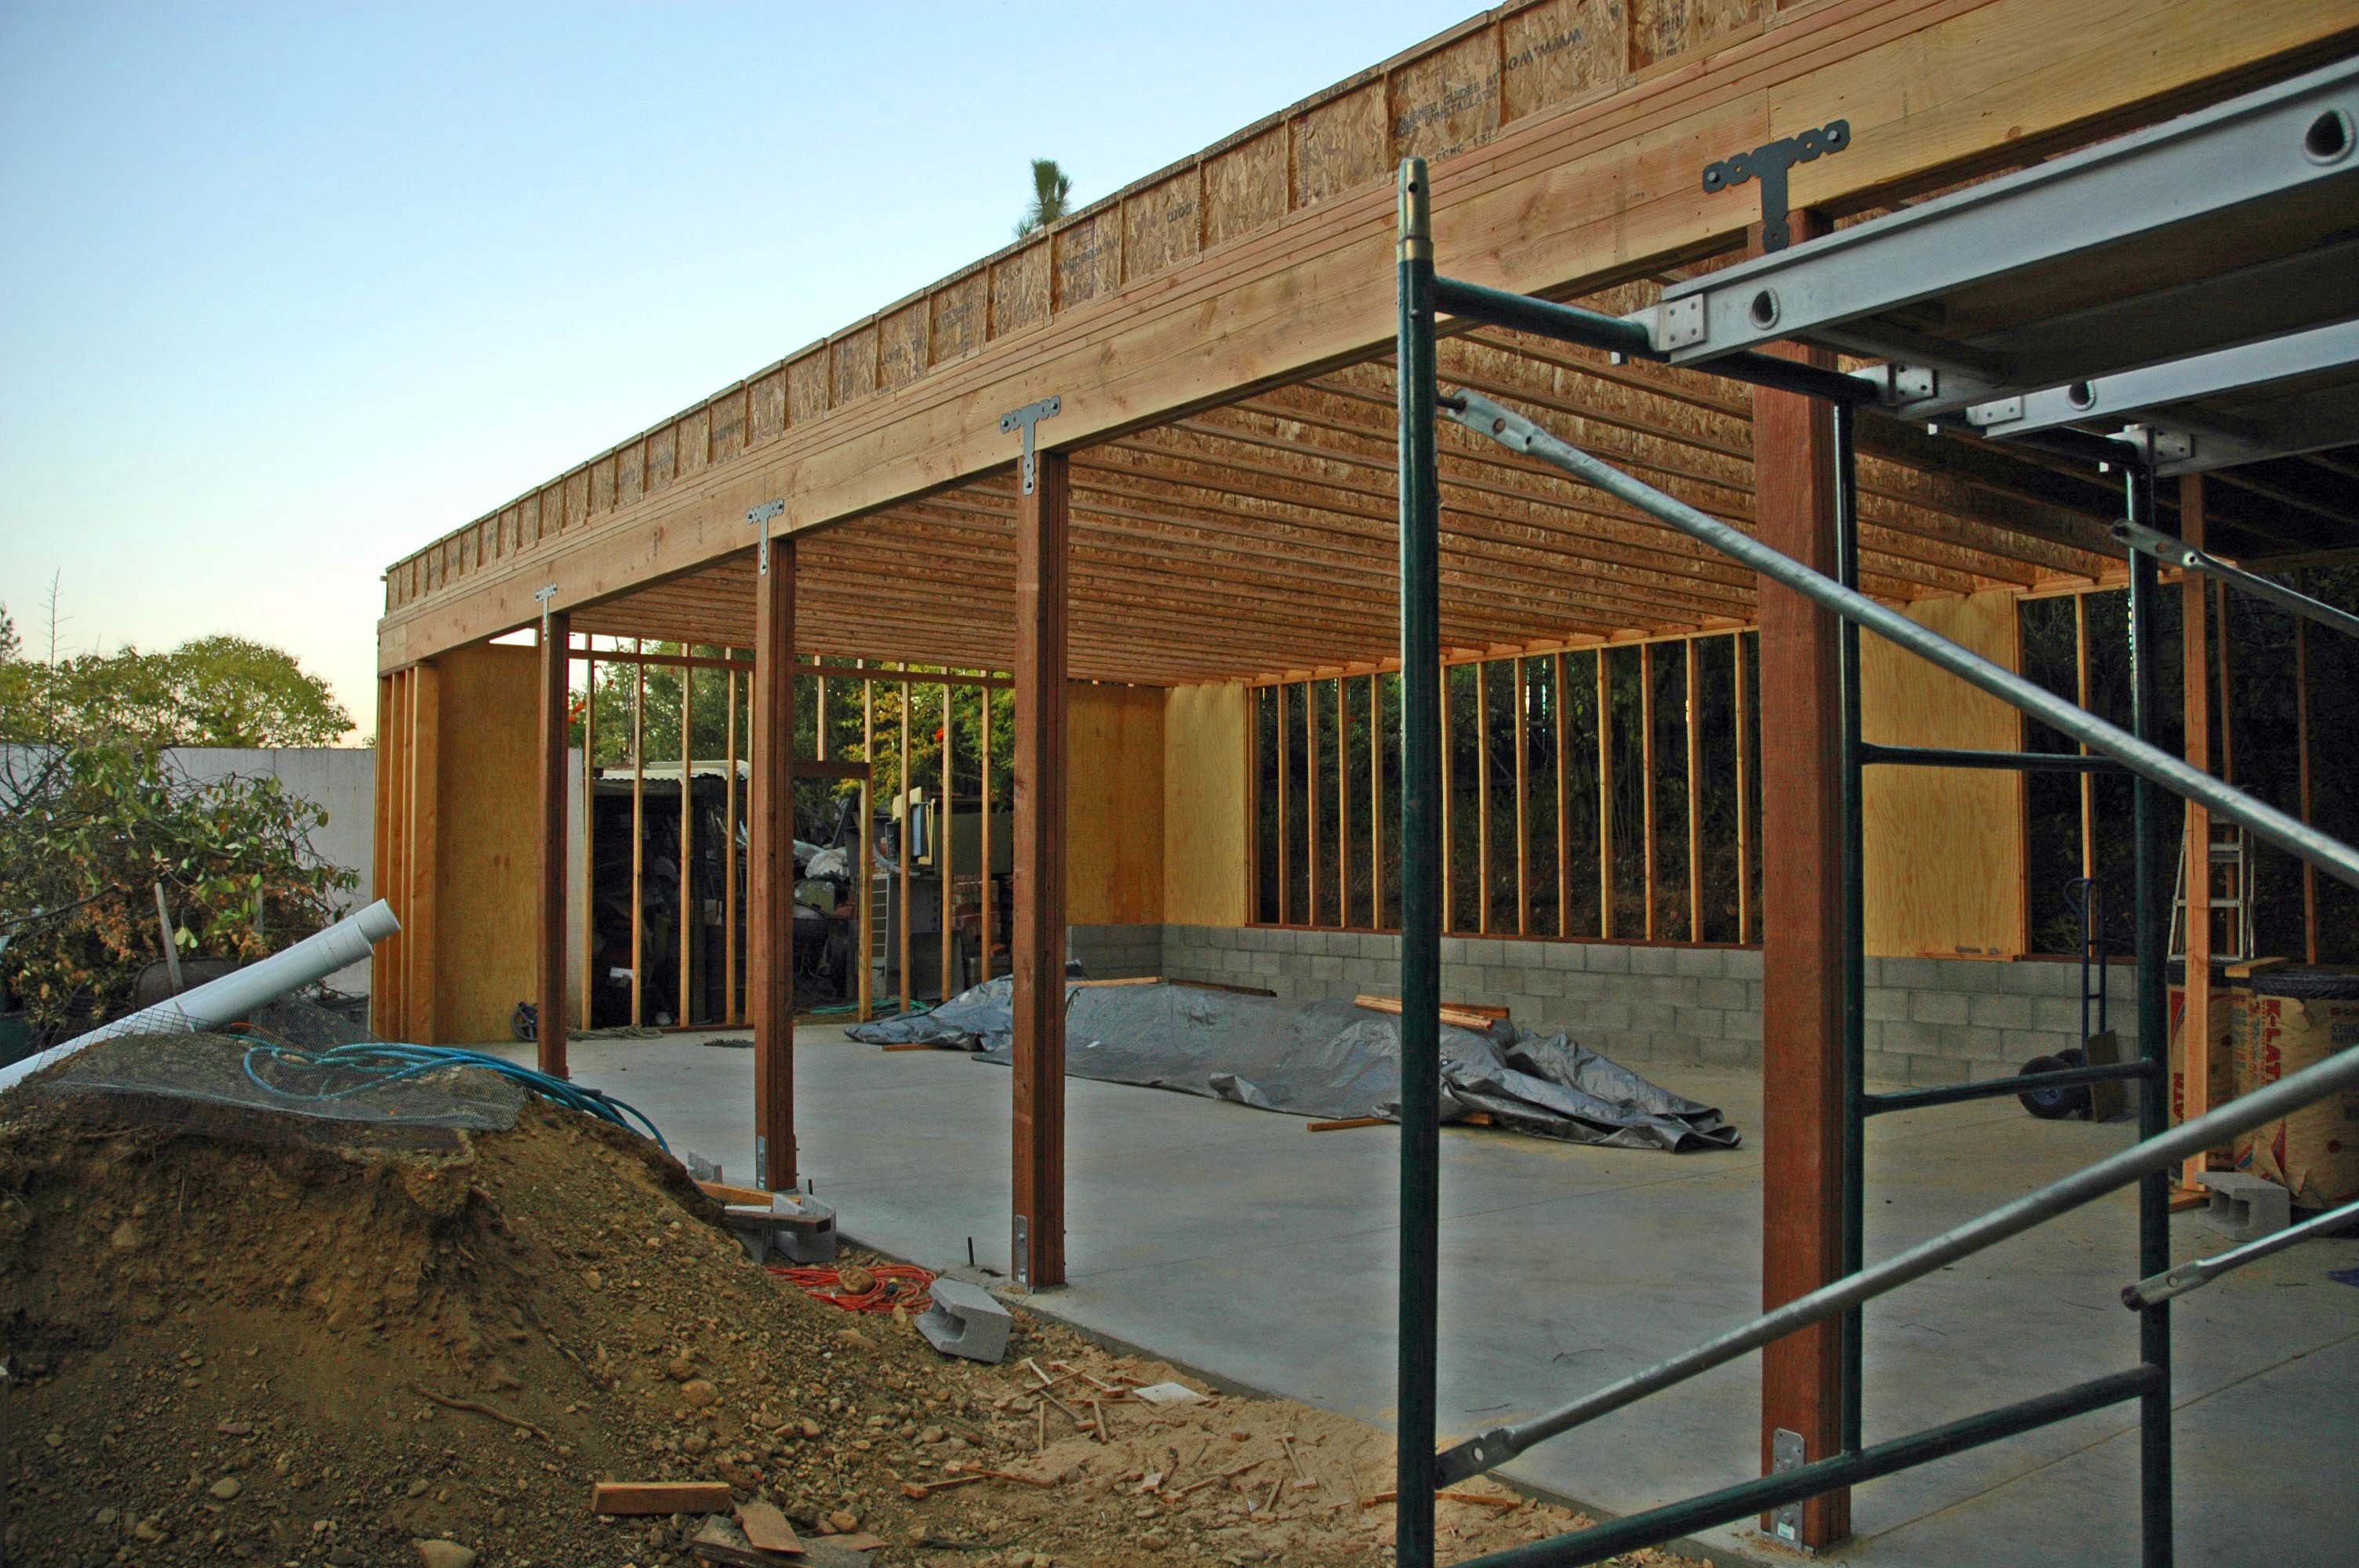
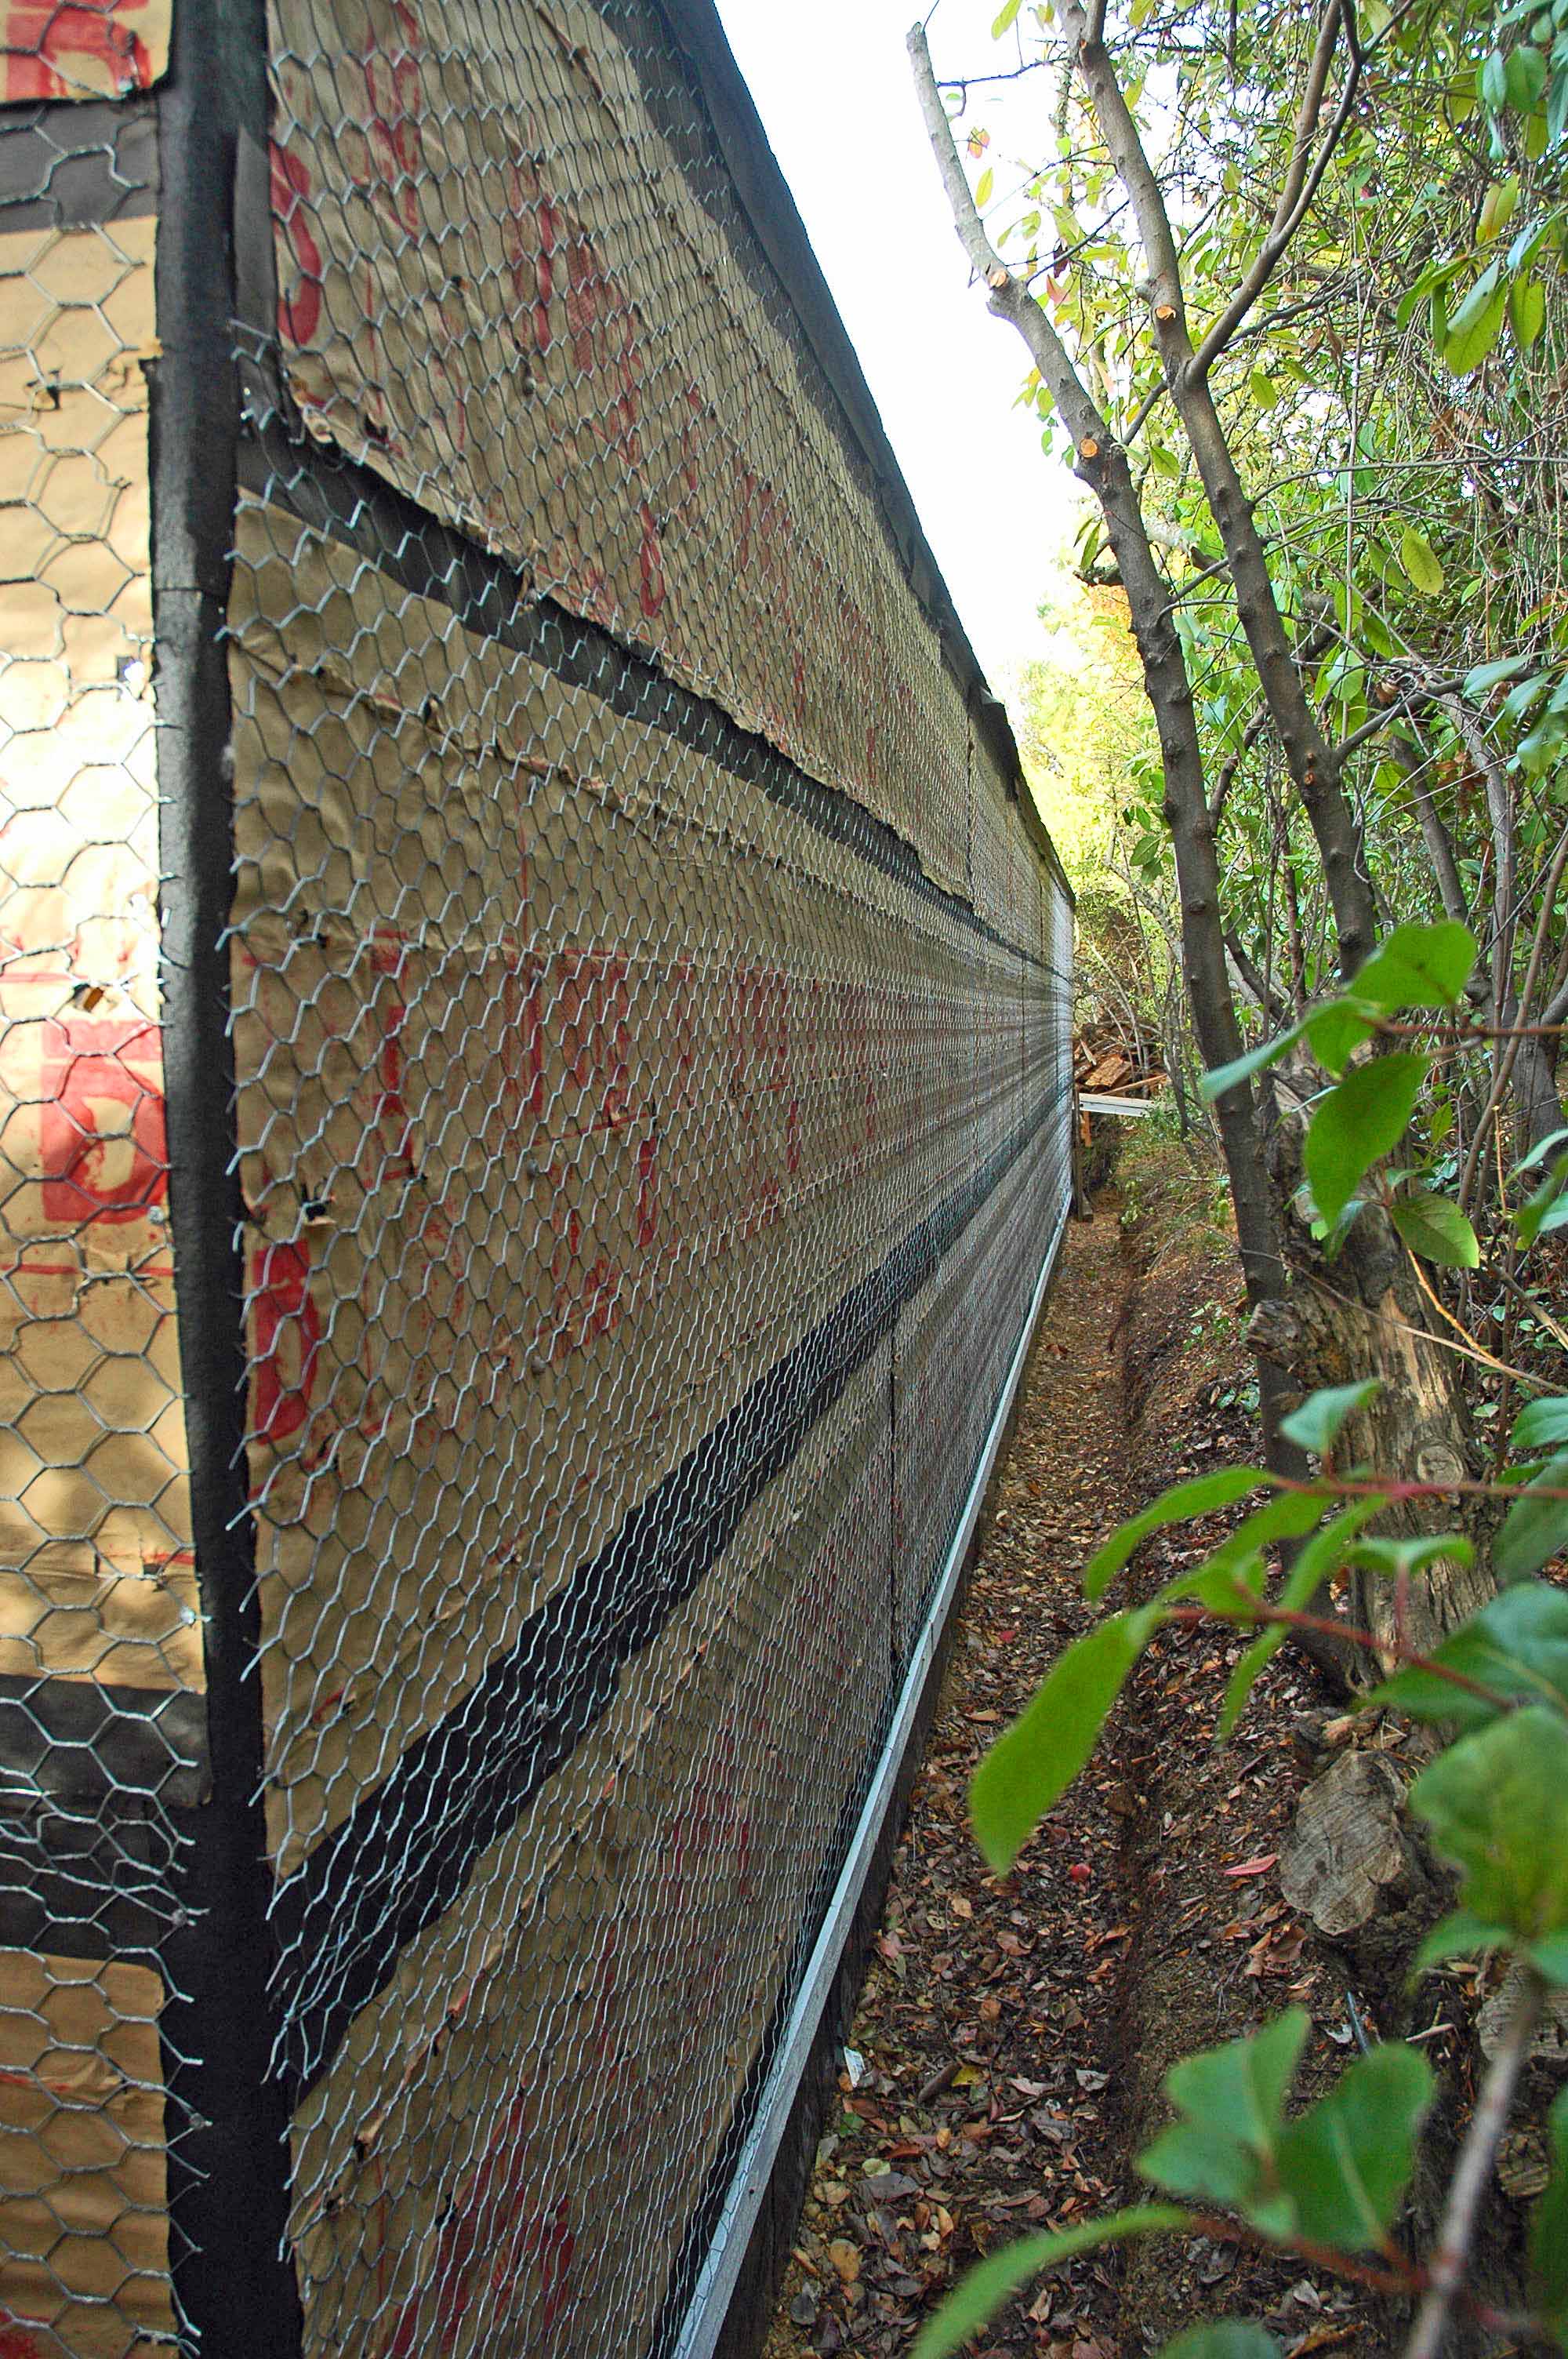
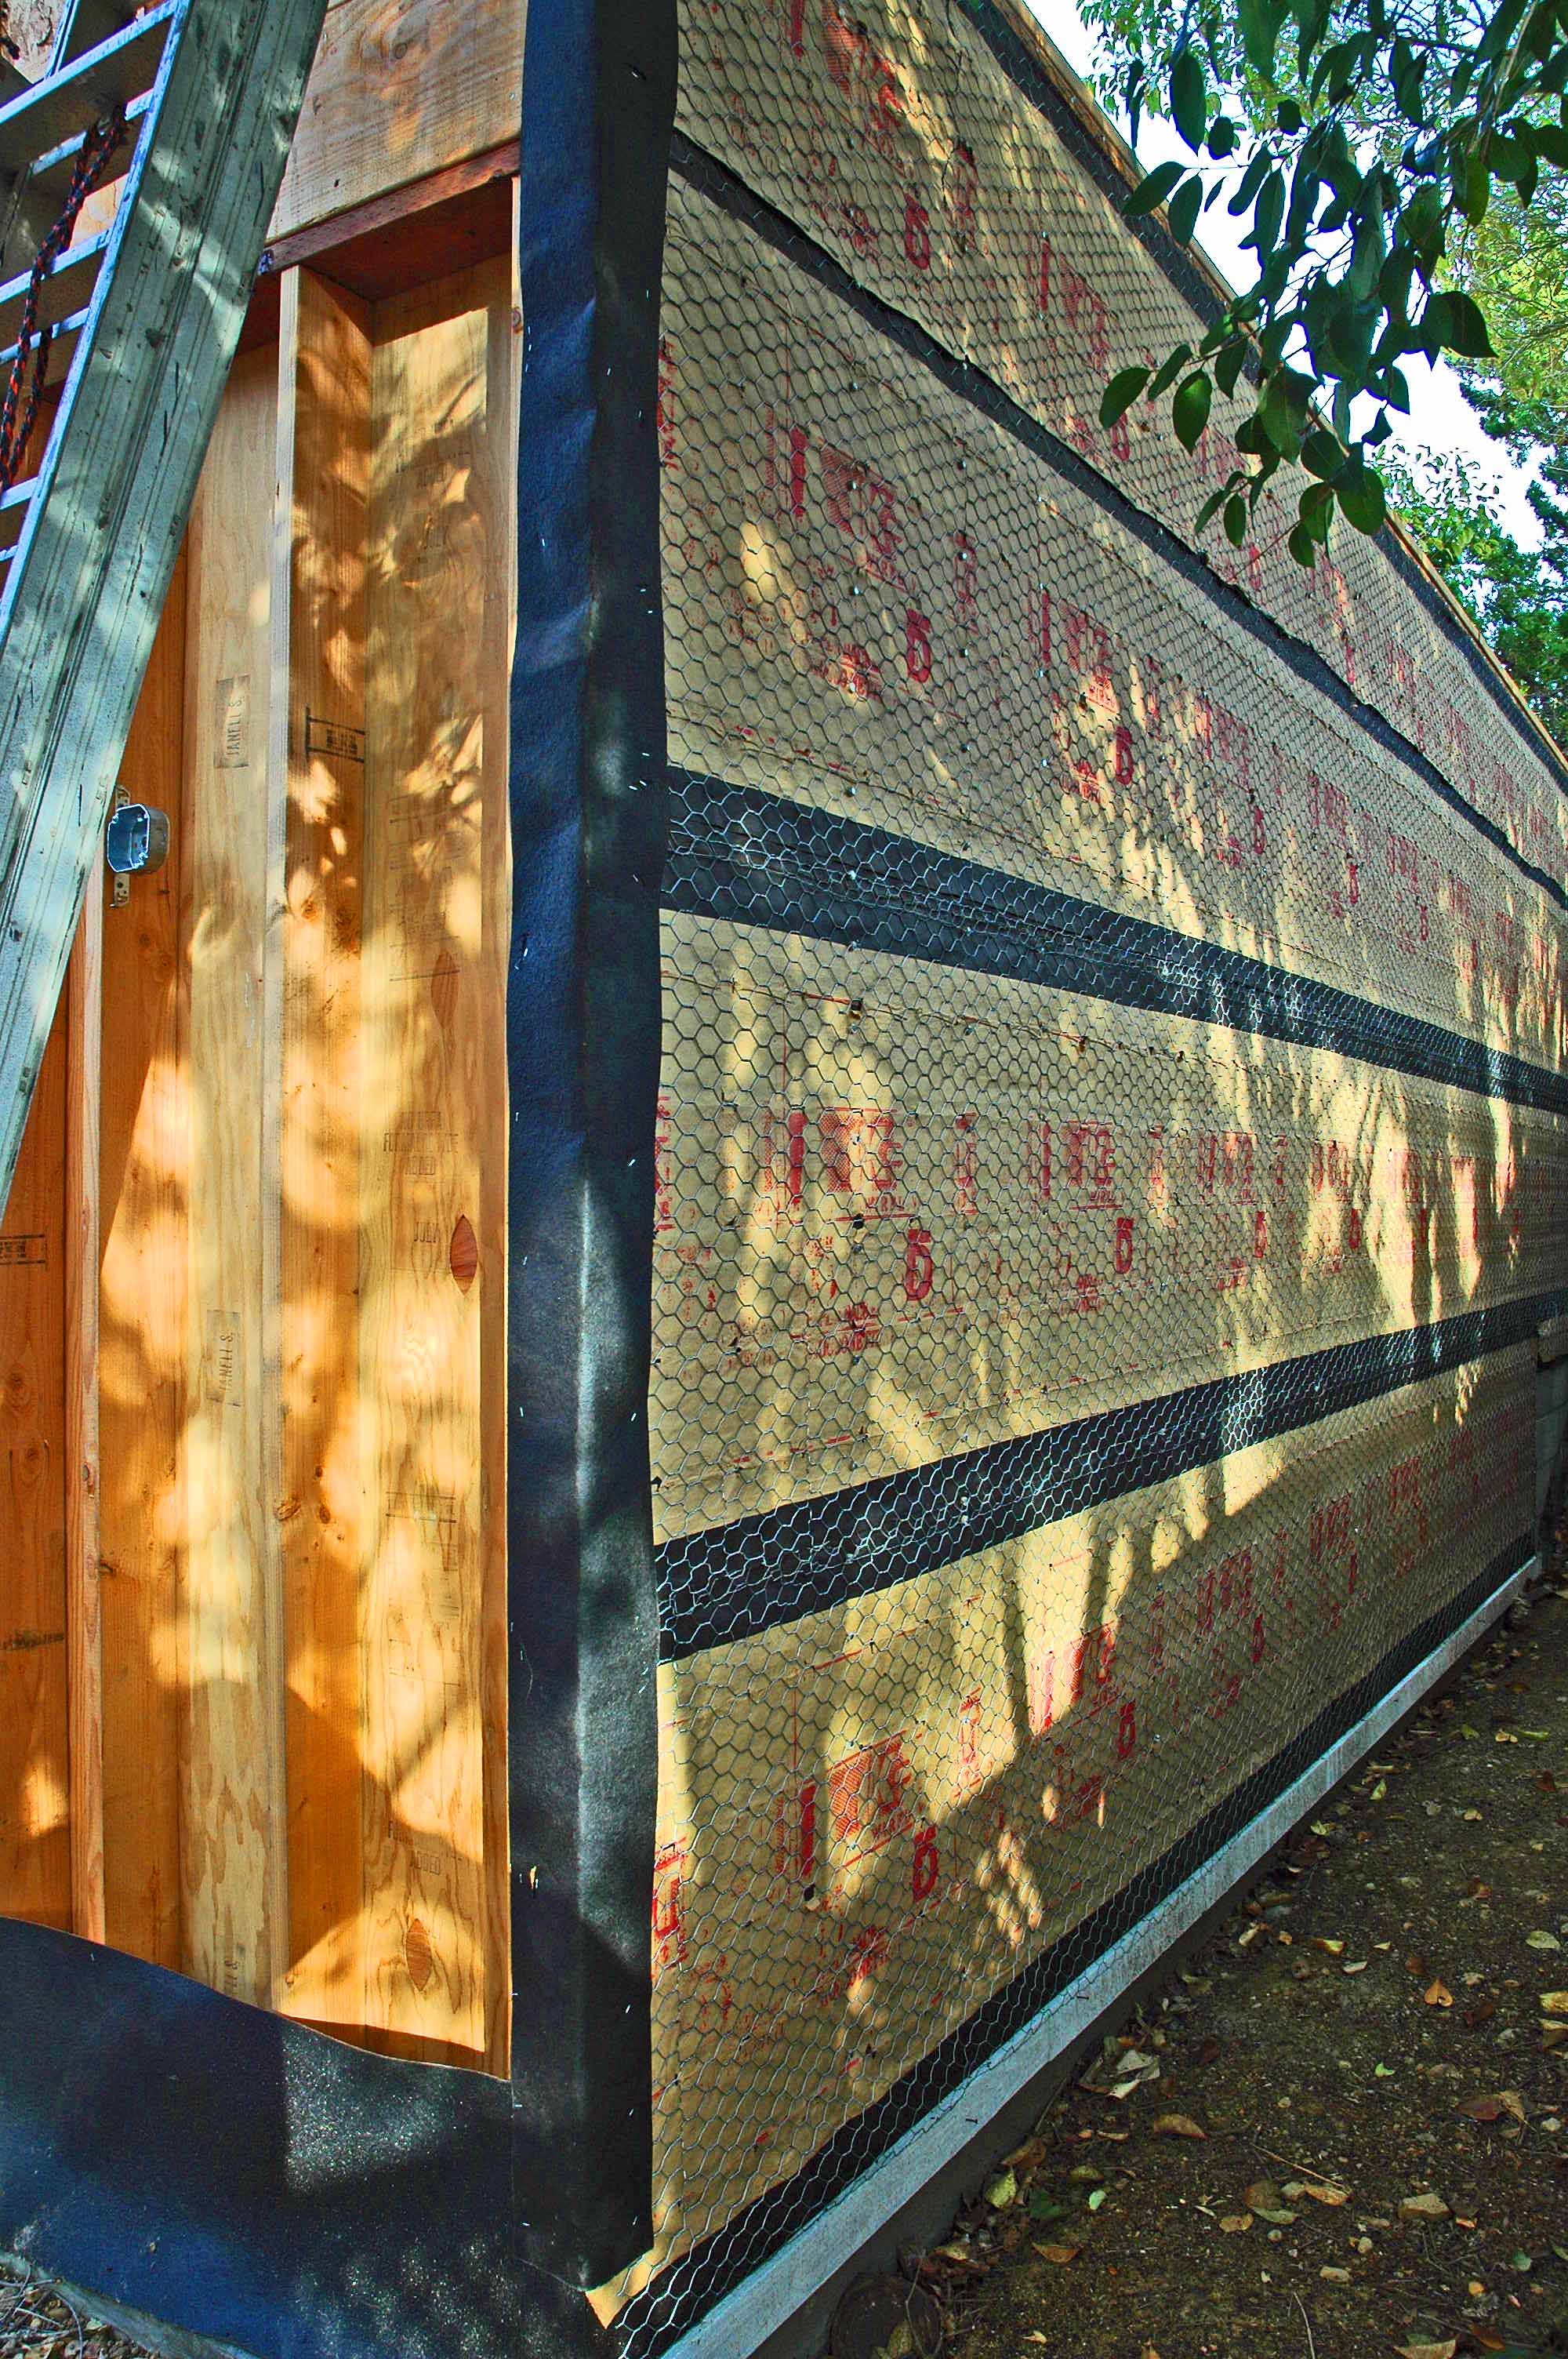
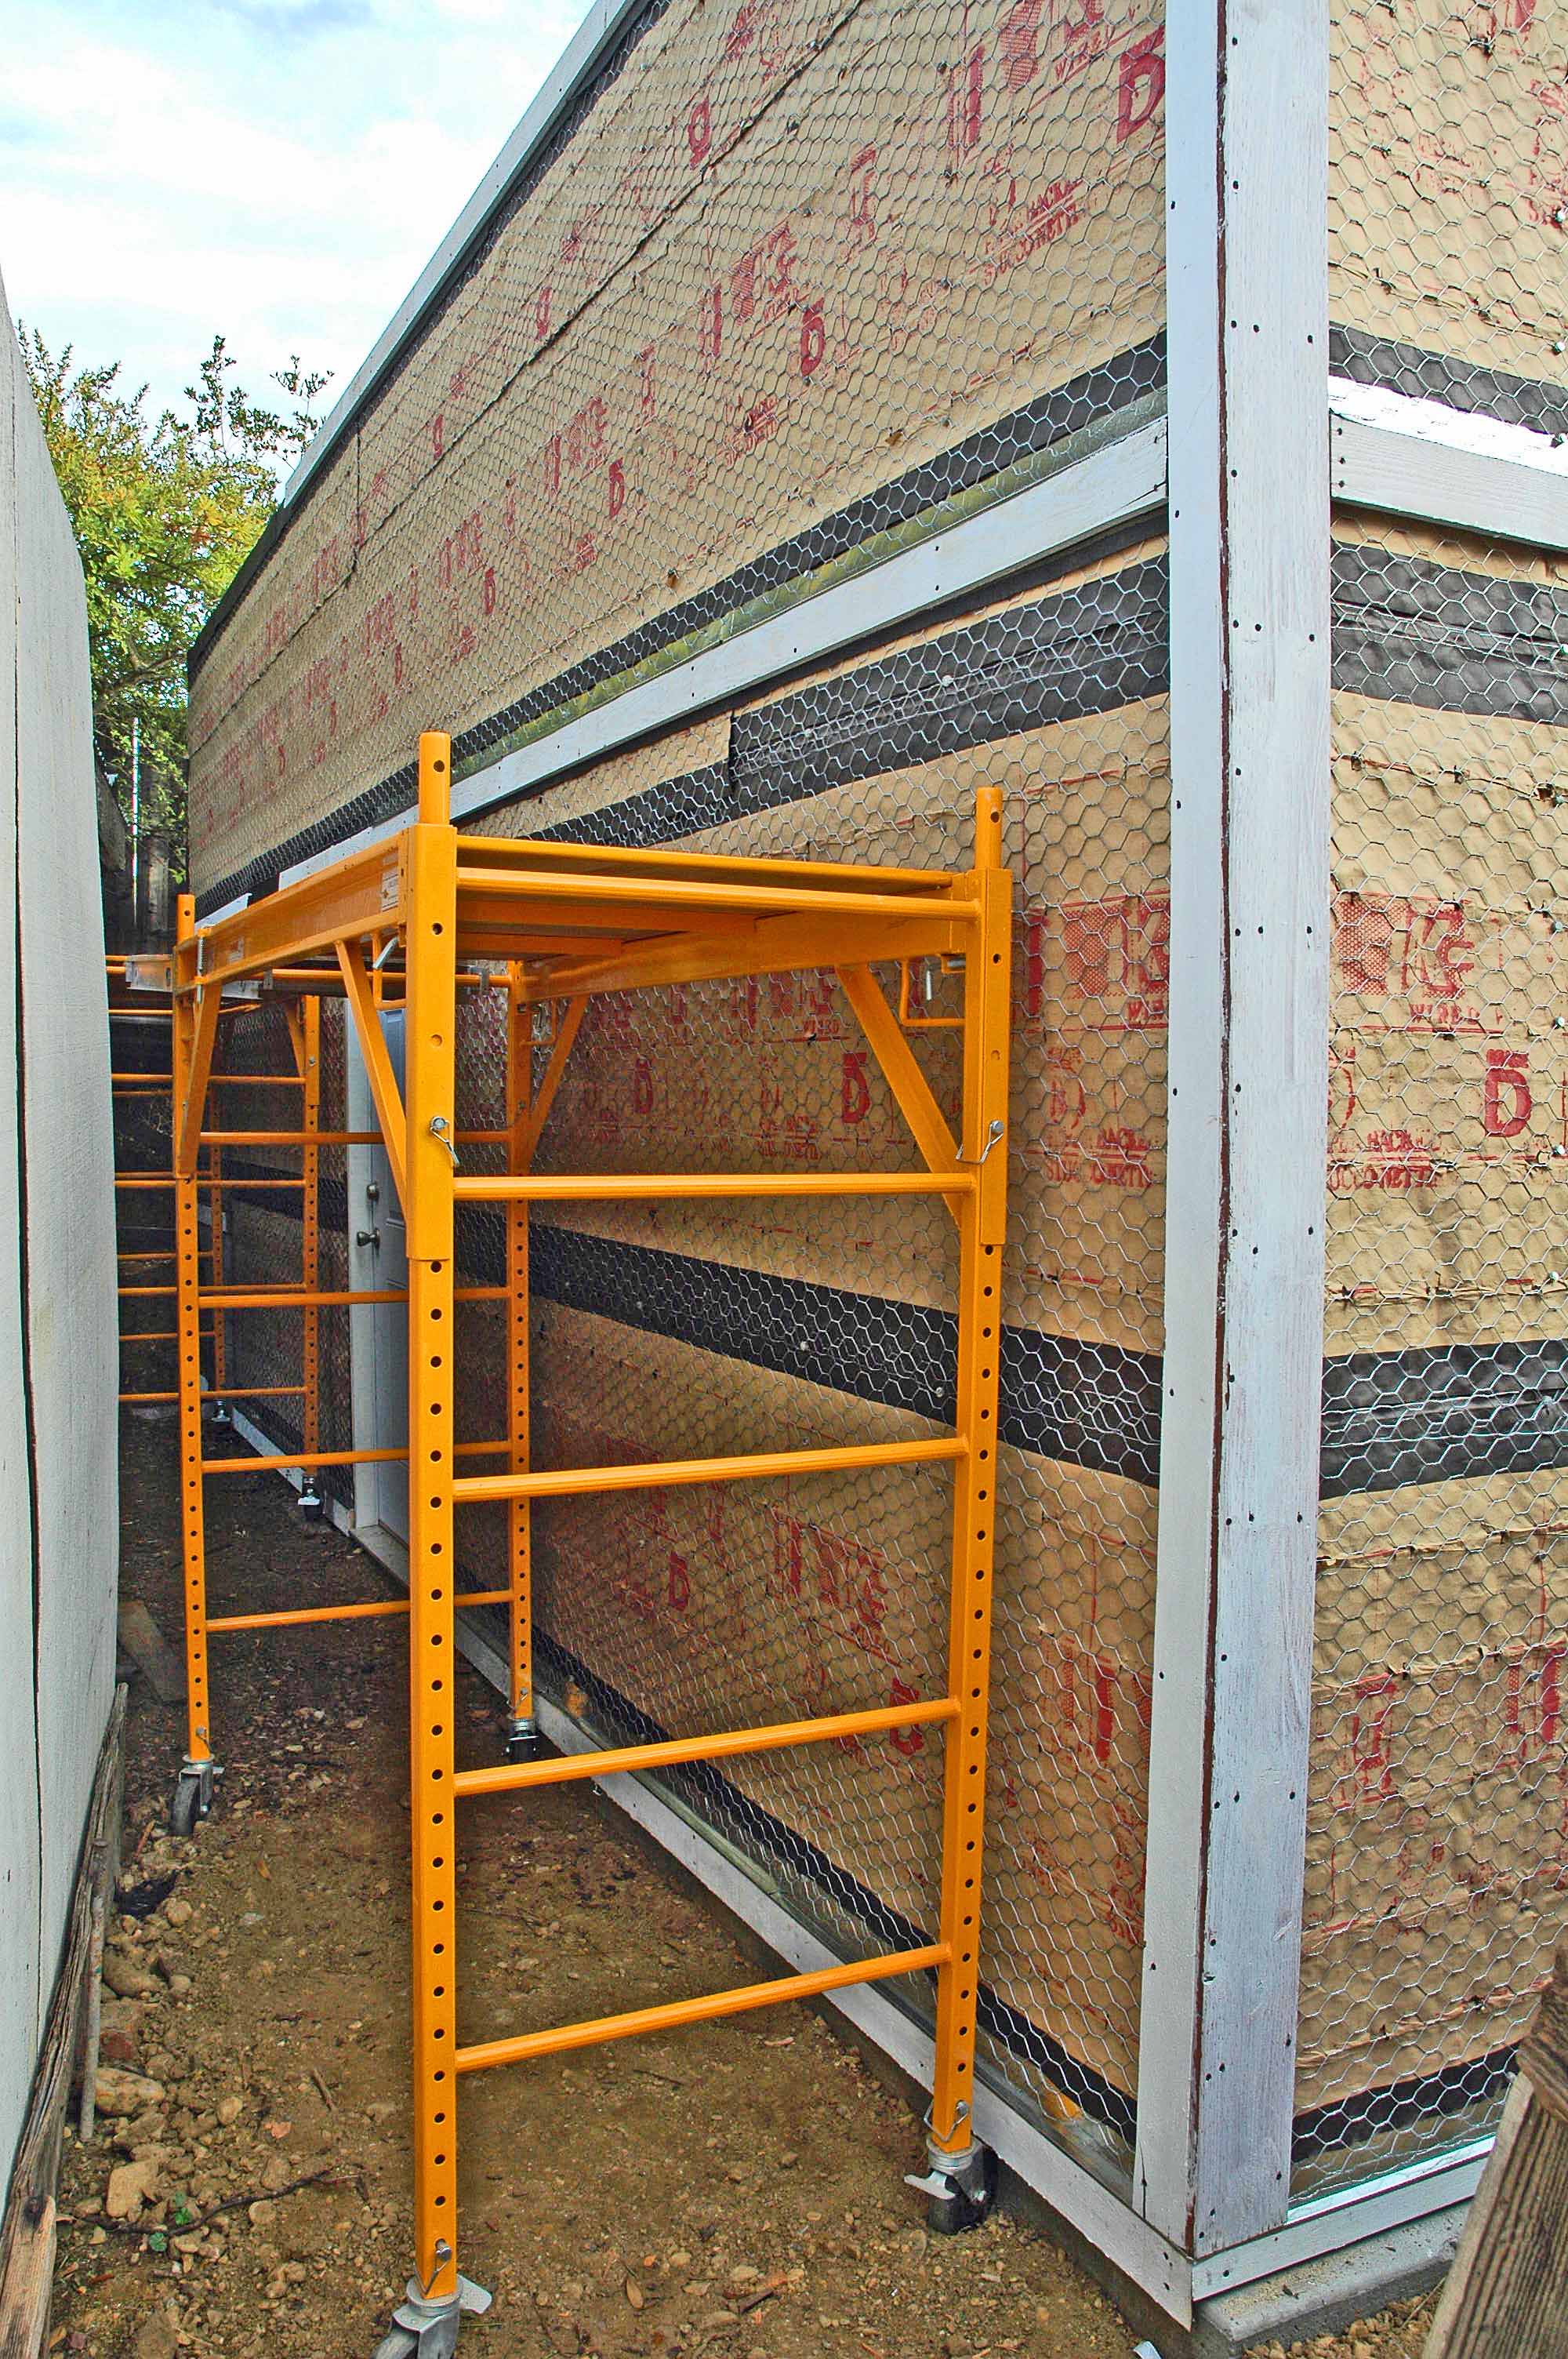
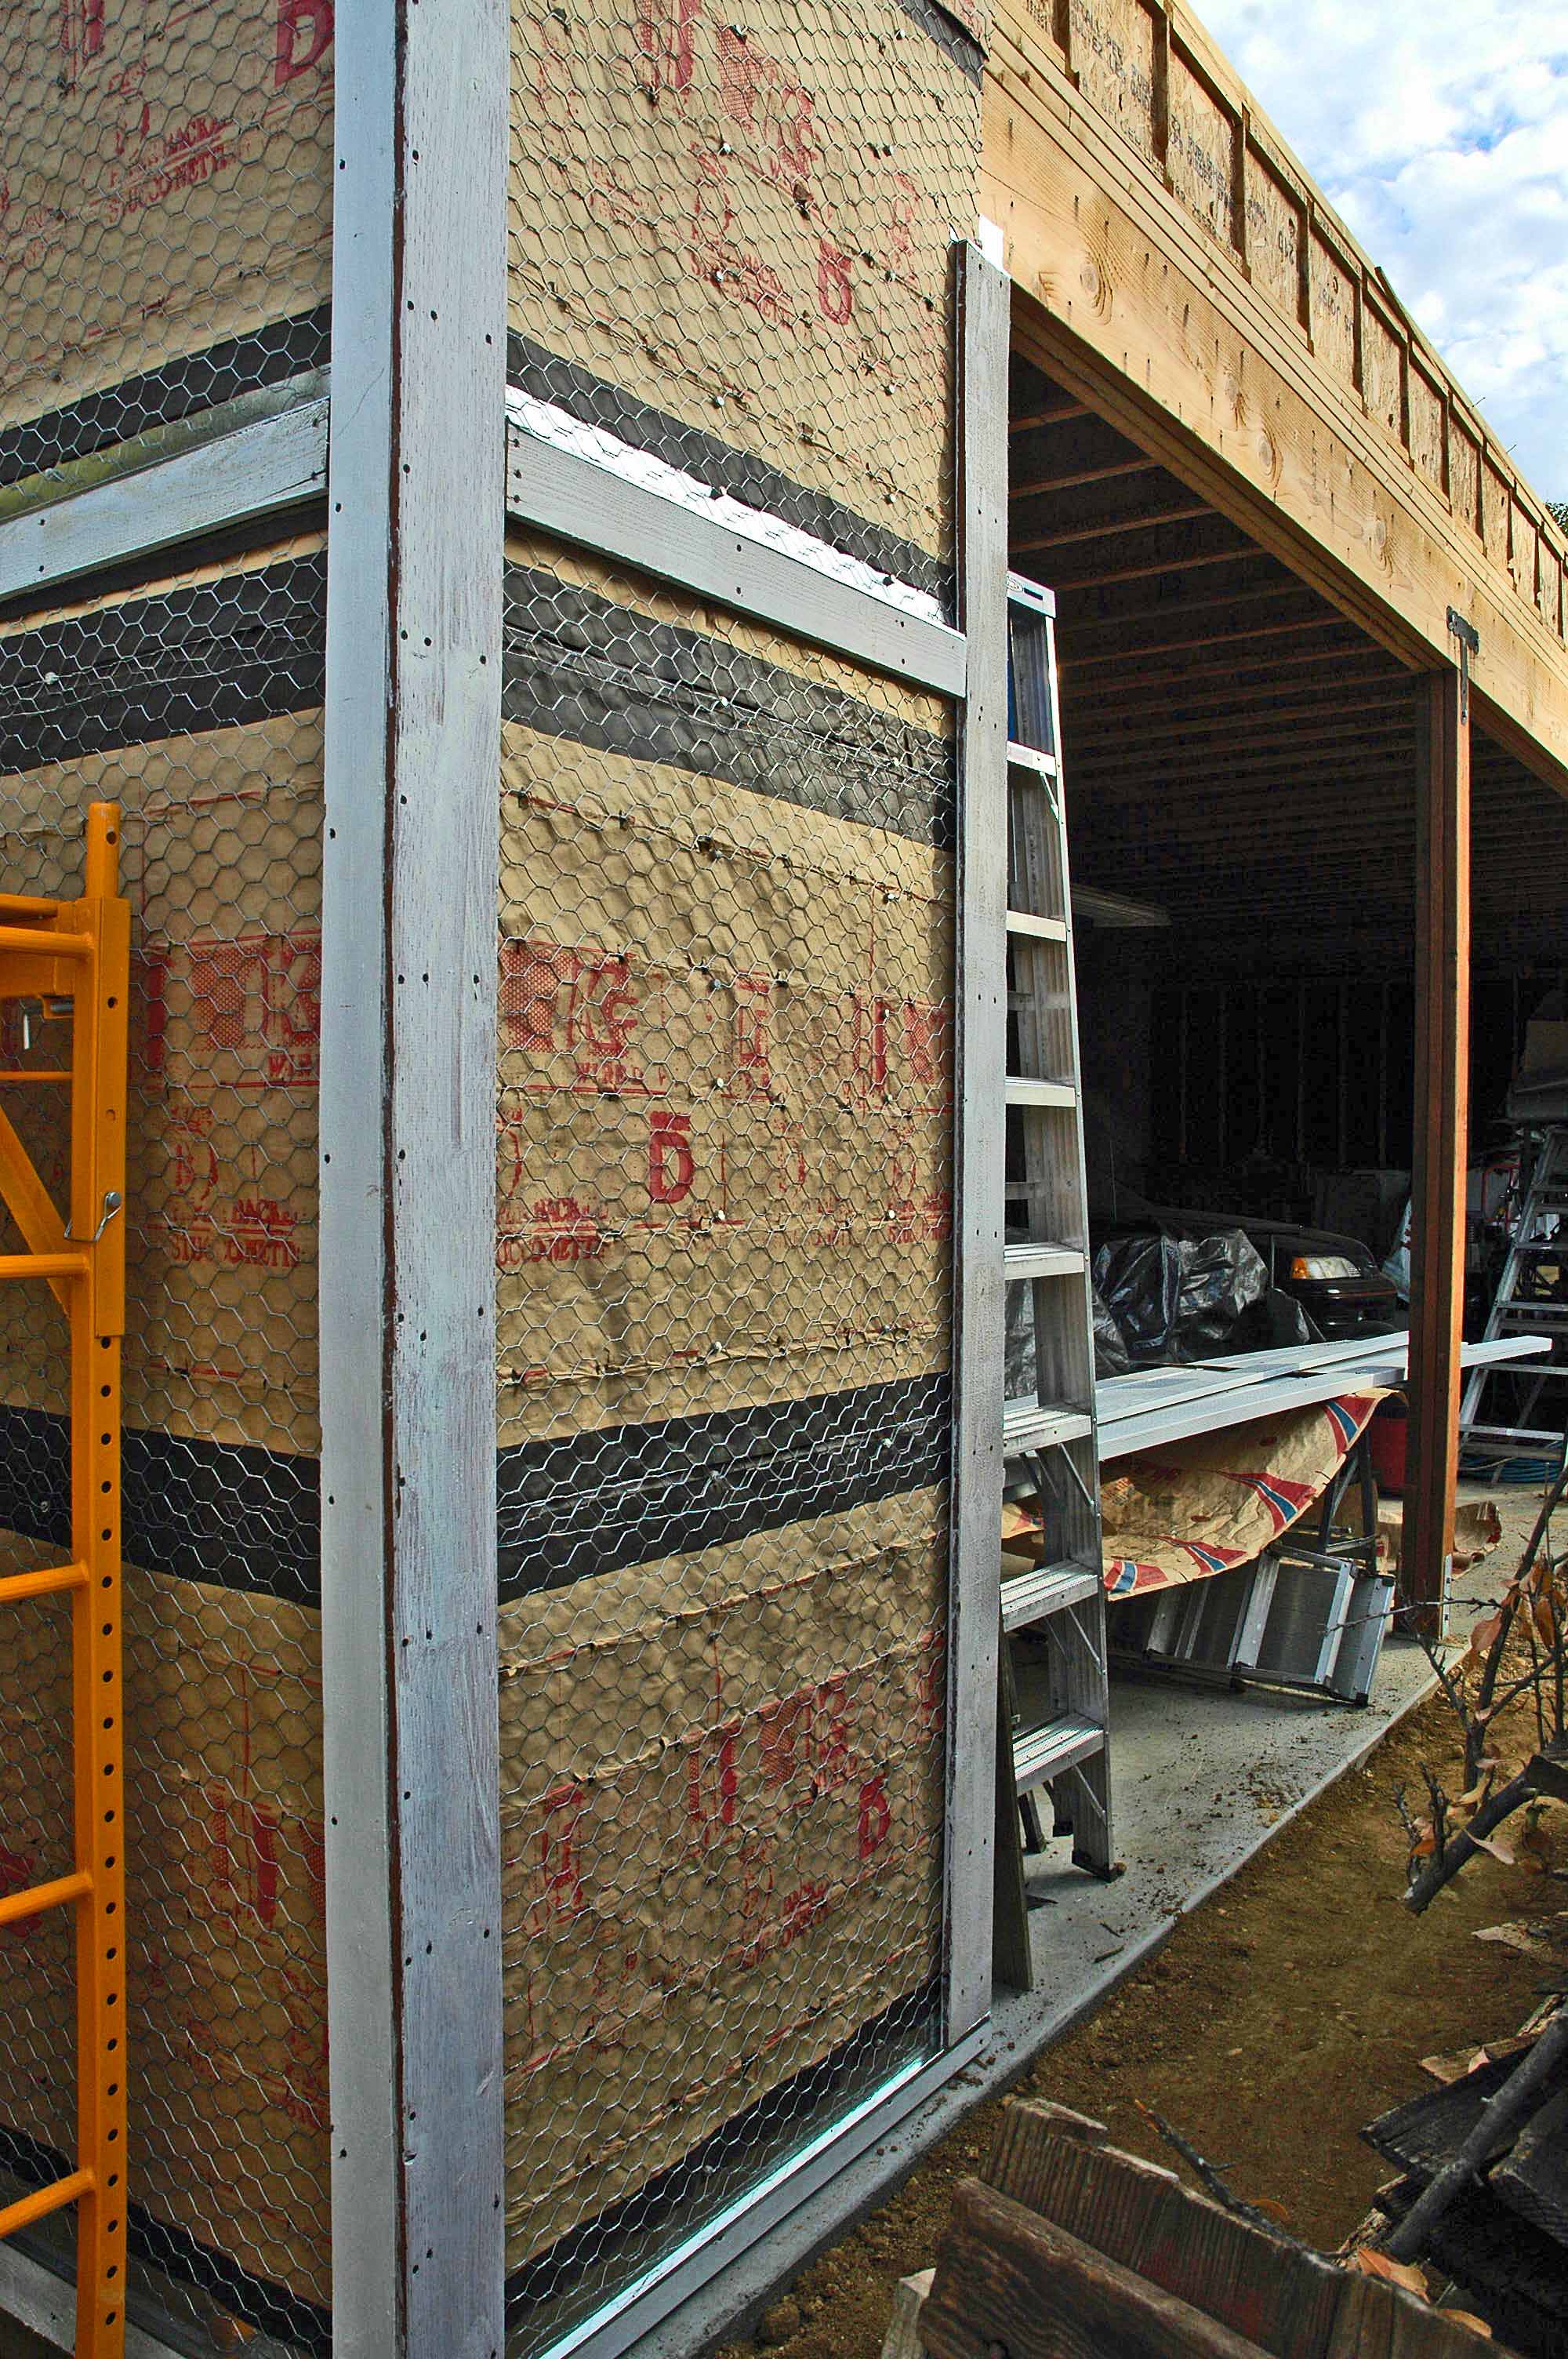
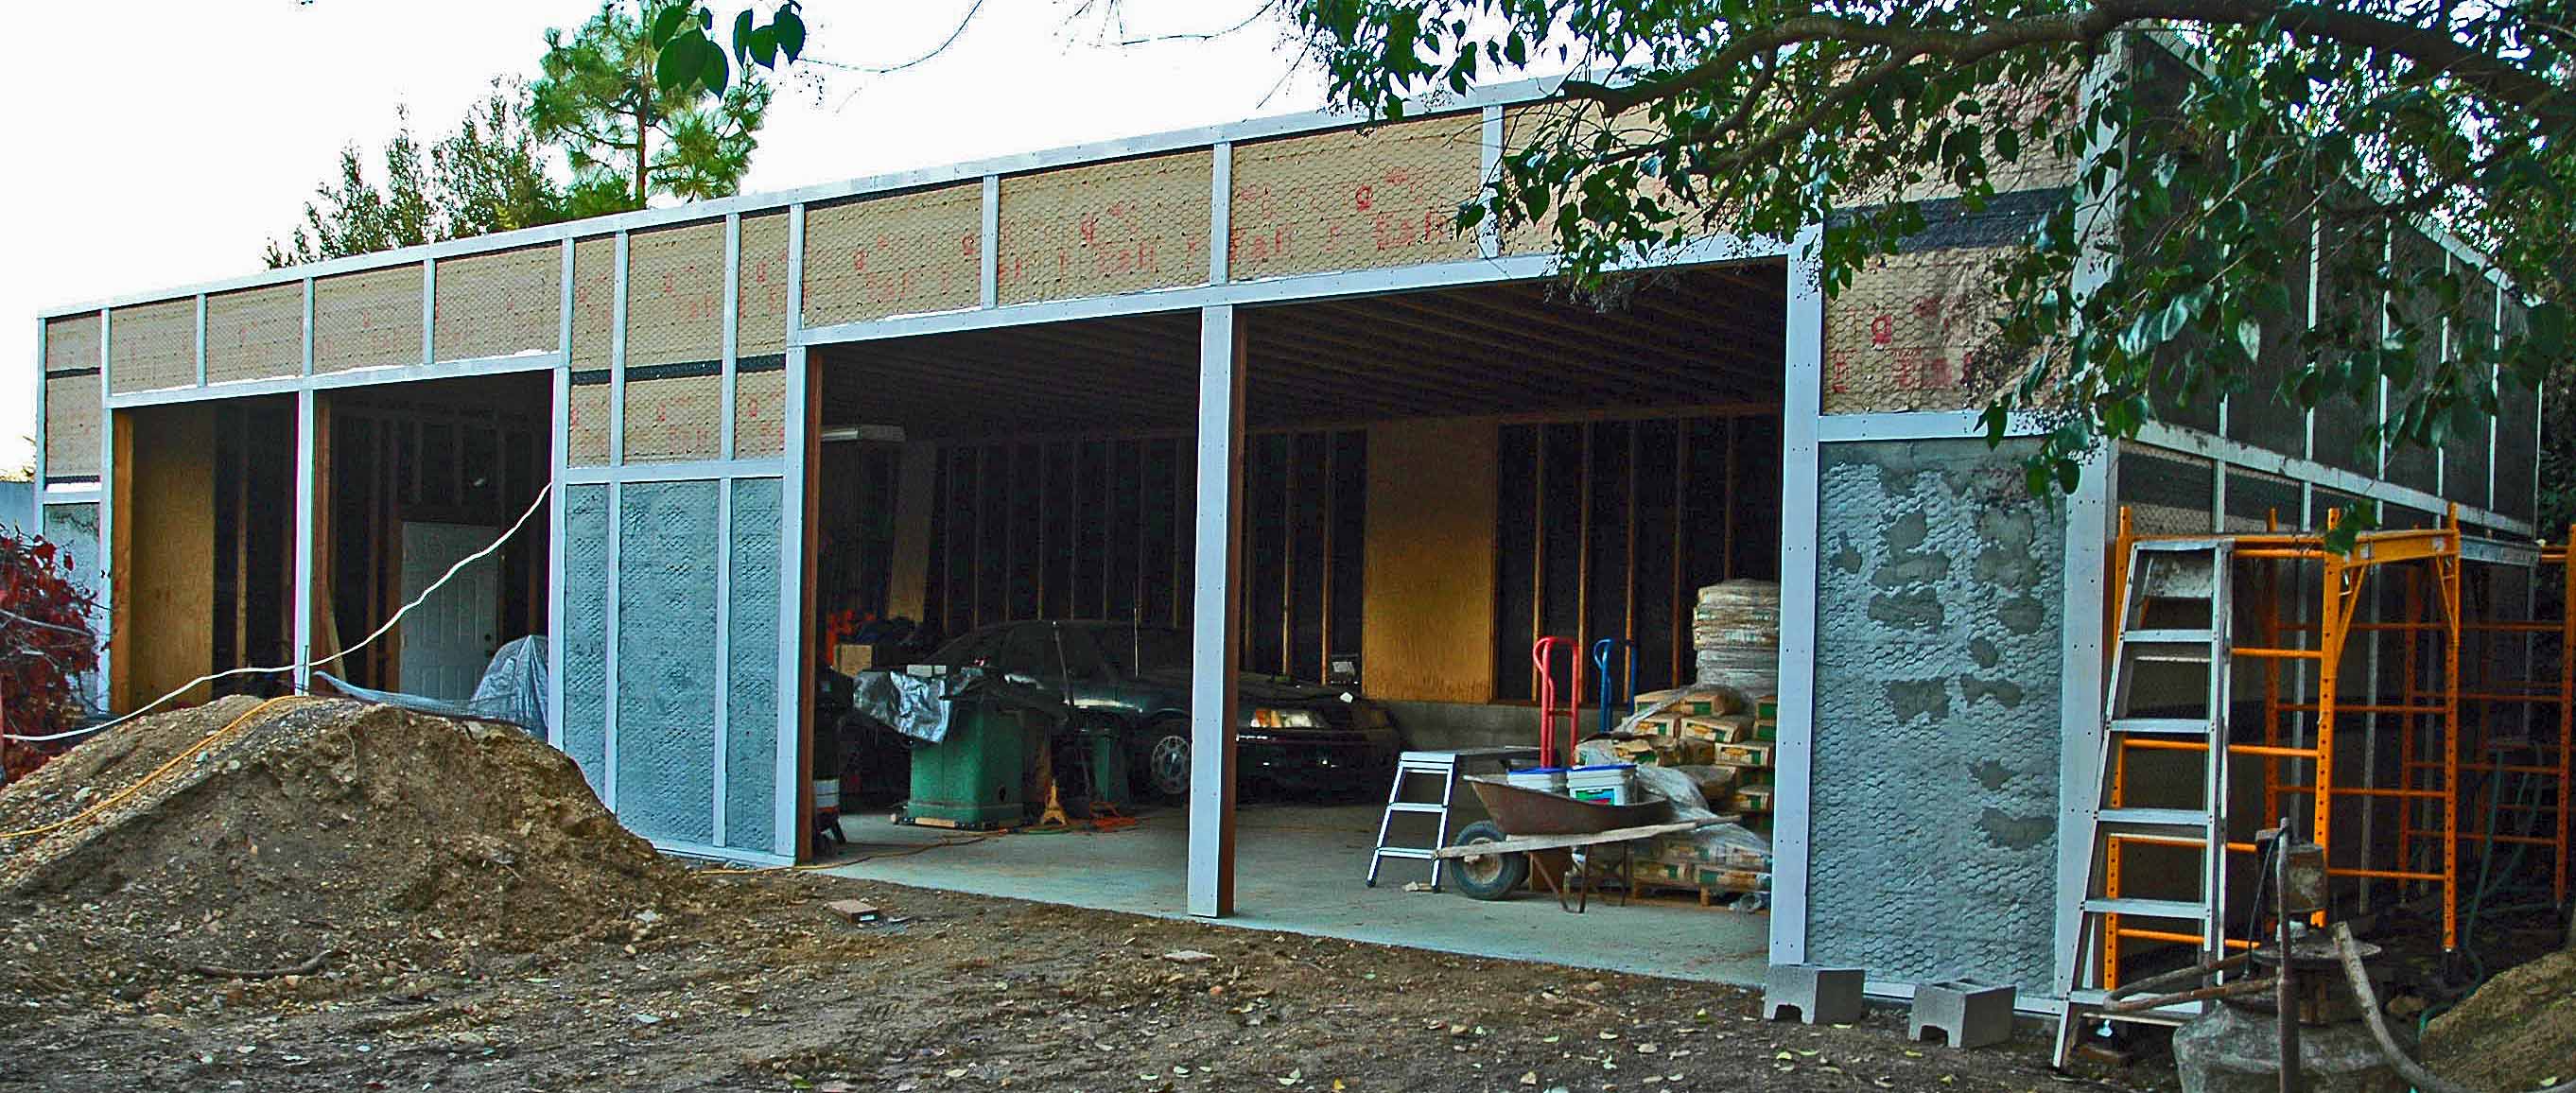
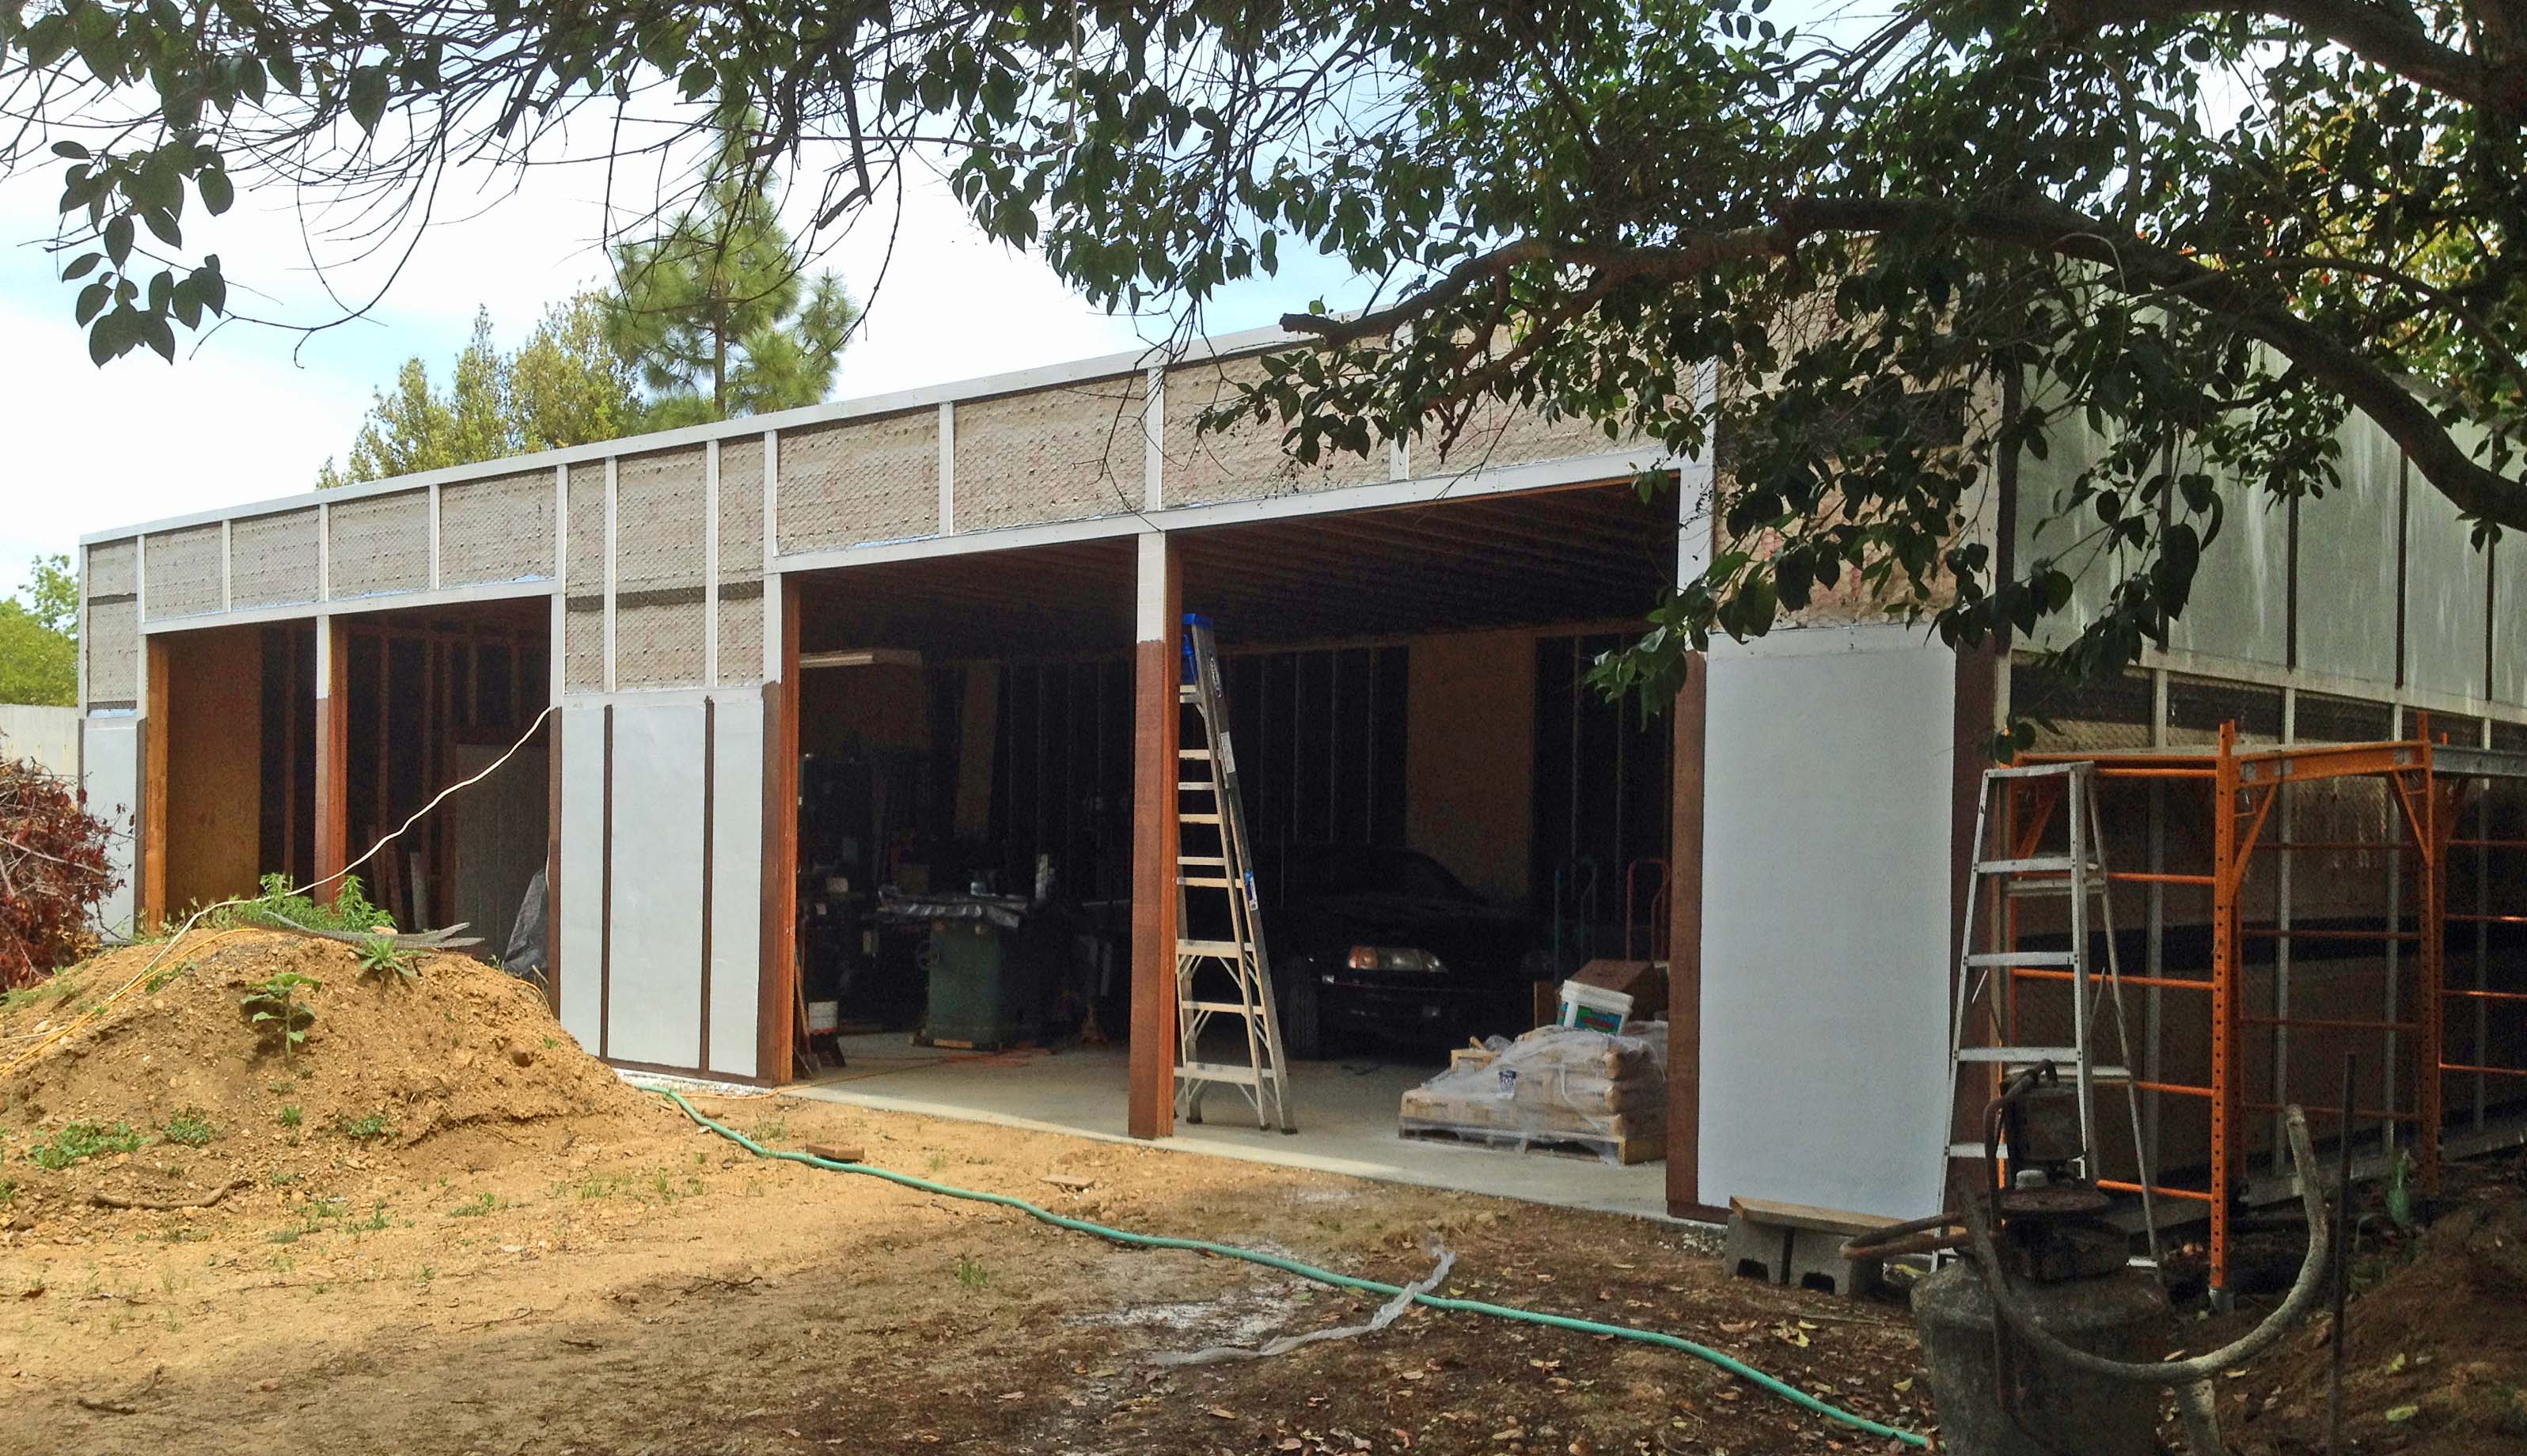
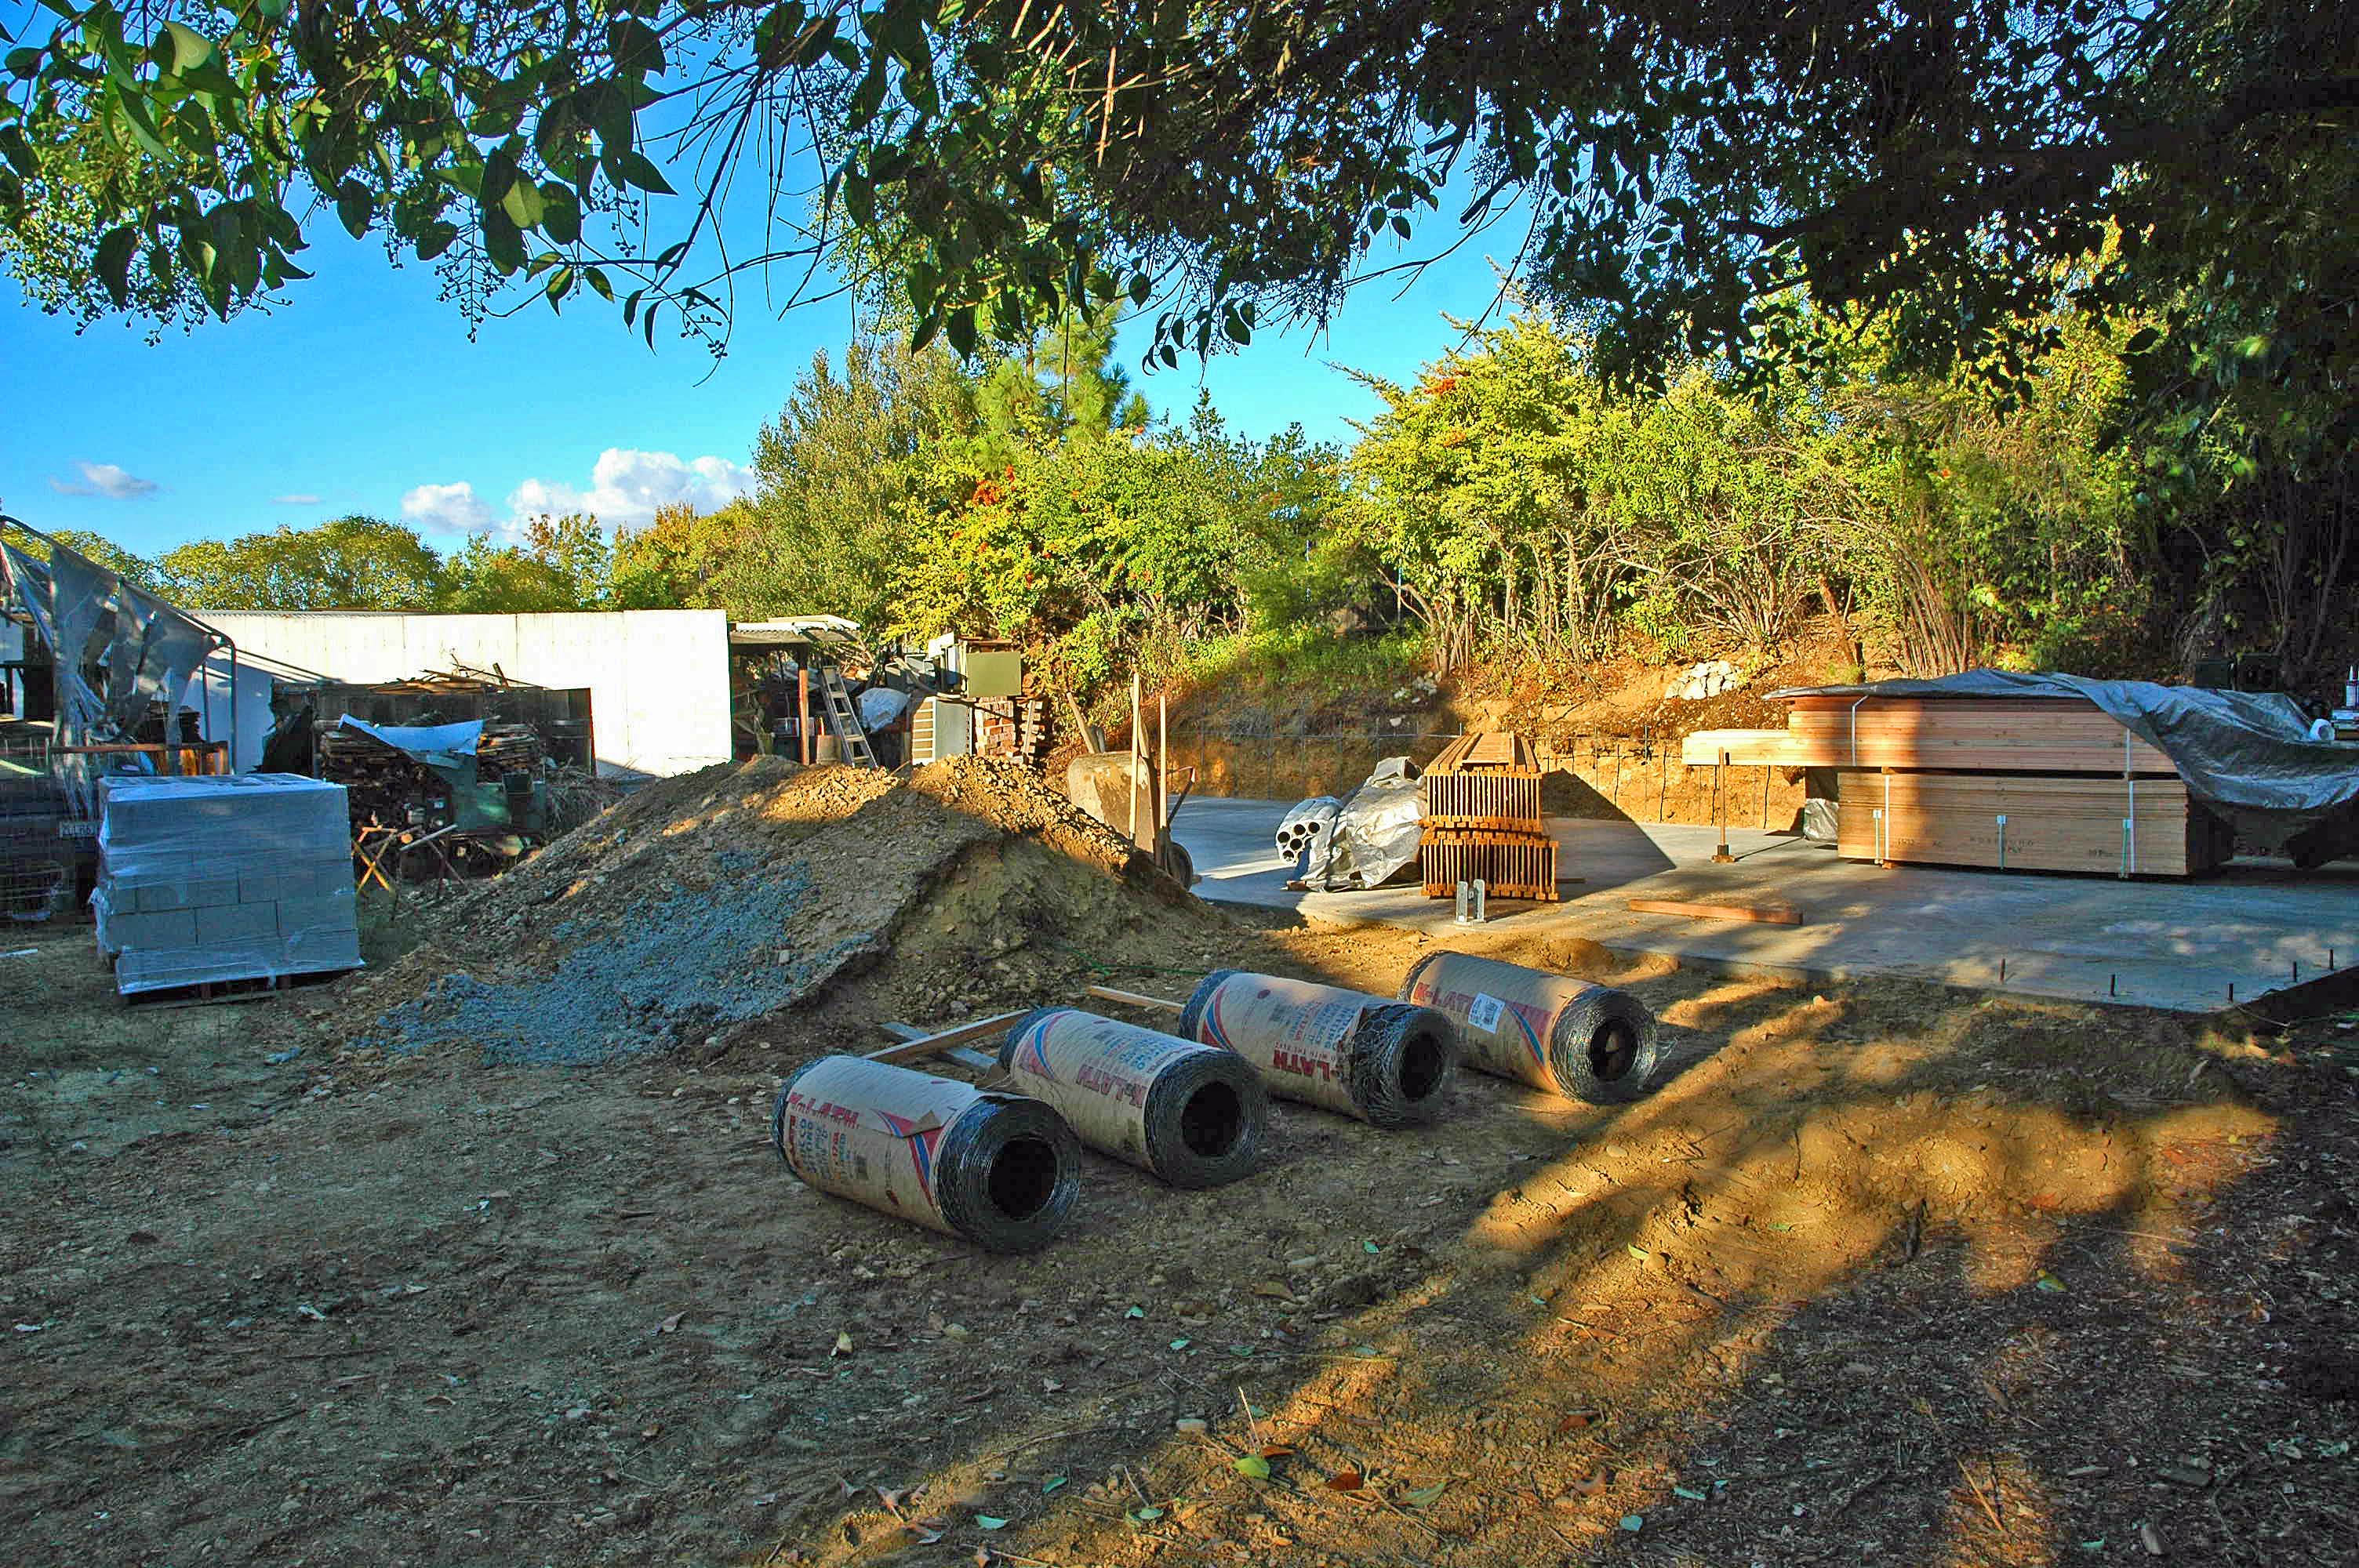
It is starting to look like the largest Do-It-Yourself kit I have ever had. Two pallets of concrete blocks on the left for the back footing/retaining wall, four of the five rolls of wire mesh w/paper or what I always called key-mesh to place on the outside of the walls to hold the stucco in place, behind them the white 4" diameter drain pipe that will be buried along the base of the hill to prevent moisture from seeping through the block wall when it rains, and next to them are 45 Trus-Joist glued roofing joists. One is lying flat on the top of the stack. On the right is the plywood that will make up the decking for the roof. On top of them are the studs we saw above, coming in through the gate on the forklift.

.

.

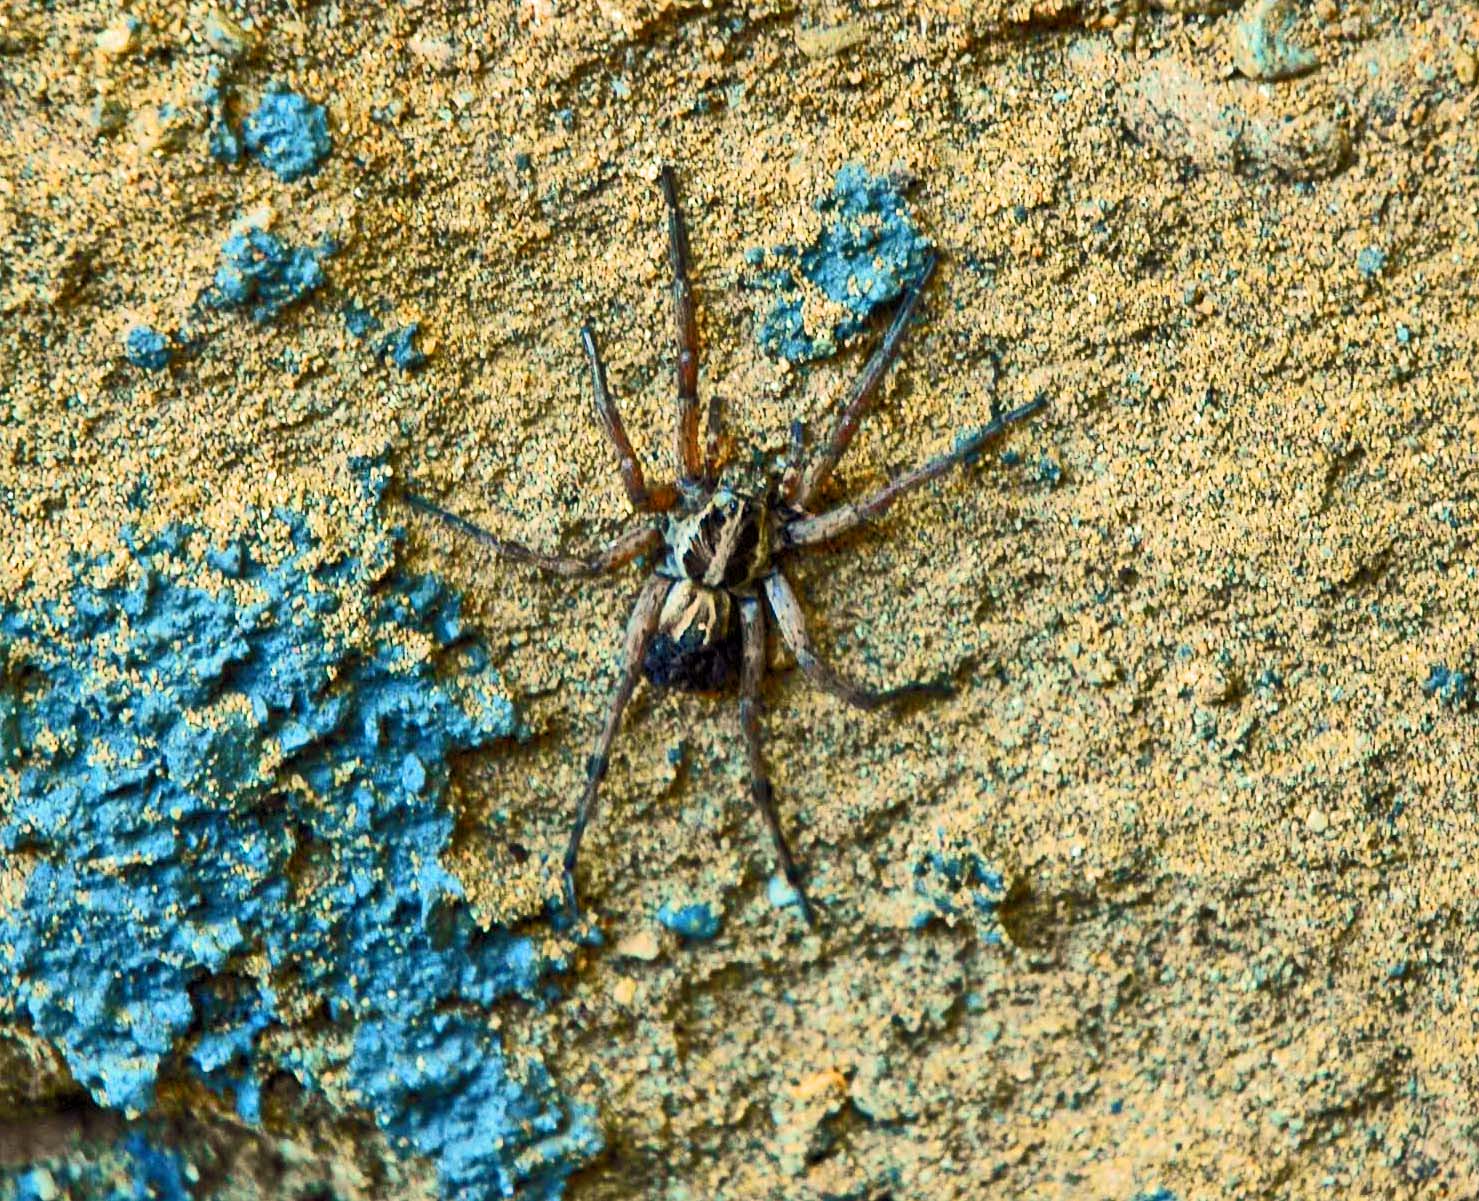
Today I started placing the drain pipe on the hill side of the slab, and I noticed my little friend here hanging onto the back dirt wall which was excavated for the slab. He was about 12 inches above where the pipe was to go. He is actually about 2 1/2" from toe-tip to toe-tip. I think that he is what we call a "Wolf Spider"... serious sounding name but rather timid soul. I just let him be and did my work, and the whole afternoon while I chopped soil loose directly below him, put in the pipe a few times, and backfilled gravel right next to him, he never moved a muscle that I could tell. When you are doing manual labor, it is always nice to have a buddy hanging around. LOL

.

.

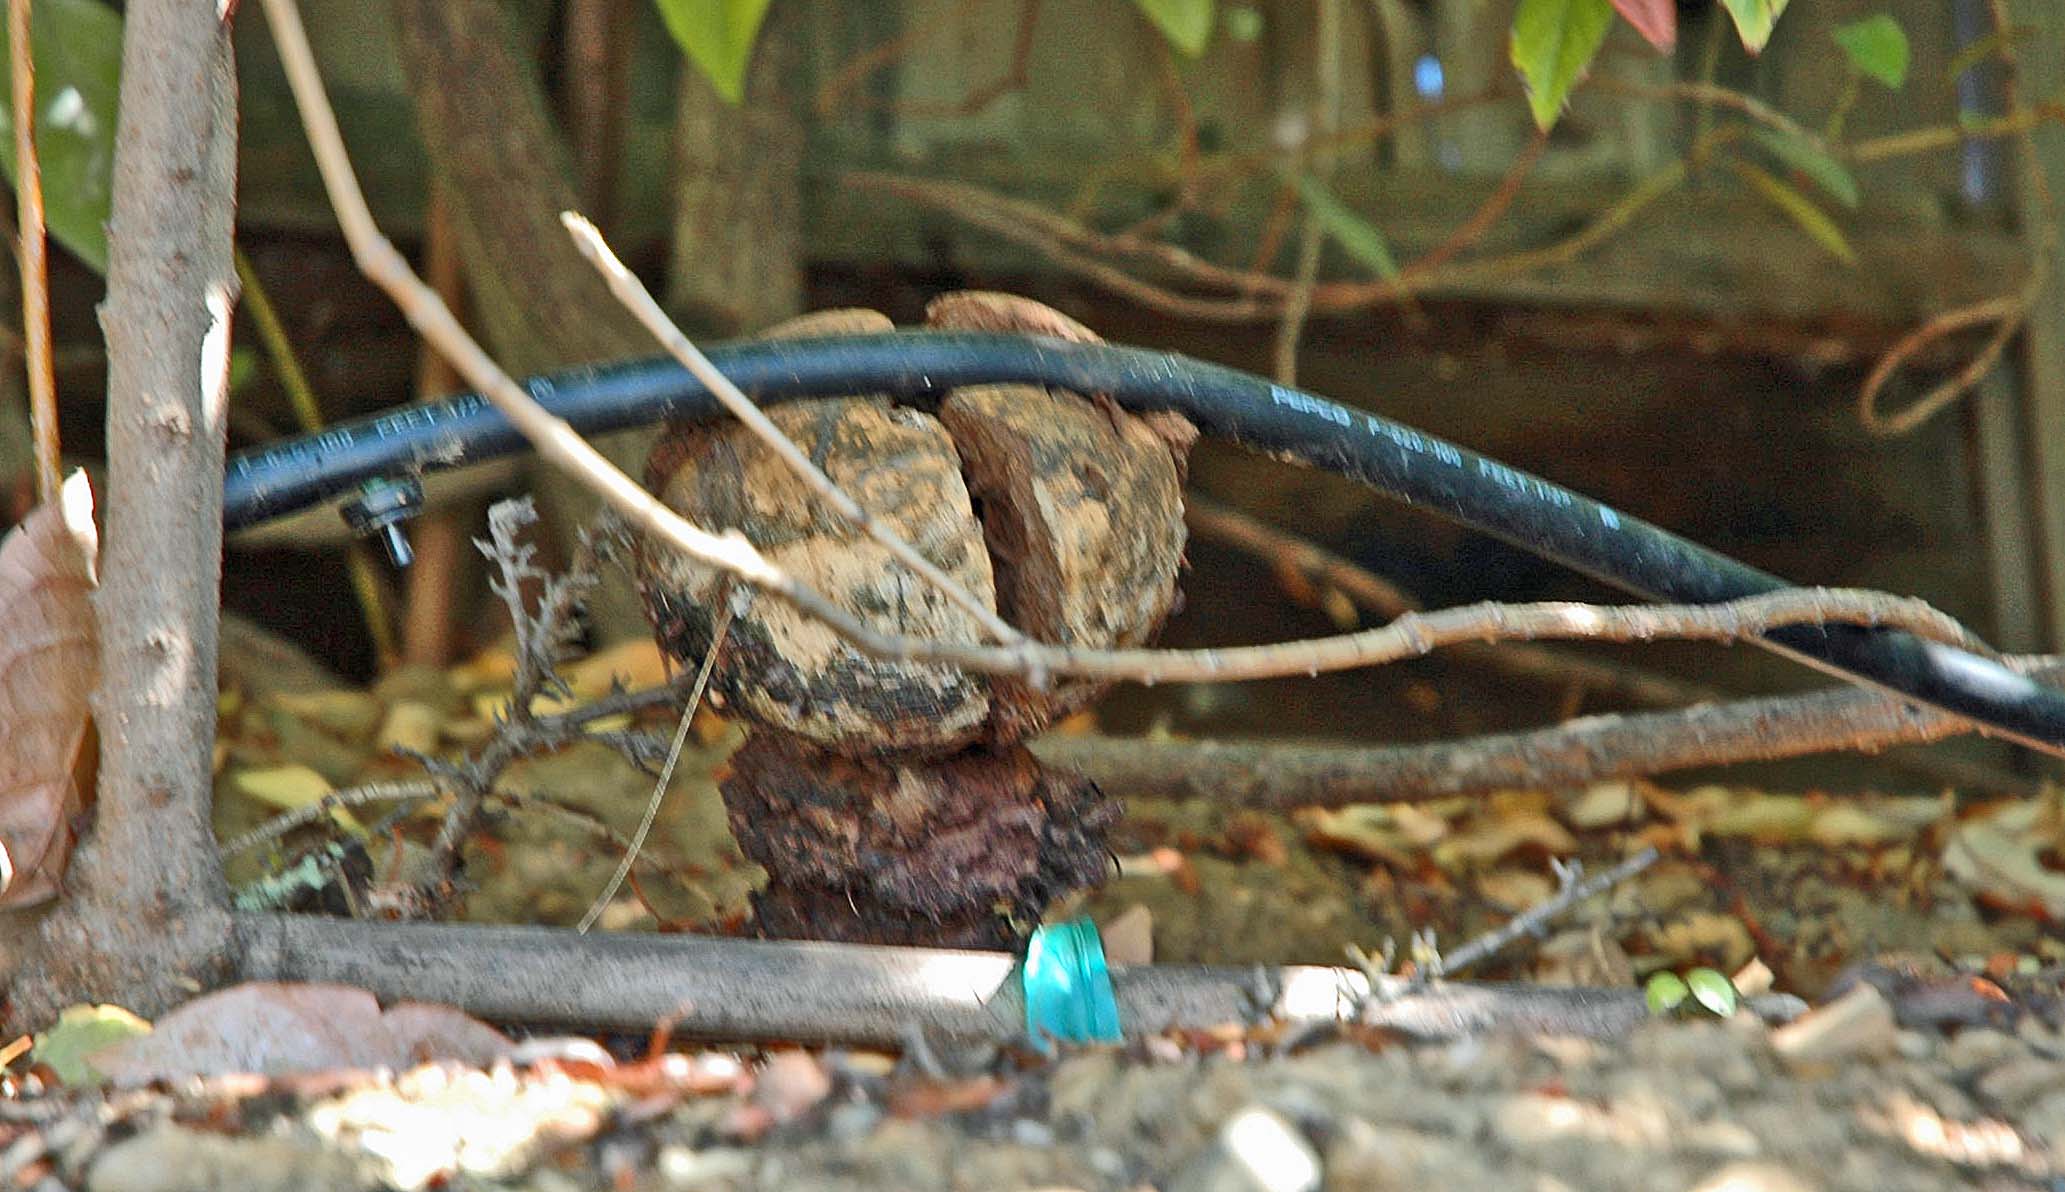
Now, talk about being bored... LOL. This, ladies and gentlemen, is a mushroom. It was growing on the hill just behind where the carriage house is going. I have never seen one like it around here. We have a lot of them but none like this one. The black thing over the top? That is a 1/2" diameter plastic irrigation drip line... notice the emitter to the left of the fungi. The 'shroom has lifted that line up with some pressure, and is standing nearly eight inches tall. I appears to have split down the middle. Wonder if it will make a good soup? LOL No, I did not get the pipe finished up today. Tomorrow is another day.


.


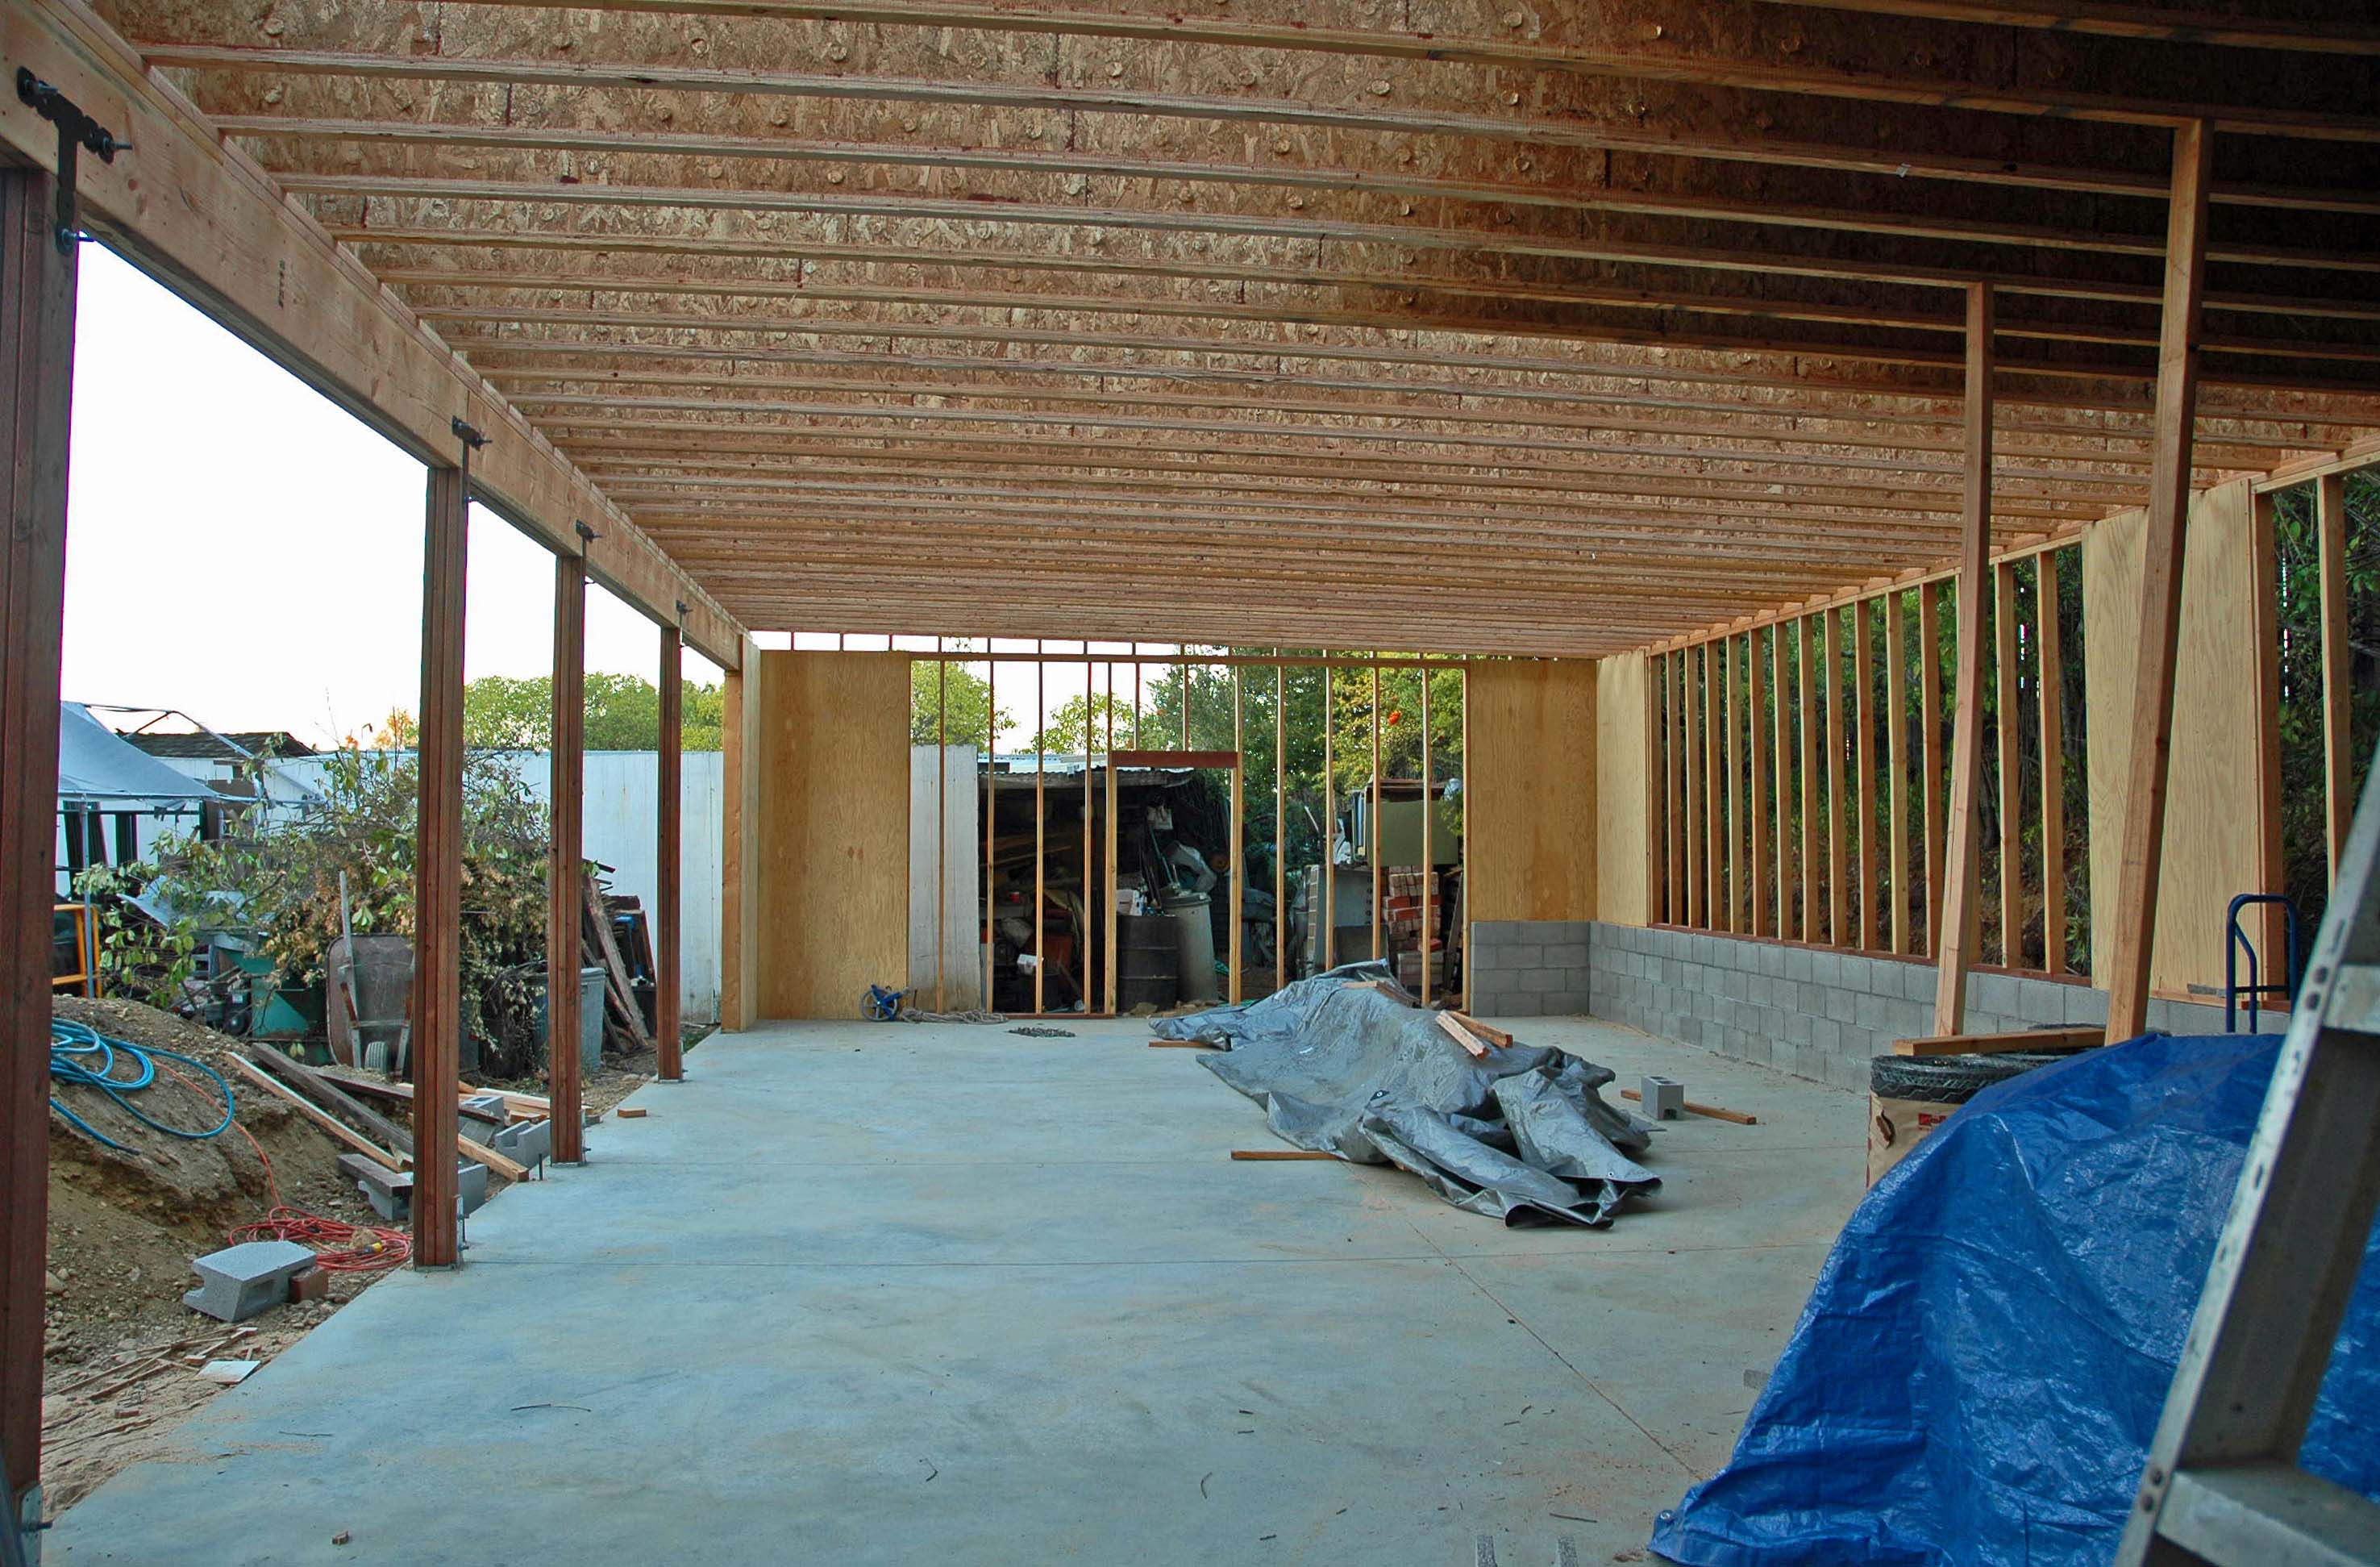
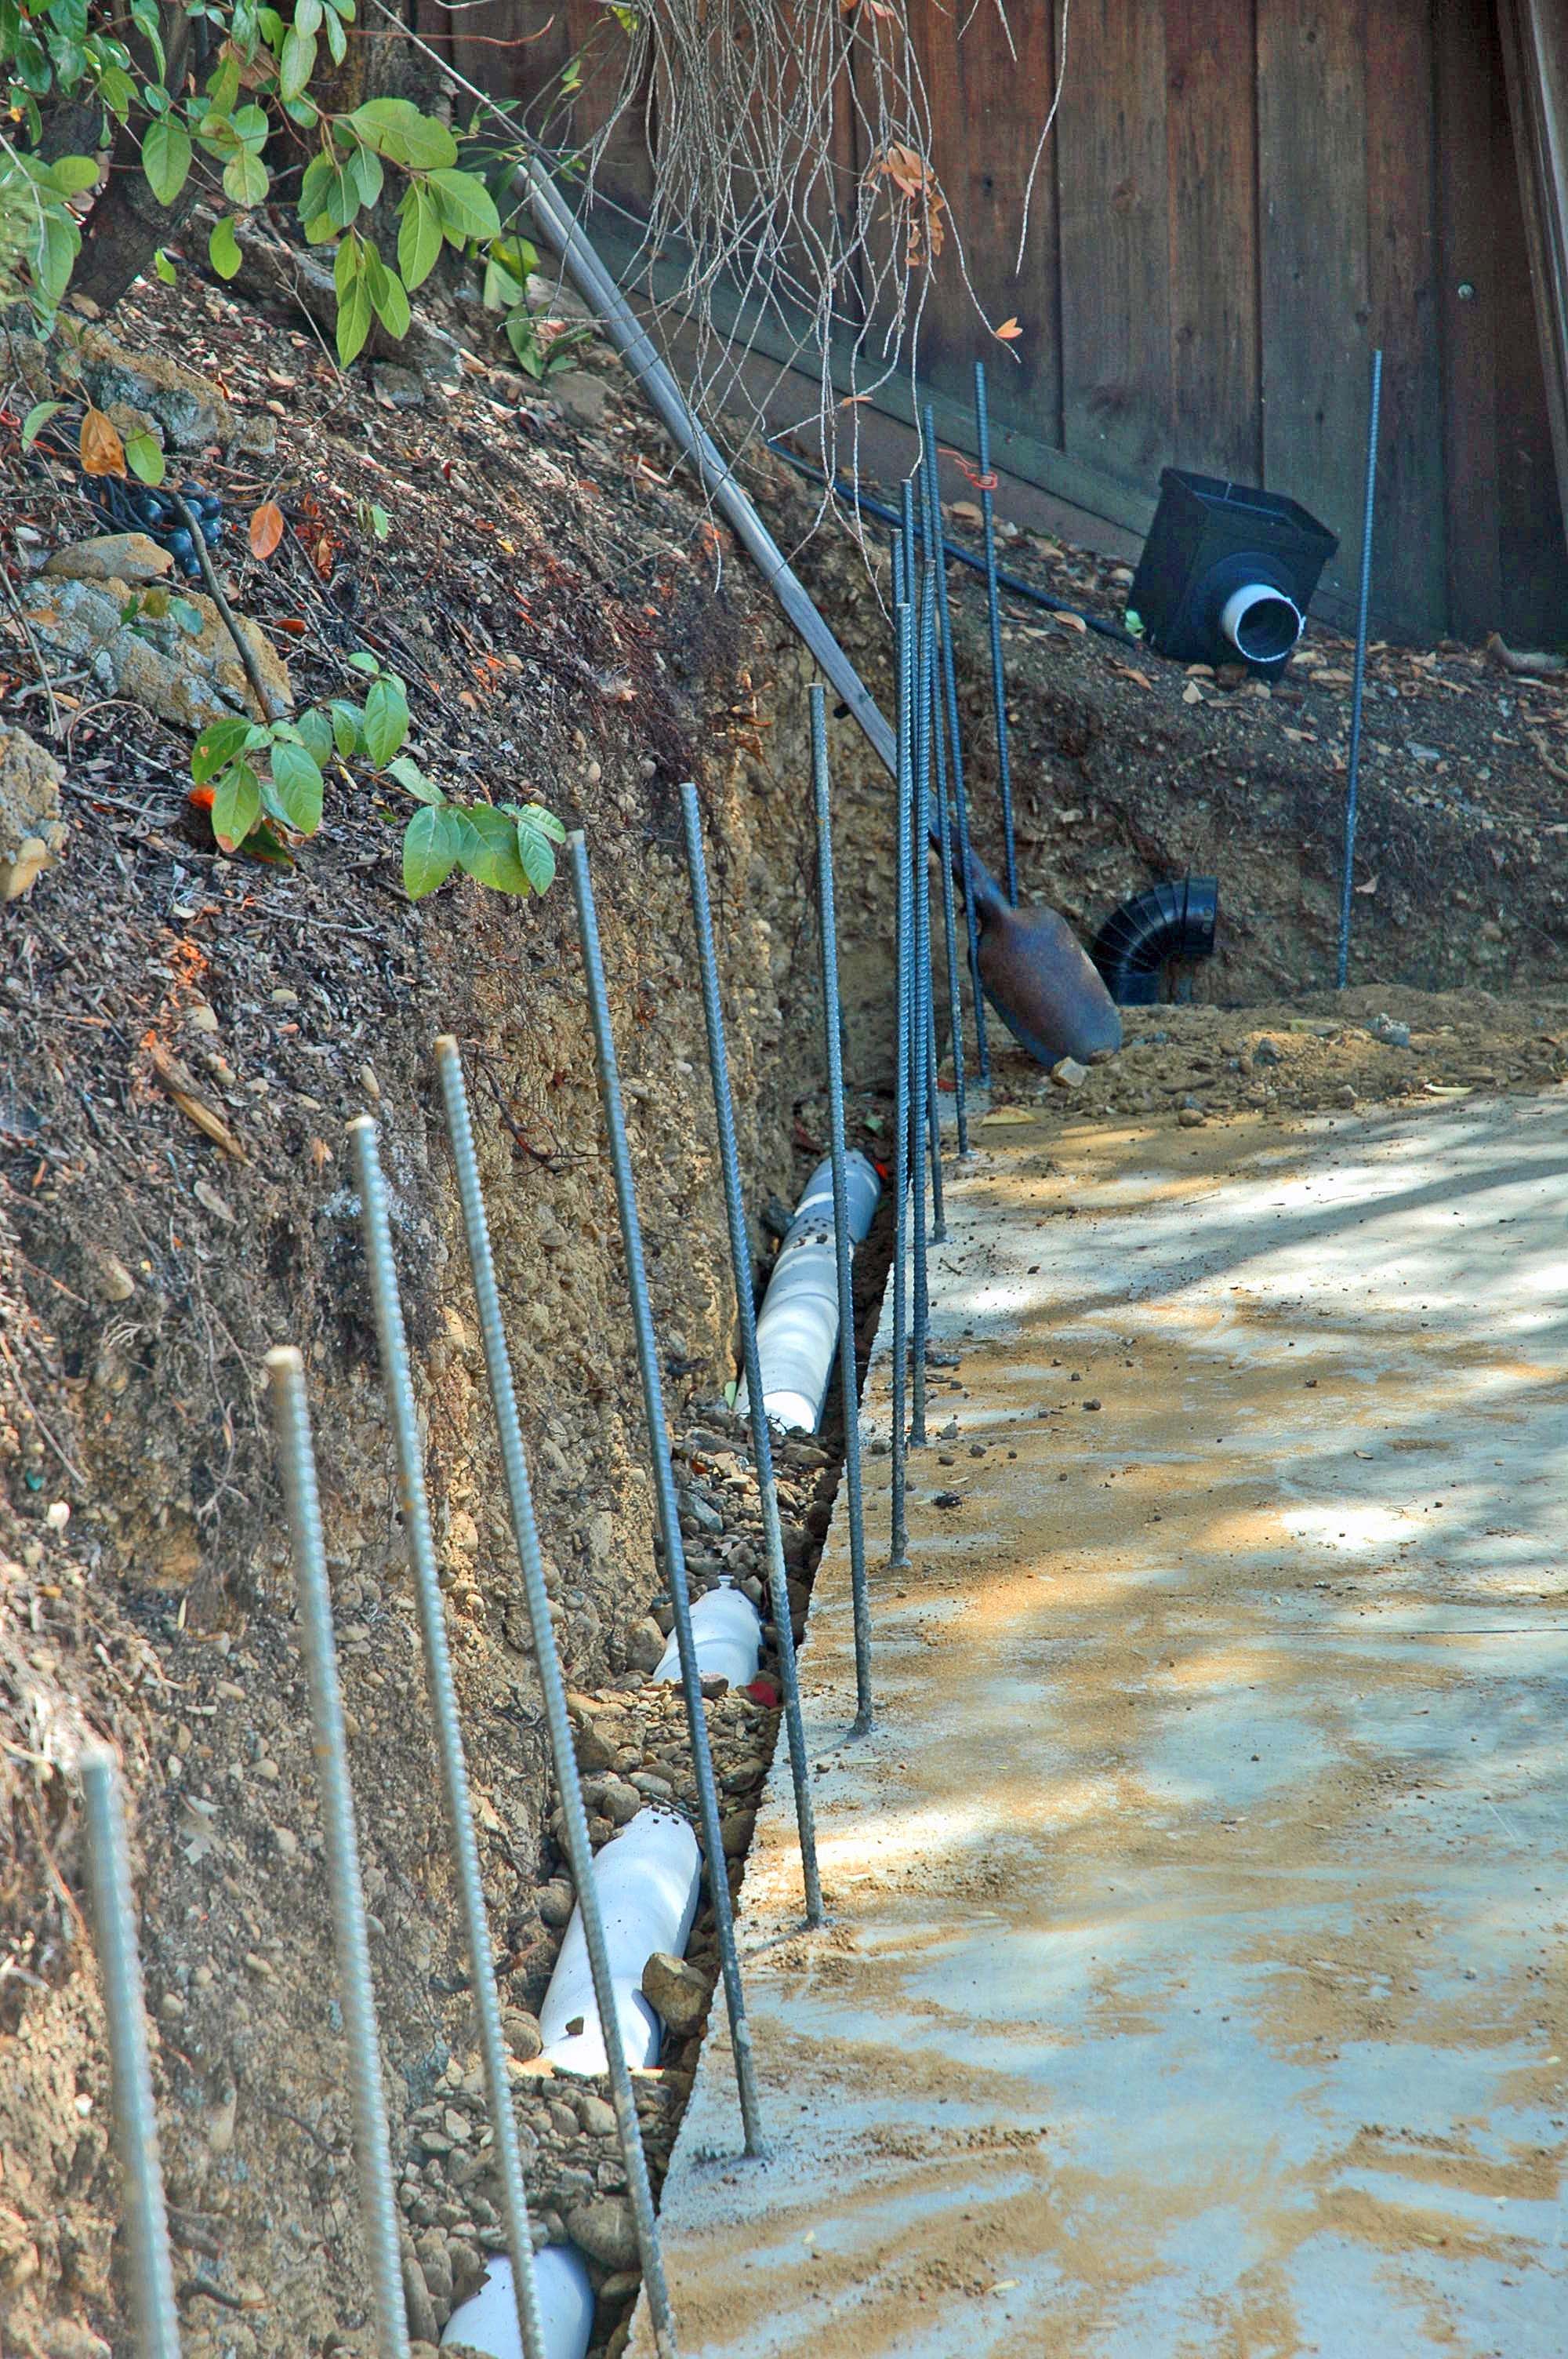
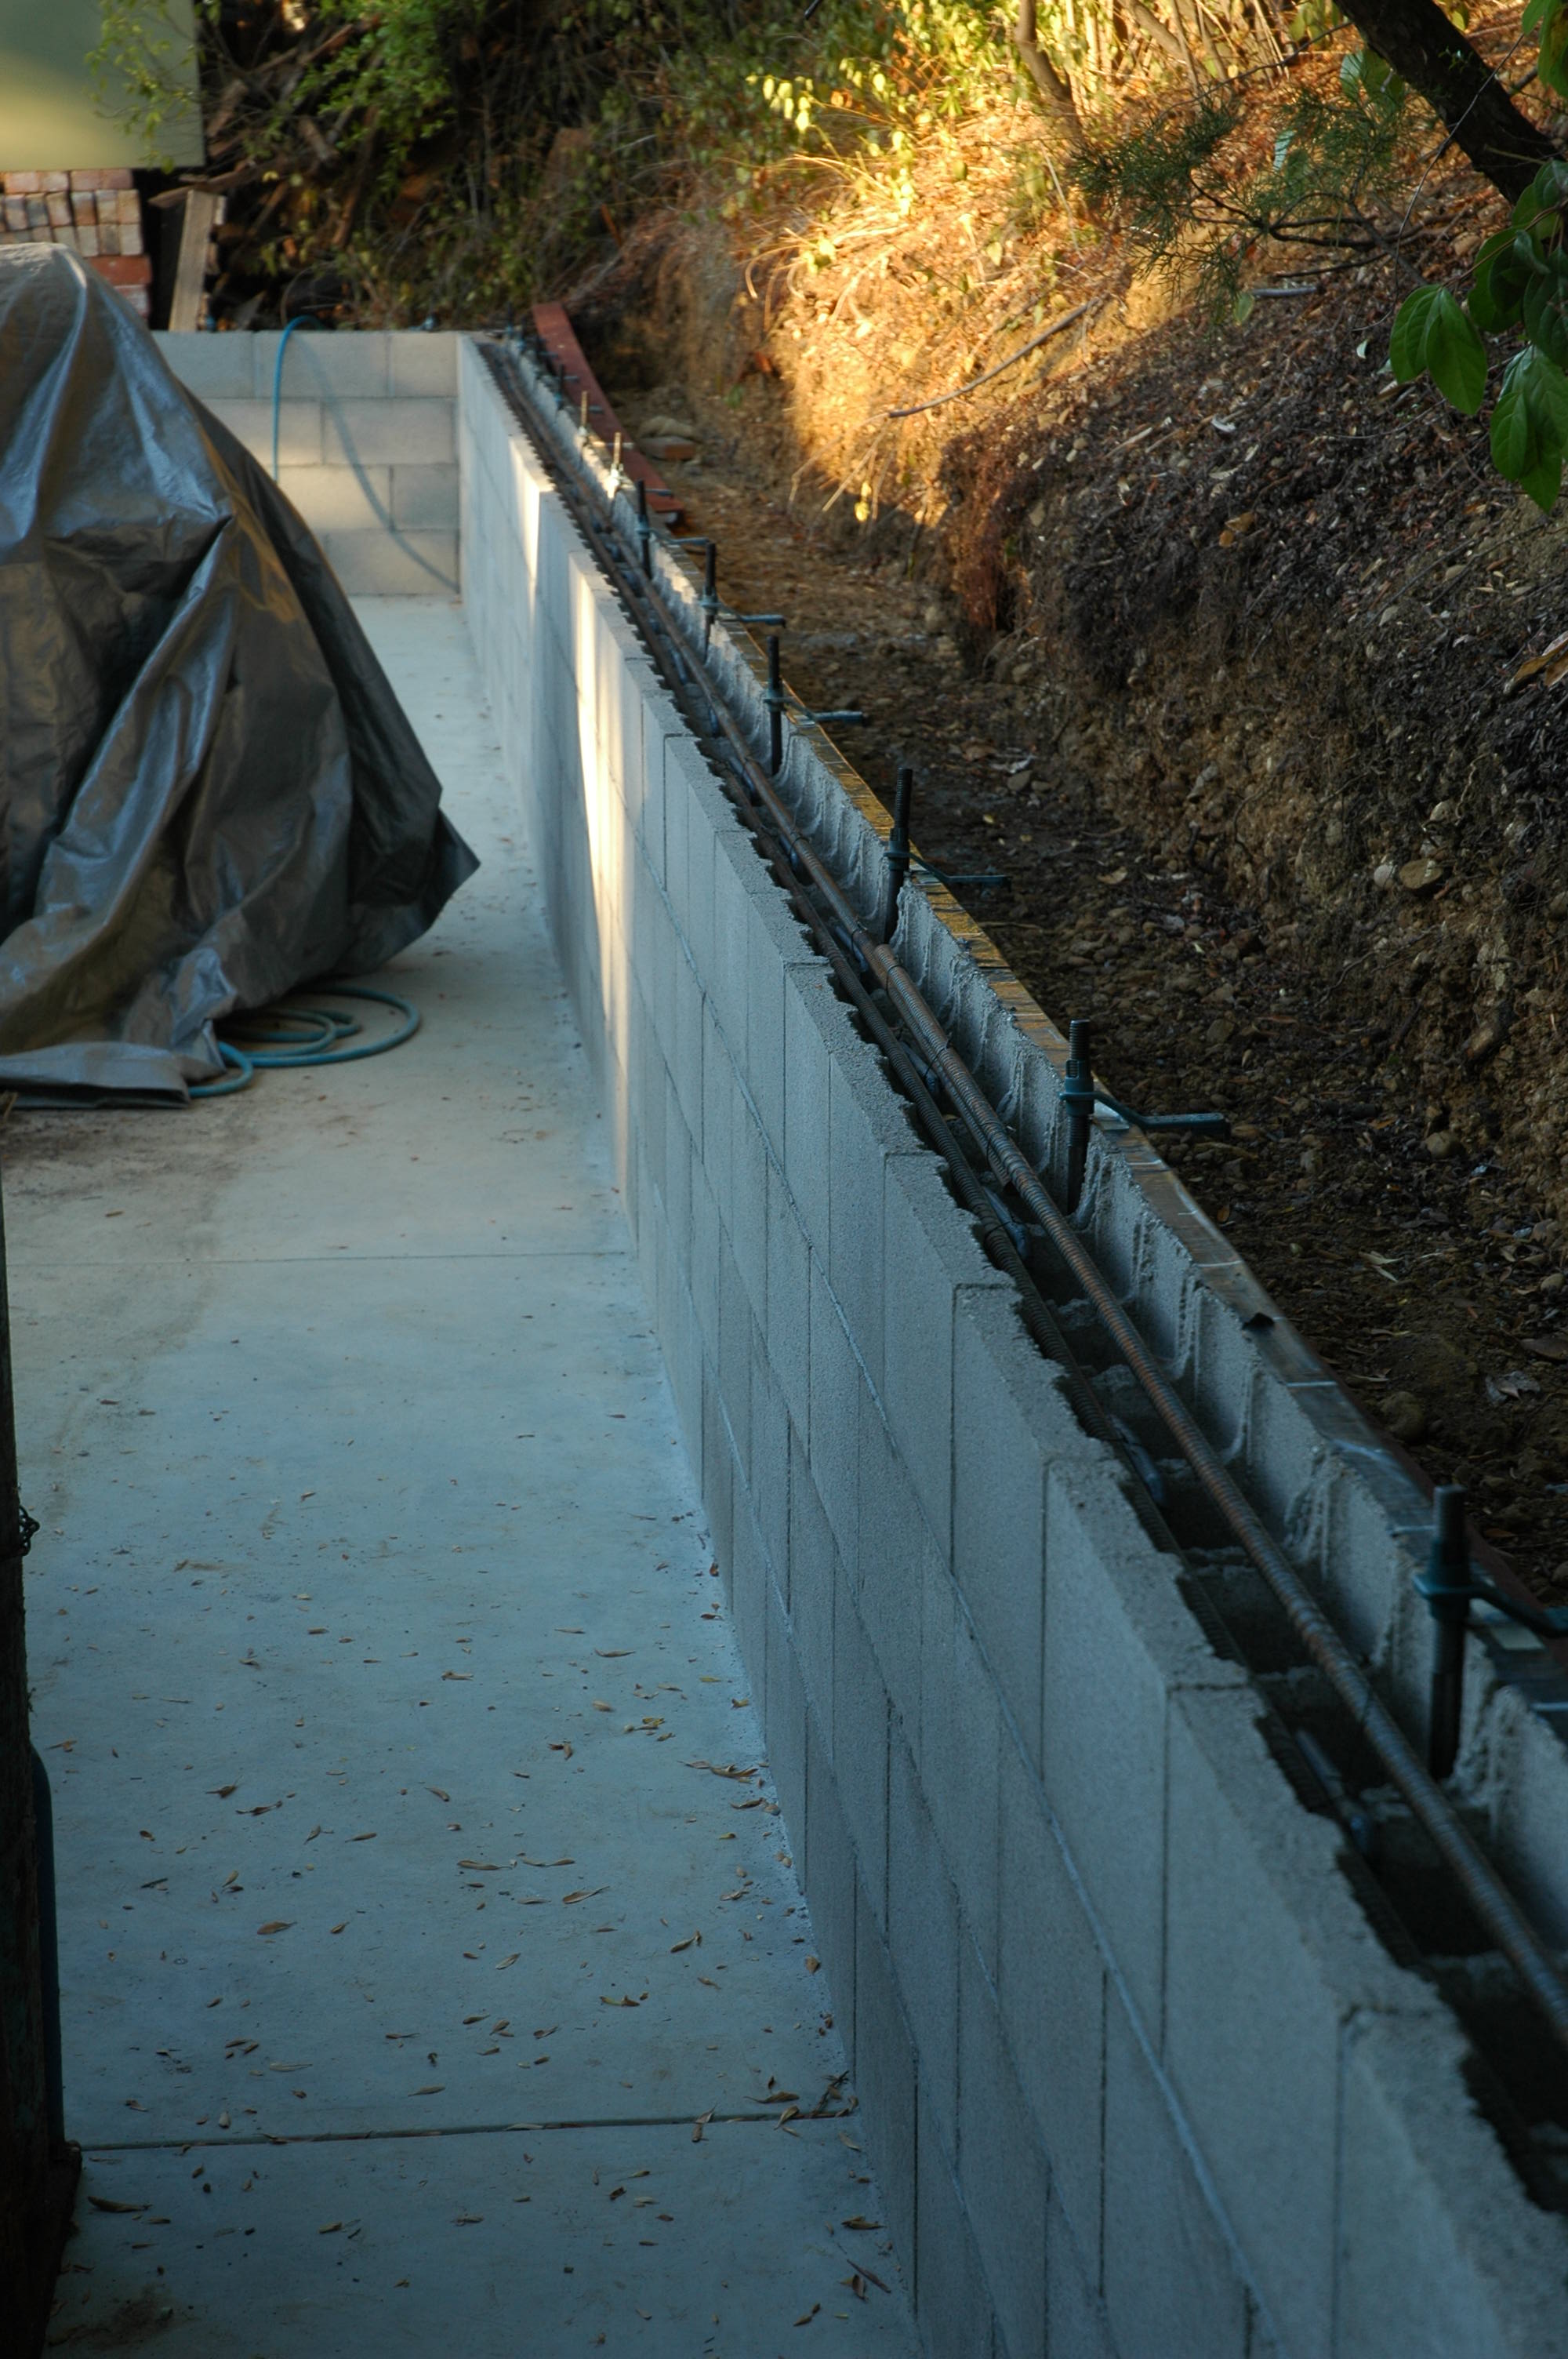
The pipe is in... and it is covered with a mesh 'stocking' that prevents dirt from dropping directly into the pipe through 1/2" perforations that allow water to seep into the pipe and drain off. This prevents water that seeps down behind the block wall to soak through to the inside surface. I screeded the natural soil with 1/4" wire mesh, and this soil is just about one half rock and one half sandy clay soil. I will completely cover the pipe with rock and then cover the rock with sheet material similar to that around the pipe, so that when I back-fill behind the wall with dirt it will not move into the gravel bed, which would plug up the rocks and prevent the drainage we need.


.


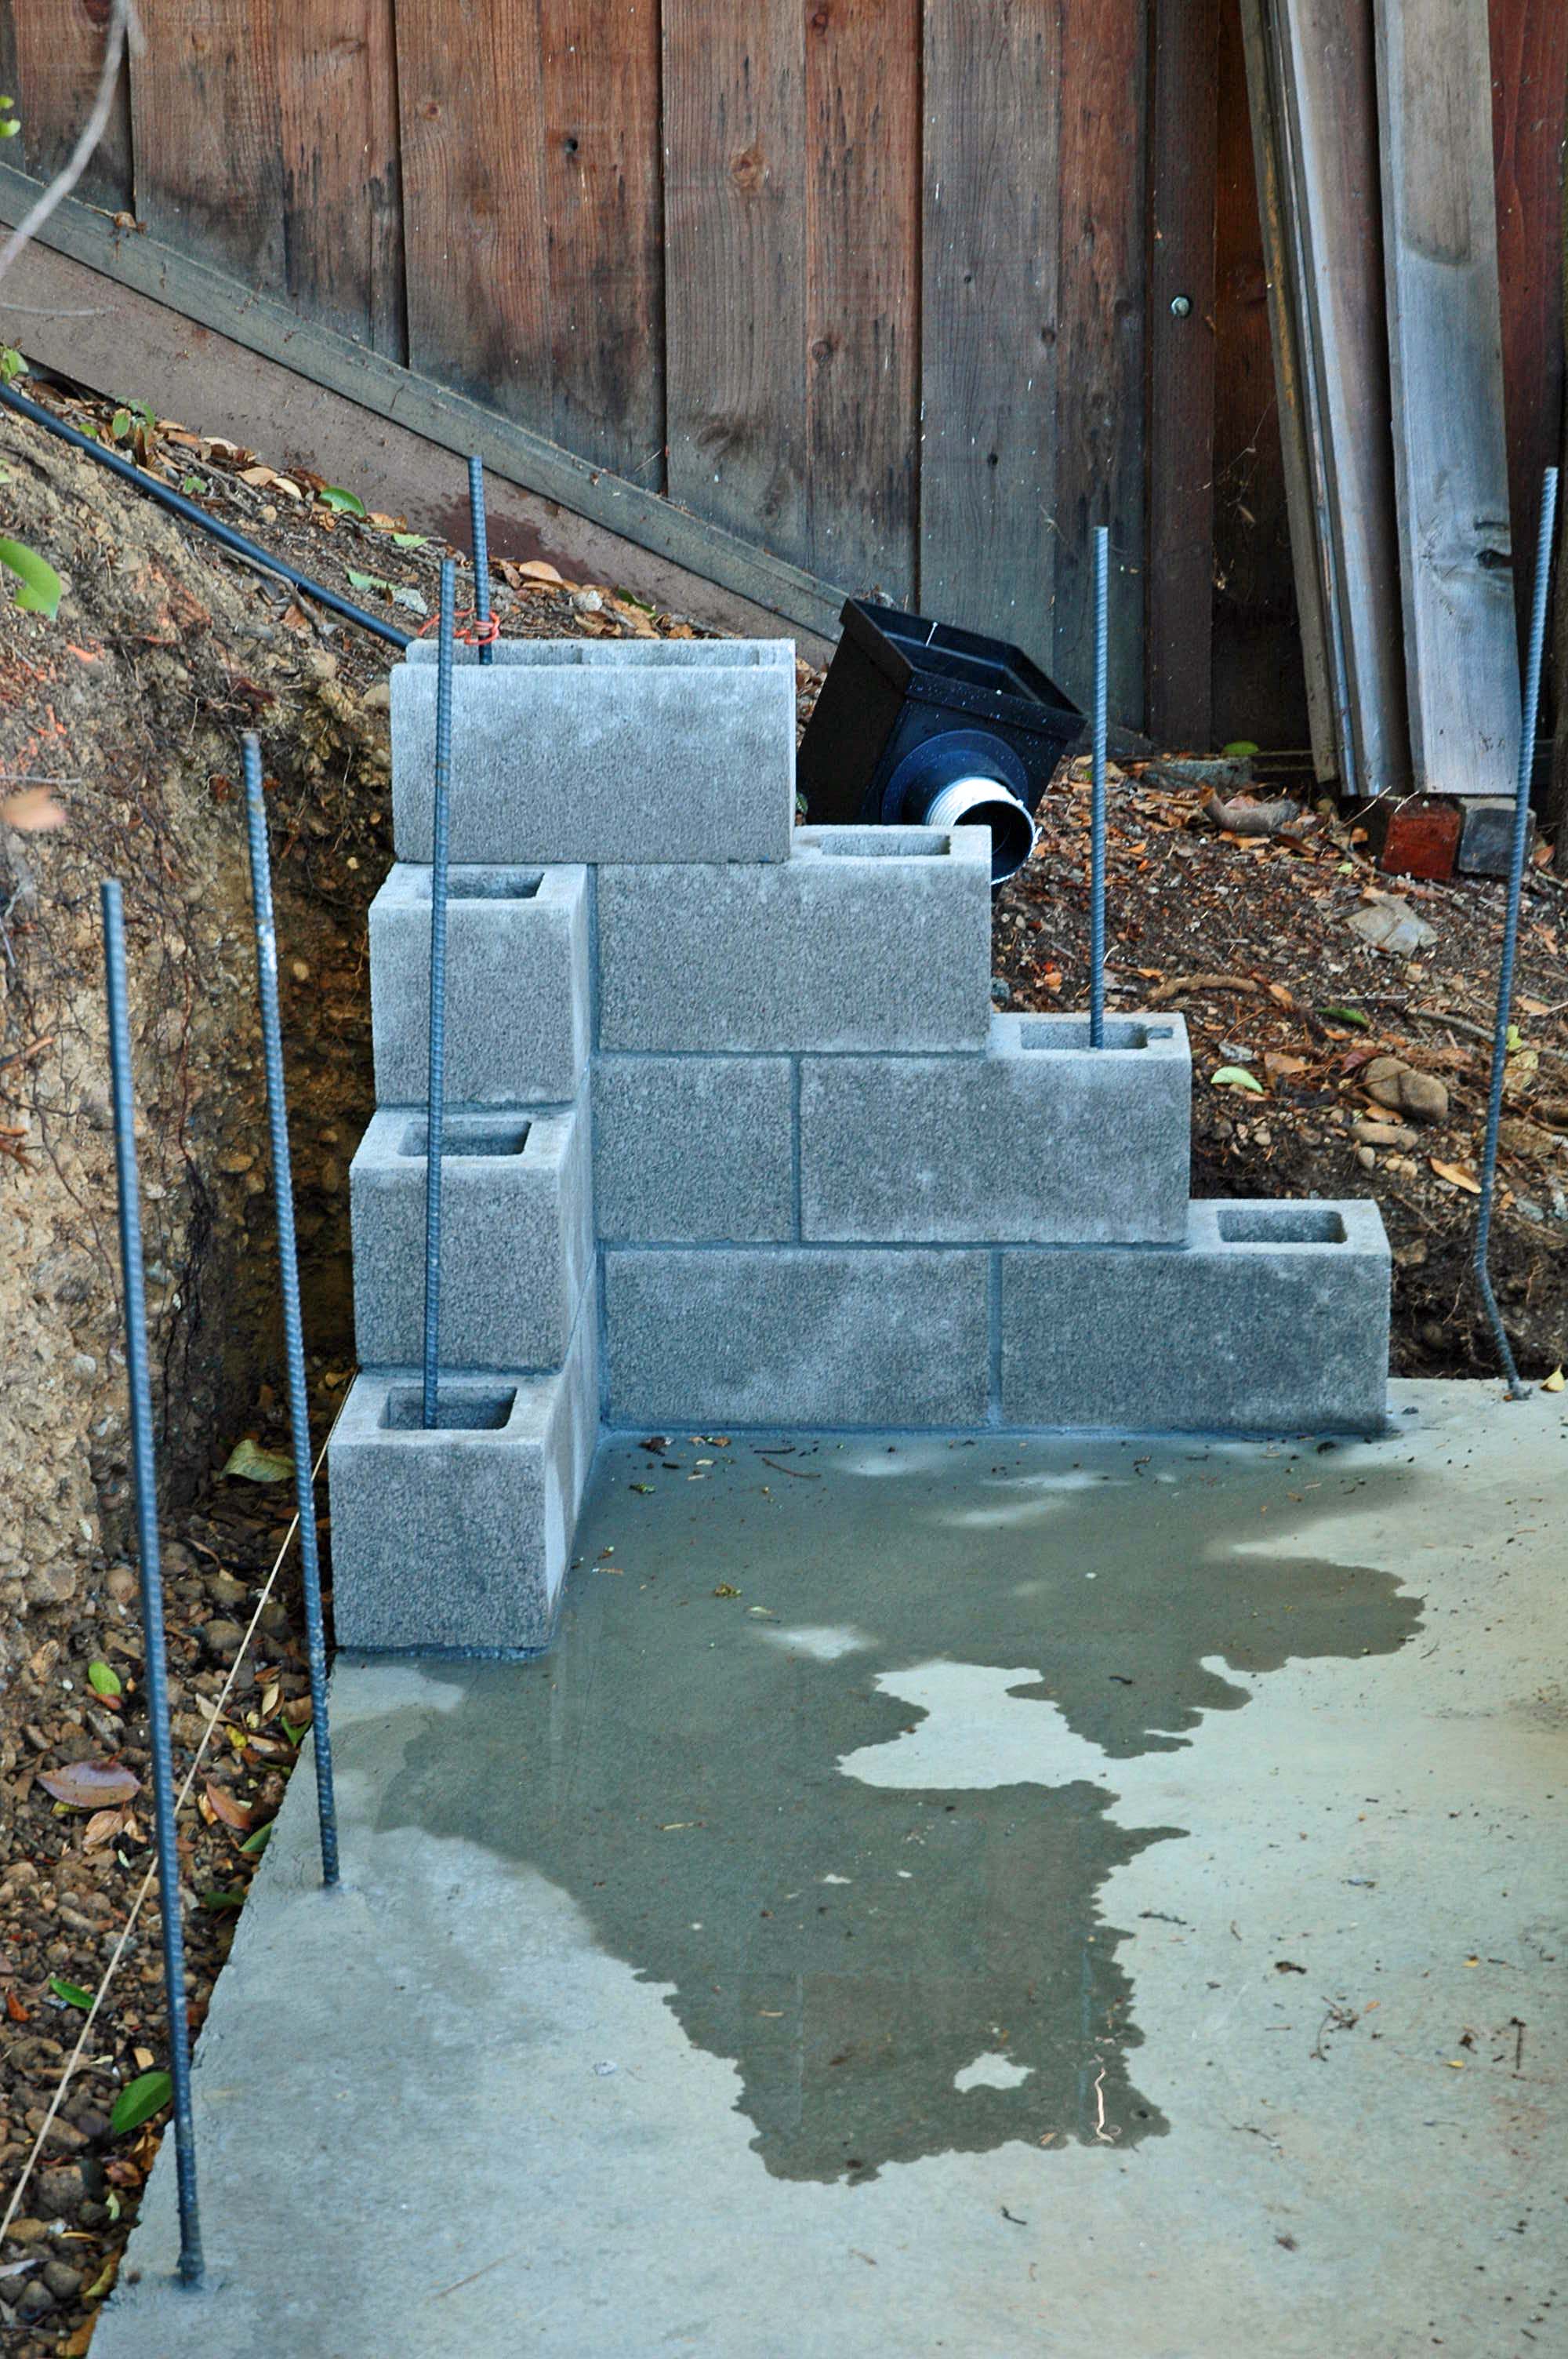
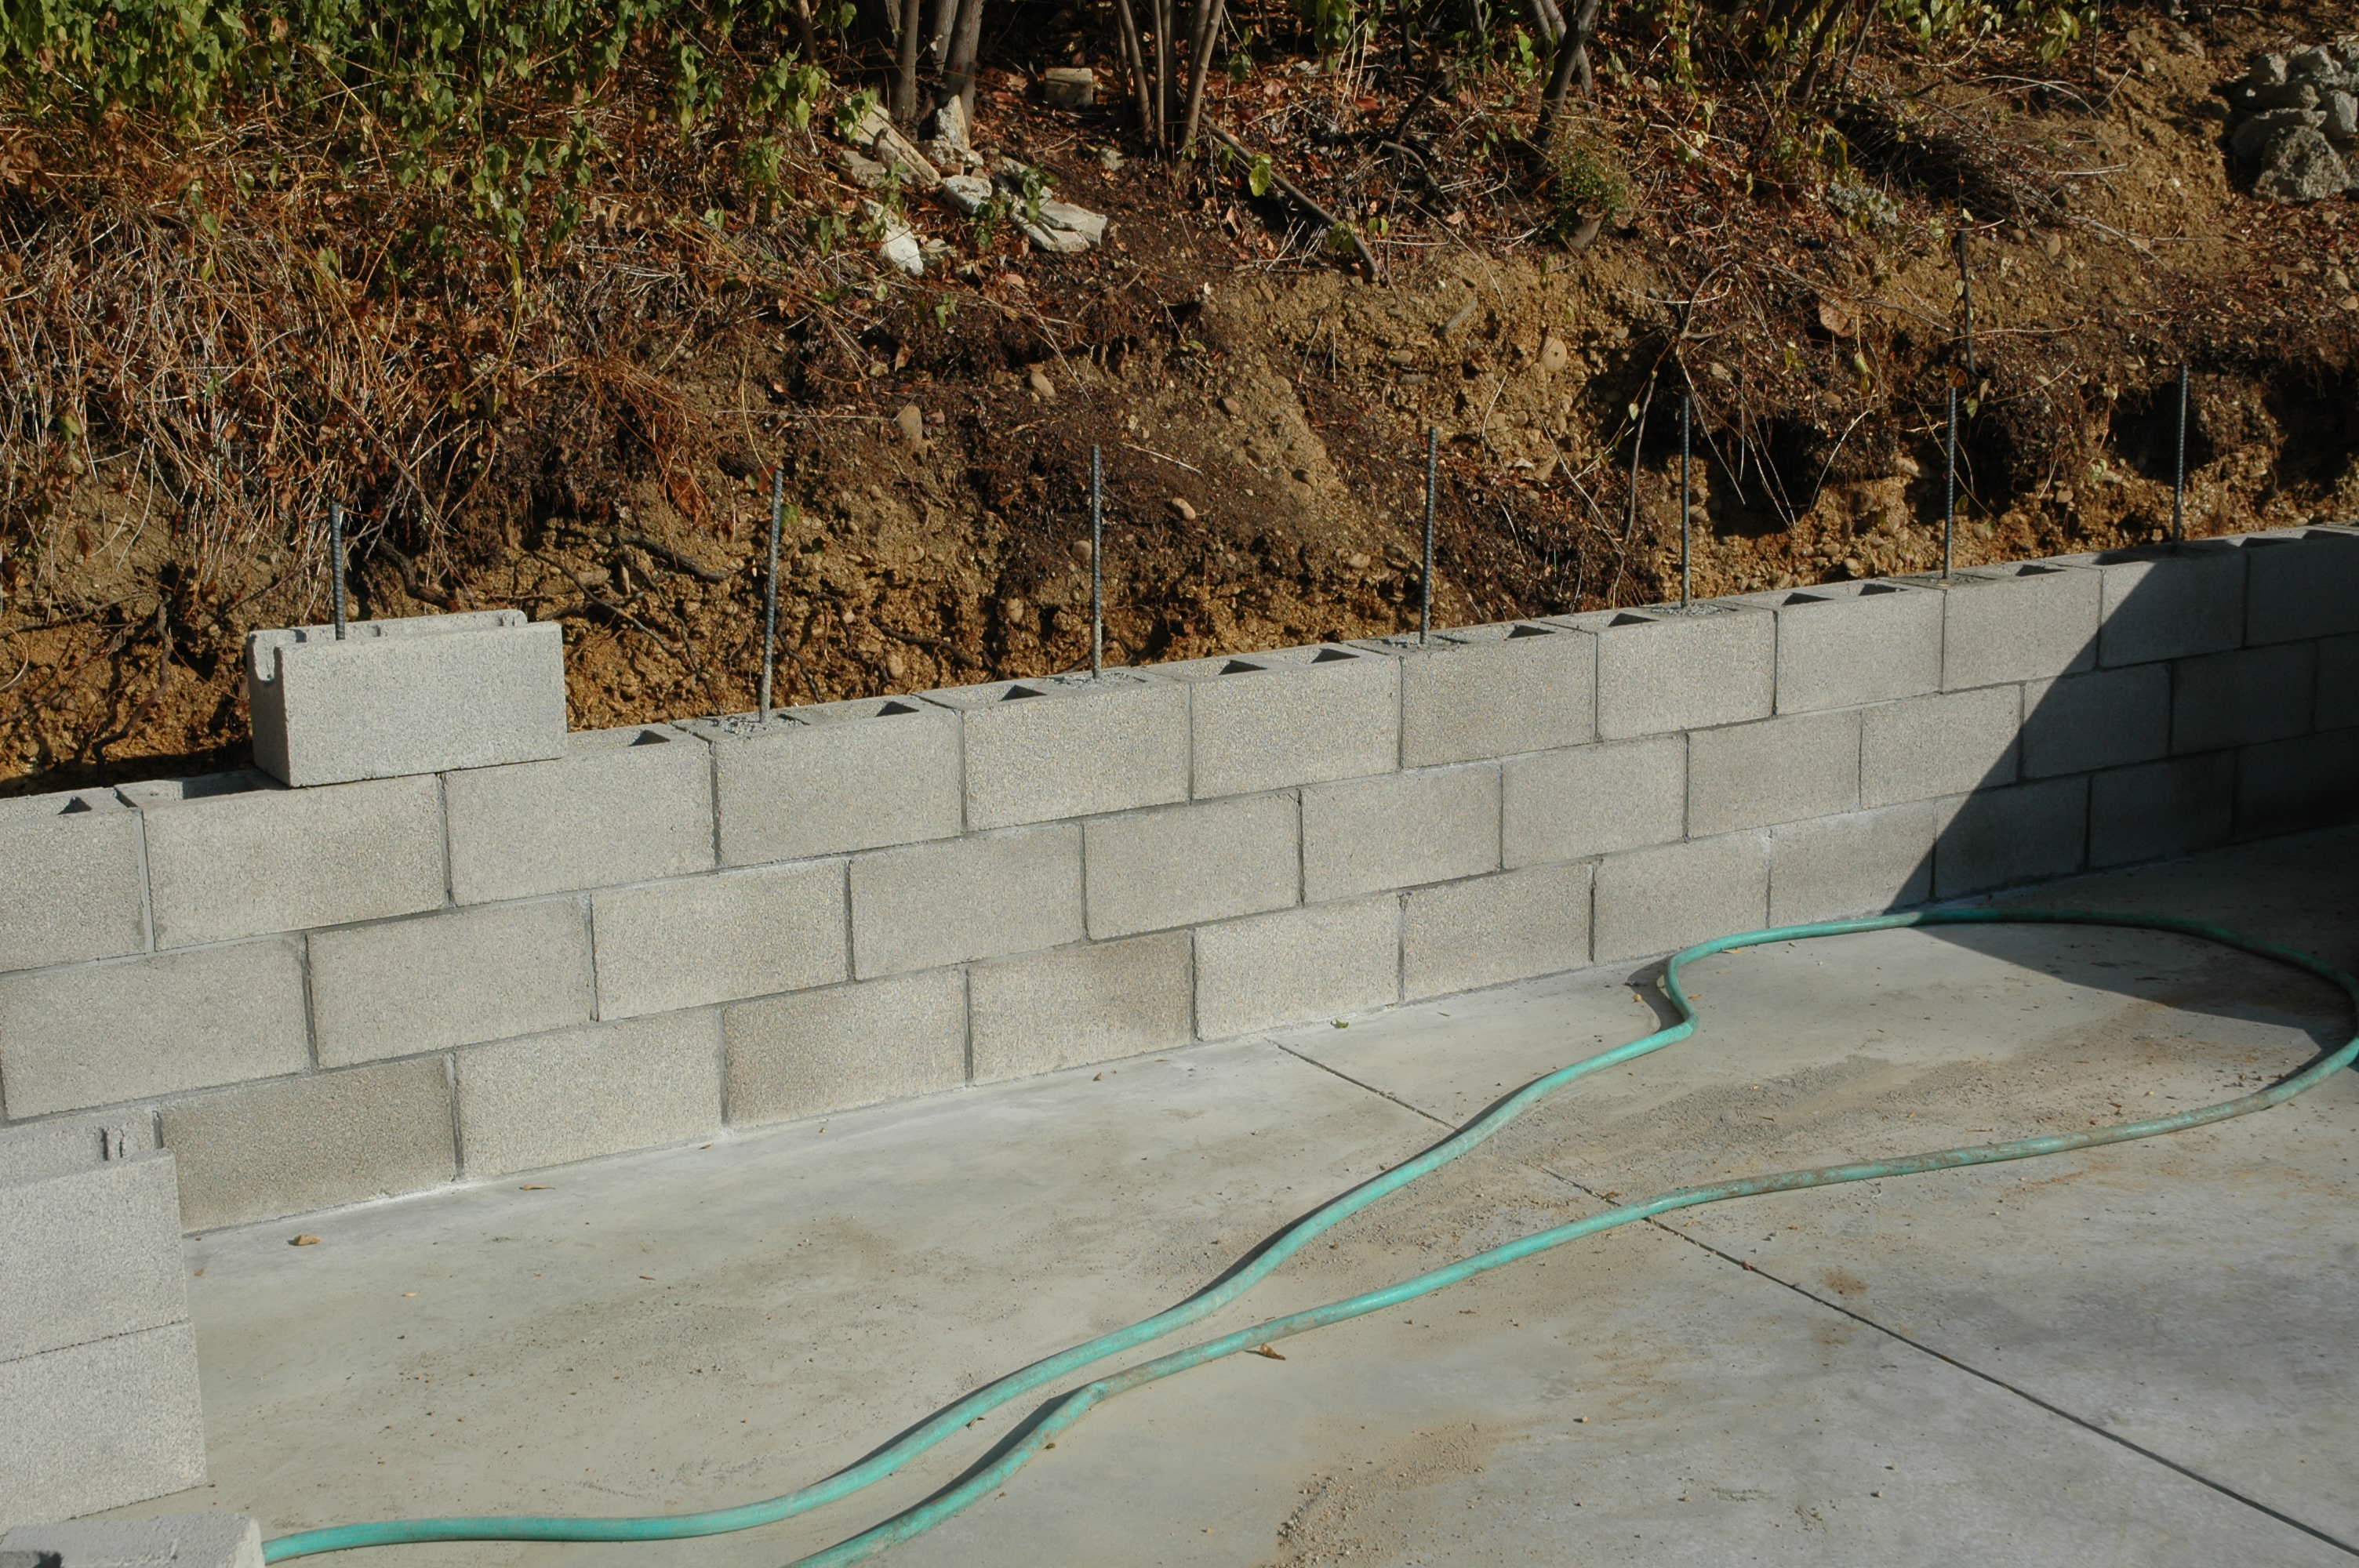
"Movin' On Up... " the pipe is covered with gravel and the string line is pulled taught to give me a straight line to guide how I lay the blocks. The top level of each course of the blocks will be controlled with a level. Laying each concrete block is a five-dimensional effort... level end to end, level across, keep in line with the string, maintain the correct distance from the previous block, and be sure it is set at the same level as the previous block. The re-bar fills every third cell and those cells will be poured with concrete to give the wall the strength needed to retard the soil from pushing the wall inward. Sharp eyes may note that the fourth course block is not mortared in place yet. It is merely sitting on top. You may also be able to see that the inner portion of the block is shaped differently. Each of the three webs is hollowed out so as to make a channel in which more reinforcing steel may be laid horizontally and then the top course will be poured with concrete up to the top surface. This forms what is called a "bond beam" and it adds rigidity to the top of the wall. The stud wall will stand on this stem wall. Steel sill bolts will be placed in the bond beam concrete to bolt down the walls that will sit on the top of the block wall, preventing them from shaking off and falling during an earthquake or heavy winds.


.


Three courses are laid... one more to go. We poured every third cell with concrete... the ones with the steel coming up through them from the footing. The fourth course will be laid next, and the vertical steel bars will be bent over to lay in the channel of the top blocks. This channel will also hold the horizontal steel and then the whole top course will be poured solid with concrete... after the city does an inspection to make sure the horizontal and vertical steel is in place. Then... we are ready to start building the frame walls to make it start looking like a building.


.


Ready for inspection. The steel re-bars are in place and the sill bolts are ready. Inspection is tomorrow morning, so I will be able to get started on building walls.


.


The first walls, one on the left and one on the right. They will be covered with a 4' x 10' sheet of plywood so they will both be Shear Panels for earthquake protection. There will be one more in the center, between a two pairs of 9-foot drive through doors. There will be seven more of these panels, two in each corner and two in the middle, front and rear wall. I think there is more wall that is shear panel than not.


.

Our daughter Kim called last night and said she 'owed' me some time for my 'Daddy-Do' projects that come up from time to time, and she wanted to come over and lend a hand if I could use her. We shifted lumber piles to allow us to access the materials we needed to build walls and then we cut, nailed and framed over fifty feet of wall, including that far corner with the shear panel on it. You can see that each section of wall had to be lifted up over three feet and sat back down onto the foundation bolts on top of the block wall. You can just see the crane to the right of the taller ladder that is part of the scaffolding system that we have. Using four pulleys we got enough leverage to lift each section of wall which is nearly six hundred pounds. Kim was a fantastic help. She was very intuitive and anticipated my every move, making sure the right tools were in my hands and bucking sixteen foot long lumber from the stack to the cut-off station and trimming those bushes twelve feet off the ground and picking up stuff that I dropped... Young backs are a real blessing, for sure. You are AWESOME, KIM! Thanks So Much!! We Be Movin' Now, Boy!


.

This is a blow-up from the image above that shows the series of pulleys and ropes that Kim and I came up with, making the pull rope have less than one hundred pounds of effort to lift the sixteen foot long section of wall.


Three walls are up and the beam running across the west side is going in. Lee next door stopped in at the wrong time... I pressed him into service helping to build that beam. Thanks Lee. It is made from three 'sistered' 2 x 12's that go the full 53 feet long. Two of the four posts are in place. They are each three 'sistered' 2 x 6's that are pressure-treated. I better order some screws to put down the plywood decking. It won't be long now.


And that completes the beam. Thanks Lee. The beam is made up of six 2 x 12 x 20' and three 2 x 12 x 16' timbers cut into thirteen pieces and nailed together. A 'T' strap on each side, at the top of each post with three 1/2" bolts and the post brackets at the bottom with two more 1/2" bolts turns the beam and posts an integral unit for shear strength. City only sees a long wall, not a structural shear system, so they want me to place a shear panel in the smaller opening in the center of the west wall, where the posts are only seven feet apart.


.

Two up... thirty eight to go. The first two trus-joists went up today. I am planning to put up about sixteen of them... maybe twenty... and cover them with the plywood. Then I can call for an inspection and after that I can put down a coat of Geco-Deck roofing to protect the plywood. It will also give some protection for some of the materials.


Lee from next door came over and in two days we finished putting the trusses up. Thanks Lee. Good help is very much appreciated.


.

I think that I can just see myself moving into this unit.


.

Kent came over Sunday afternoon and Lee came over so the three of us could lift 42 half-inch thick 4 x 8 foot sheets of plywood up to the roof where they become the decking material. They were stacked in two stacks... the temporary 2 x 4s are providing some support with all of that weight on those Trus-Joists. Thanks guys. Now... we have to get that plywood all laid down and screwed down for the next inspection from the city. Then I can get the Geco Deck roofing material on the top. That is when I can finally relax when I hear it is going to rain.


Bring Your Skates! Lee and I got all of the plywood screwed down and in place. City did an inspection and approved the shear panels in the walls, the structure framing, and the screw pattern of the roofing plywood. Kim came over and we put down the sheet metal flashing around the perimeter of the roof and we did the taping of all of the joints. Before we could get the first coat of roofing/decking material down we were facing showers, so we had the whole roof covered with tarps, but we still did get some rain on the plywood. Damage was minimum. This shows two coats of roofing down with two to go. The roof slopes from the left to the right, at a slope of just slightly less than 1/4 inch per foot. But it is now secure from the rain.


Of course... once the roof can stop rainfall, 'stuff' will go into the building. The T-Bird has the honor of being the first vehicle to take its place. Big Red will slip into hole number one. I have moved the sheet metal tools out to this building where I have room to cut and form the flashing. I am also moving the band saw and table saw out there to allow me to 're-saw' the sixteen foot long 2 X 4 pressure-treated wood to make 1 X 4's for trim in the stucco work. That will allow me to get the paper and metal lathing up on the outside of the walls for the stucco. That will make the walls weather-tight as well, and I can start moving my 'stuff' out there. And THAT will allow Rosalee to have a garage for parking her car. :-) With the rain under control, I need to bring home a milling machine that I bought a few months ago. Karen, the lady 'storing' the milling machine that I bought (from her) will be excited about the mill not being in her garage. This will allow her to park her car in her garage for the first time in years.


This is the east wall... the back wall that no one can see. It is also the shorter wall since it is standing on the concrete block retaining wall in the back of the shop. We have applied the "KeyMesh" or more commonly called Building Paper and Chicken Wire. It is the base upon which stucco is smushed where it will harden into the first layer of stucco. Normally three applications of stucco are placed on the wall... the Scratch Coat, the Brown Coat, and the Color Coat, which may have a color mixed into it for a permanent color. We do not use color as it is difficult to get all of the applications to have the same color match, and white is especially tough. I will just paint the stucco white.

That's fifty-three feet of eight-foot high wall, and this Okie ain't gonna stucco that much in one day. To lend more of an English Tudor Carriage House flavor we will add a vertical board every four feet to give what we used to refer to as the "Half-timbered" effect. That also allows us to stucco only one section (or as many as we feel like doing)  in one day. I see a lot of days ahead of us here.

The vertical boards will go over the wire and paper, but any horizontal boards, such as the one on the bottom, will have to have a sheet metal flashing placed on the top edge to slip under the paper and divert any water that gets behind the stucco to be ejected at the next horizontal piece. On the back there is only the upper and the lower board. On the other three sides that are eleven feet high, there will be at least one more horizontal board at about the level of the top of the personnel doors.

The sheet metal flashing (210 feet of it) is cut from rolls of sheet metal. We have used the sheet metal brake (to bend the sheet metal) enough to pay its way for sure.


This is the southern wall. We have placed the paper and wire all the way to the top to make it temporarily water tight against the rain. This allowed us to move material and equipment into the building and keep it from the elements.

We will have to come back and add the second horizontal board, which will mean the wire mesh at that point will have to be cut as well as the paper, to allow the sheet metal flashing to slip under the paper above the board. That does not impede the integrity of the wire mesh as it is nailed every six inches vertically to the studs, which are sixteen inches apart (or less).

The nails are broad-headed and press the wire directly onto the stud and paper if a vertical trim board is going at that location. Where a board will not be placed, furring nails are used which have a fiber washer that is a half inch thick to hold the wire a half inch away from the stud and allow stucco to get in behind the wire. The wire is essentially a reinforcement for the stucco and holds it in place until the cement in the stucco 'sets' (hardens).


This is the north wall, and it is a little further ahead of the other walls. The second horizontal board has been added just above the door (half way back). A third horizontal board is added at the very top as well. That is a "stucco stop" to provide an ending of the stucco application at the perimeter of the entire wall.

You can see that a corner board has been constructed and added to the front corner. Every corner will have one of these. All of the wood is pressure-treated Douglas Fir 2 x 4 or 2 x 6 lumber and we have "re-sawn" it to make it into one inch thick material. We did this to get better quality lumber that is only one inch thick. The band saw we bought a couple of years ago is really earning it's keep. This is what it was intended to be used for. Then the wood is painted with two coats of primer to help preserve it where it meets the stucco material. The outer-facing surfaces will get two coats of dark brown paint.

There will be some vertical boards added to this wall before stucco is applied. They will basically stand every four feet of wall length. The vertical wood does not need to be flashed, except at the very top of the board where water can get in behind the board.

To prevent termites that live in the soil from turning that bottom board into a luncheon counter, the soil will have to be at least six inches below the wood. It is filled higher right now to allow the scaffolding to be safe.


This view of the west or front wall shows one complete 'panel' of stucco ready to be applied. The trim around the larger door opening is in place an you can see the flashing at the top of the vertical board. The second horizontal trim board is in place with it's flashing, and the bottom  board has it's sheet metal installed (out of picture on the bottom of the wall). The top board is not applied yet. The paper and wire must be strung across the top of the door before that goes on, or the trim over the door goes on.

As far as the City of Pleasanton is concerned, there will be no large doors on this building. However, it is clear that we will need to add some, so the design of those doors is still 'in limbo' so to speak. We think that we want double swinging doors (four pairs), each a little over four feet wide. They will swing out on hinges to open.

We think we want some glass in the doors, possibly along the top edge. Also, we may put a curve at the top, so that each pair of doors will sit under an archway. That would be four arches that we get to carve. Hmmm.

Whatever we decide, we have to put a trim board across the top of the openings to the large doors to be a stucco-stop before the City can sign off the building. Possibly the arched beam can go under that trim piece, similar to the way the front door on the house is done. Something like this:

That should carry through the theme of the house to this building. That is what the people in the City Planning Commission were insisting on. Best sharpen my chisels.


The west side is complete, and ready for stucco. Two more walls to go. The stucco goes between the white boards (which will eventually be dark brown), and will fill up the space until it is flush with the outside face of the trim boards.

Feb 3rd... The KeyMesh (lathing) on the other two walls are completed so today the City was here and signed off on the lathing inspection. I am cleared to put on the stucco. I plan to mix the stucco and apply it at a rate that will allow me to do it alone. They's a lotta stinkin' stucco on thet buildin. Gonna take me awhile. When the stucco is all on, it will be time for Final Inspection. At that time I can start working on the big doors to hang in those large holes so I can actually work out there. The tools will also be just a little bit more secure with doors on the building.


Stucco is going on... the light gray is the stucco, as a first (scratch) coat. Around the south side the upper panels have been filled in with stucco, and it is the second (brown) coat. Brown is the name of the second coat, not the color of the coat. With the scaffolding in place to allow access to the upper panels, I wanted to finish the upper ones before moving the scaffolding out so I can have access to the lower panels. So, while waiting for the materials to do the final (color) coat on those upper panels, I have started doing other panels to which I do have access. The lower panels on the west wall are done, and the lower panels on the north wall are done. They will need the next two coats of stucco to be complete. 


This is a closer look at the south-west corner, showing two panels (upper left and lower right) that are KeyMesh-ready for the scratch coat of stucco. The lower left panel is scratch coat, ready for the brown coat. The 'patches' are voids that were filled after the panel was curing. The upper right panels have the second or brown coat applied, and are waiting for their final or 'color' coat.

The third coat is called the 'color' coat because sometimes a dry powder is added to the wet mix that will color the top coat and then it will never need to be painted, unless you want the color to be a different color. I do not plan to put any color into the mix. It is difficult to get the color to match when you are mixing the wet mixture for every panel individually, and the result will be variations of the color. I will simply paint the stucco. It will be white, to match the house. The boards will be painted a dark brown, also to match the house.


The lower panels on the front and the upper panels on the south side are finished. The third coat of stucco (color coat) are applied and cured, and they are painted. The wood separations between the panels are also painted (dark brown) two coats. The scaffolding on the south will now be removed and will not need to be replaced as the painting is all done. I can now stucco the lower panels. The scaffolding will be moved to the front again to allow me to stucco and paint the upper panels on the front. I cleaned up the T-Bird and even put on a coat of wax. I drove it for a couple of days to 'clean it out' so I could get a clean smog inspection that allows me to keep it licensed. It was fun driving it again. 


The south wall and the south-west corner are finished. Two coats of paint and everything. Next we move to the left and finish the upper front and at the same time work on the lower north wall. It is ready for the final layer of stucco, with the upper panels still in the lath stage. It feels good to look at something where we can say "That part is finished!" 


Today my building permit was just about exhausted, so I had an inspection from the city. The inspector came and because I needed a little more time to finish, he gave me another 180 days on the permit. That gives me another six months to finish. All that needs to be done to satisfy the permit is to complete the back wall and hang the rain gutter along the back wall. Three walls are completely finished. The back wall has the first or scratch coat on, and half the wall has the second or brown coat applied. The top image shows the front or west wall completed... if you can see past the trash and junk. The lower left image is the north wall, with the door that allows me to access my 'storage area'. The lower right image is the north and the front wall corner. The north door can be seen in the center of the wall.

The permit has been completed and written as a FINAL, as of 10/14/14. Hooray!


The added carved beam is there to provide a bit of sculpted detail over the large doors. It is doubled, so it will serve as the upper jamb for the two doors that will swing out like a pair of 'French Doors'.


This is my 500 pound load of steel to make the frames for the large doors. It is 2" square stock, 16 gauge. The two 3" wide flat stock will be the new hinges. 


I cut the steel pieces to length, with mitered corners, drilled the ones that will have bolts going through them, and tack-welded them in place. That way the door will fit. Both doors in the first opening are attached to the 2 X 4 on the bottom, and that will only be cut into two parts after the hinges are in place and the doors are hanging. After the frames are tacked together, they are laid down on the saw horses and fully welded. After grinding all the welds flat and smooth, the frames are stood back into place and more 2 X 4s are bolted to the frame and the door skin will be screwed to the wood ;pieces. A 3" long lag bolt near the top of the outer piece is screwed into the door jamb to hold the doors in place until the hinges are attached. The hinges are bolted to the front of the door jamb trim, and bolted onto the front of the doors. All of the door trim has to be in place before the hinges can be attached. They will be drilled and bolted to the doors.


The hinges are all attached, the bottom 2 X 4s are all cut into individual doors, and the doors are painted. The glazing material is not in the windows yet. The man-door was cut into the center panel. Now, I have to find a way to move that huge termite hill iin front of the door. The new solar panels can be seen on the roof. There are 31 panels up there.


Notice that the pile of dirt is gone. It is now spread out all over the yard. I sloped it toward us so the rainwater would run off and not soak into the mud. The new sidewalk was just added.


T


By going back up to the Secondary Menu and choose "Solar Project - 2015" you can view the solar project that is being installed on the Carriage House.


Hit Counter