![]()
![]()
![]()
![]()
![]()
|
Kitchen Remodel - 2012 |
|
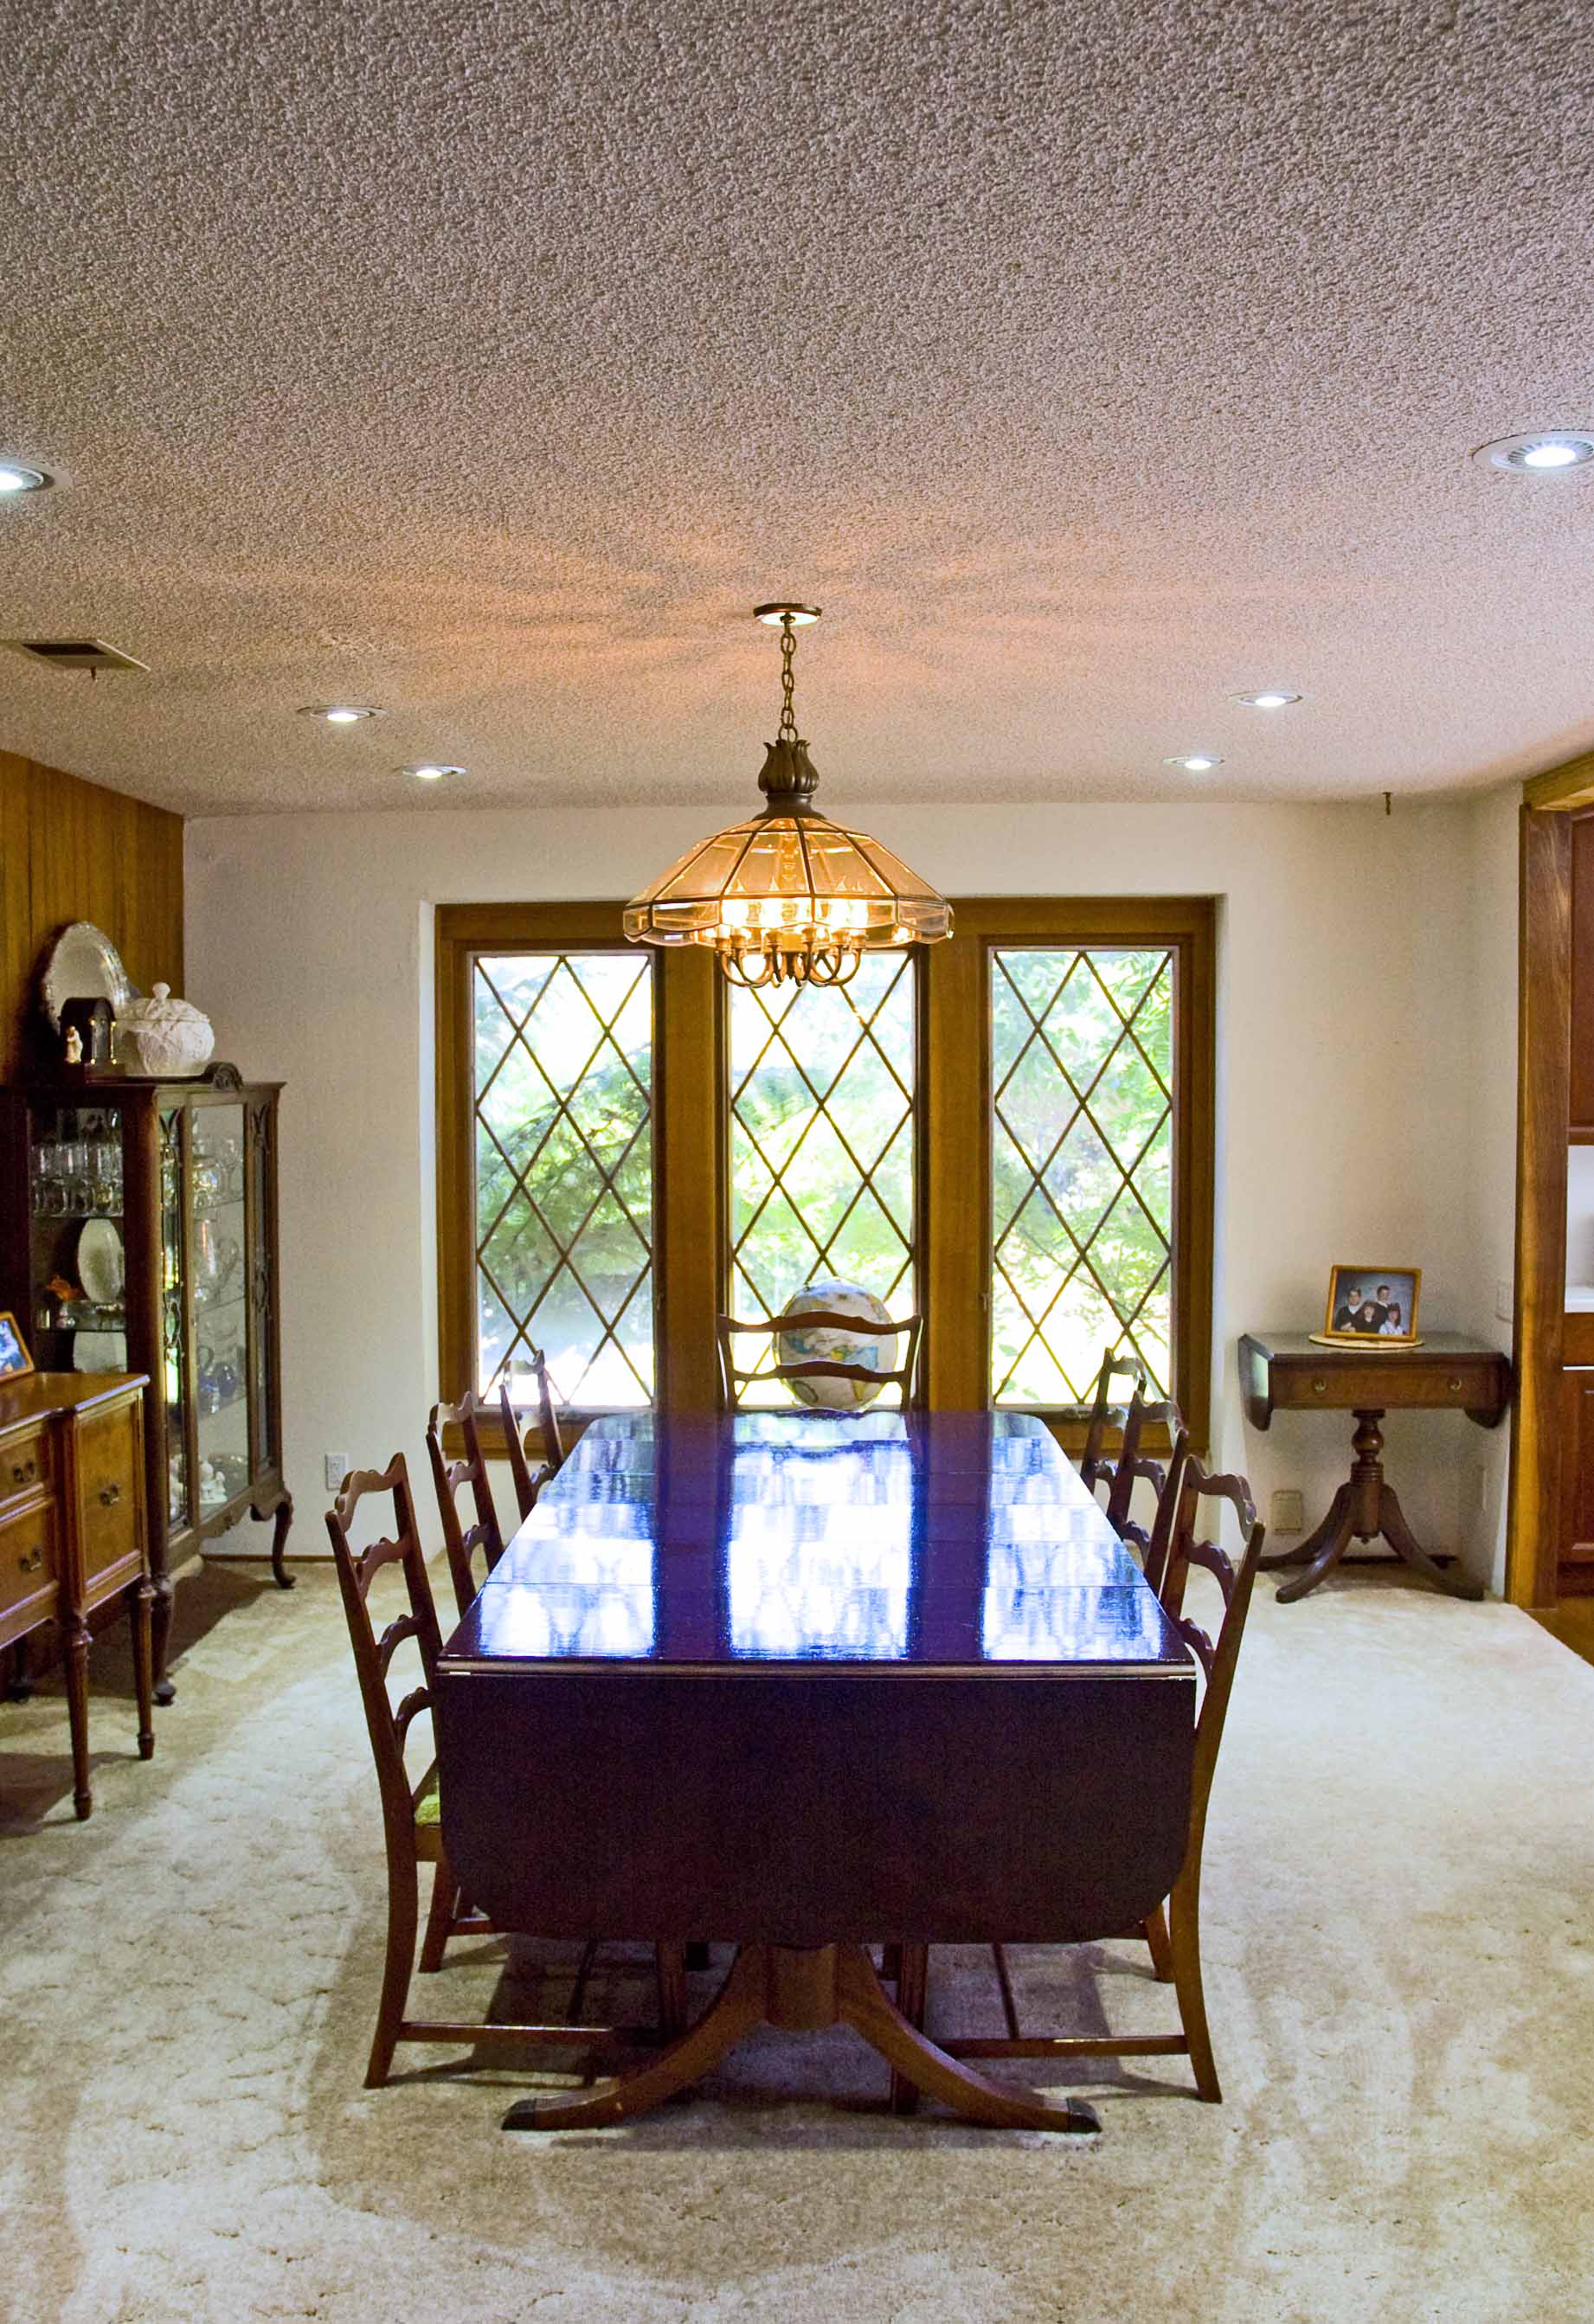
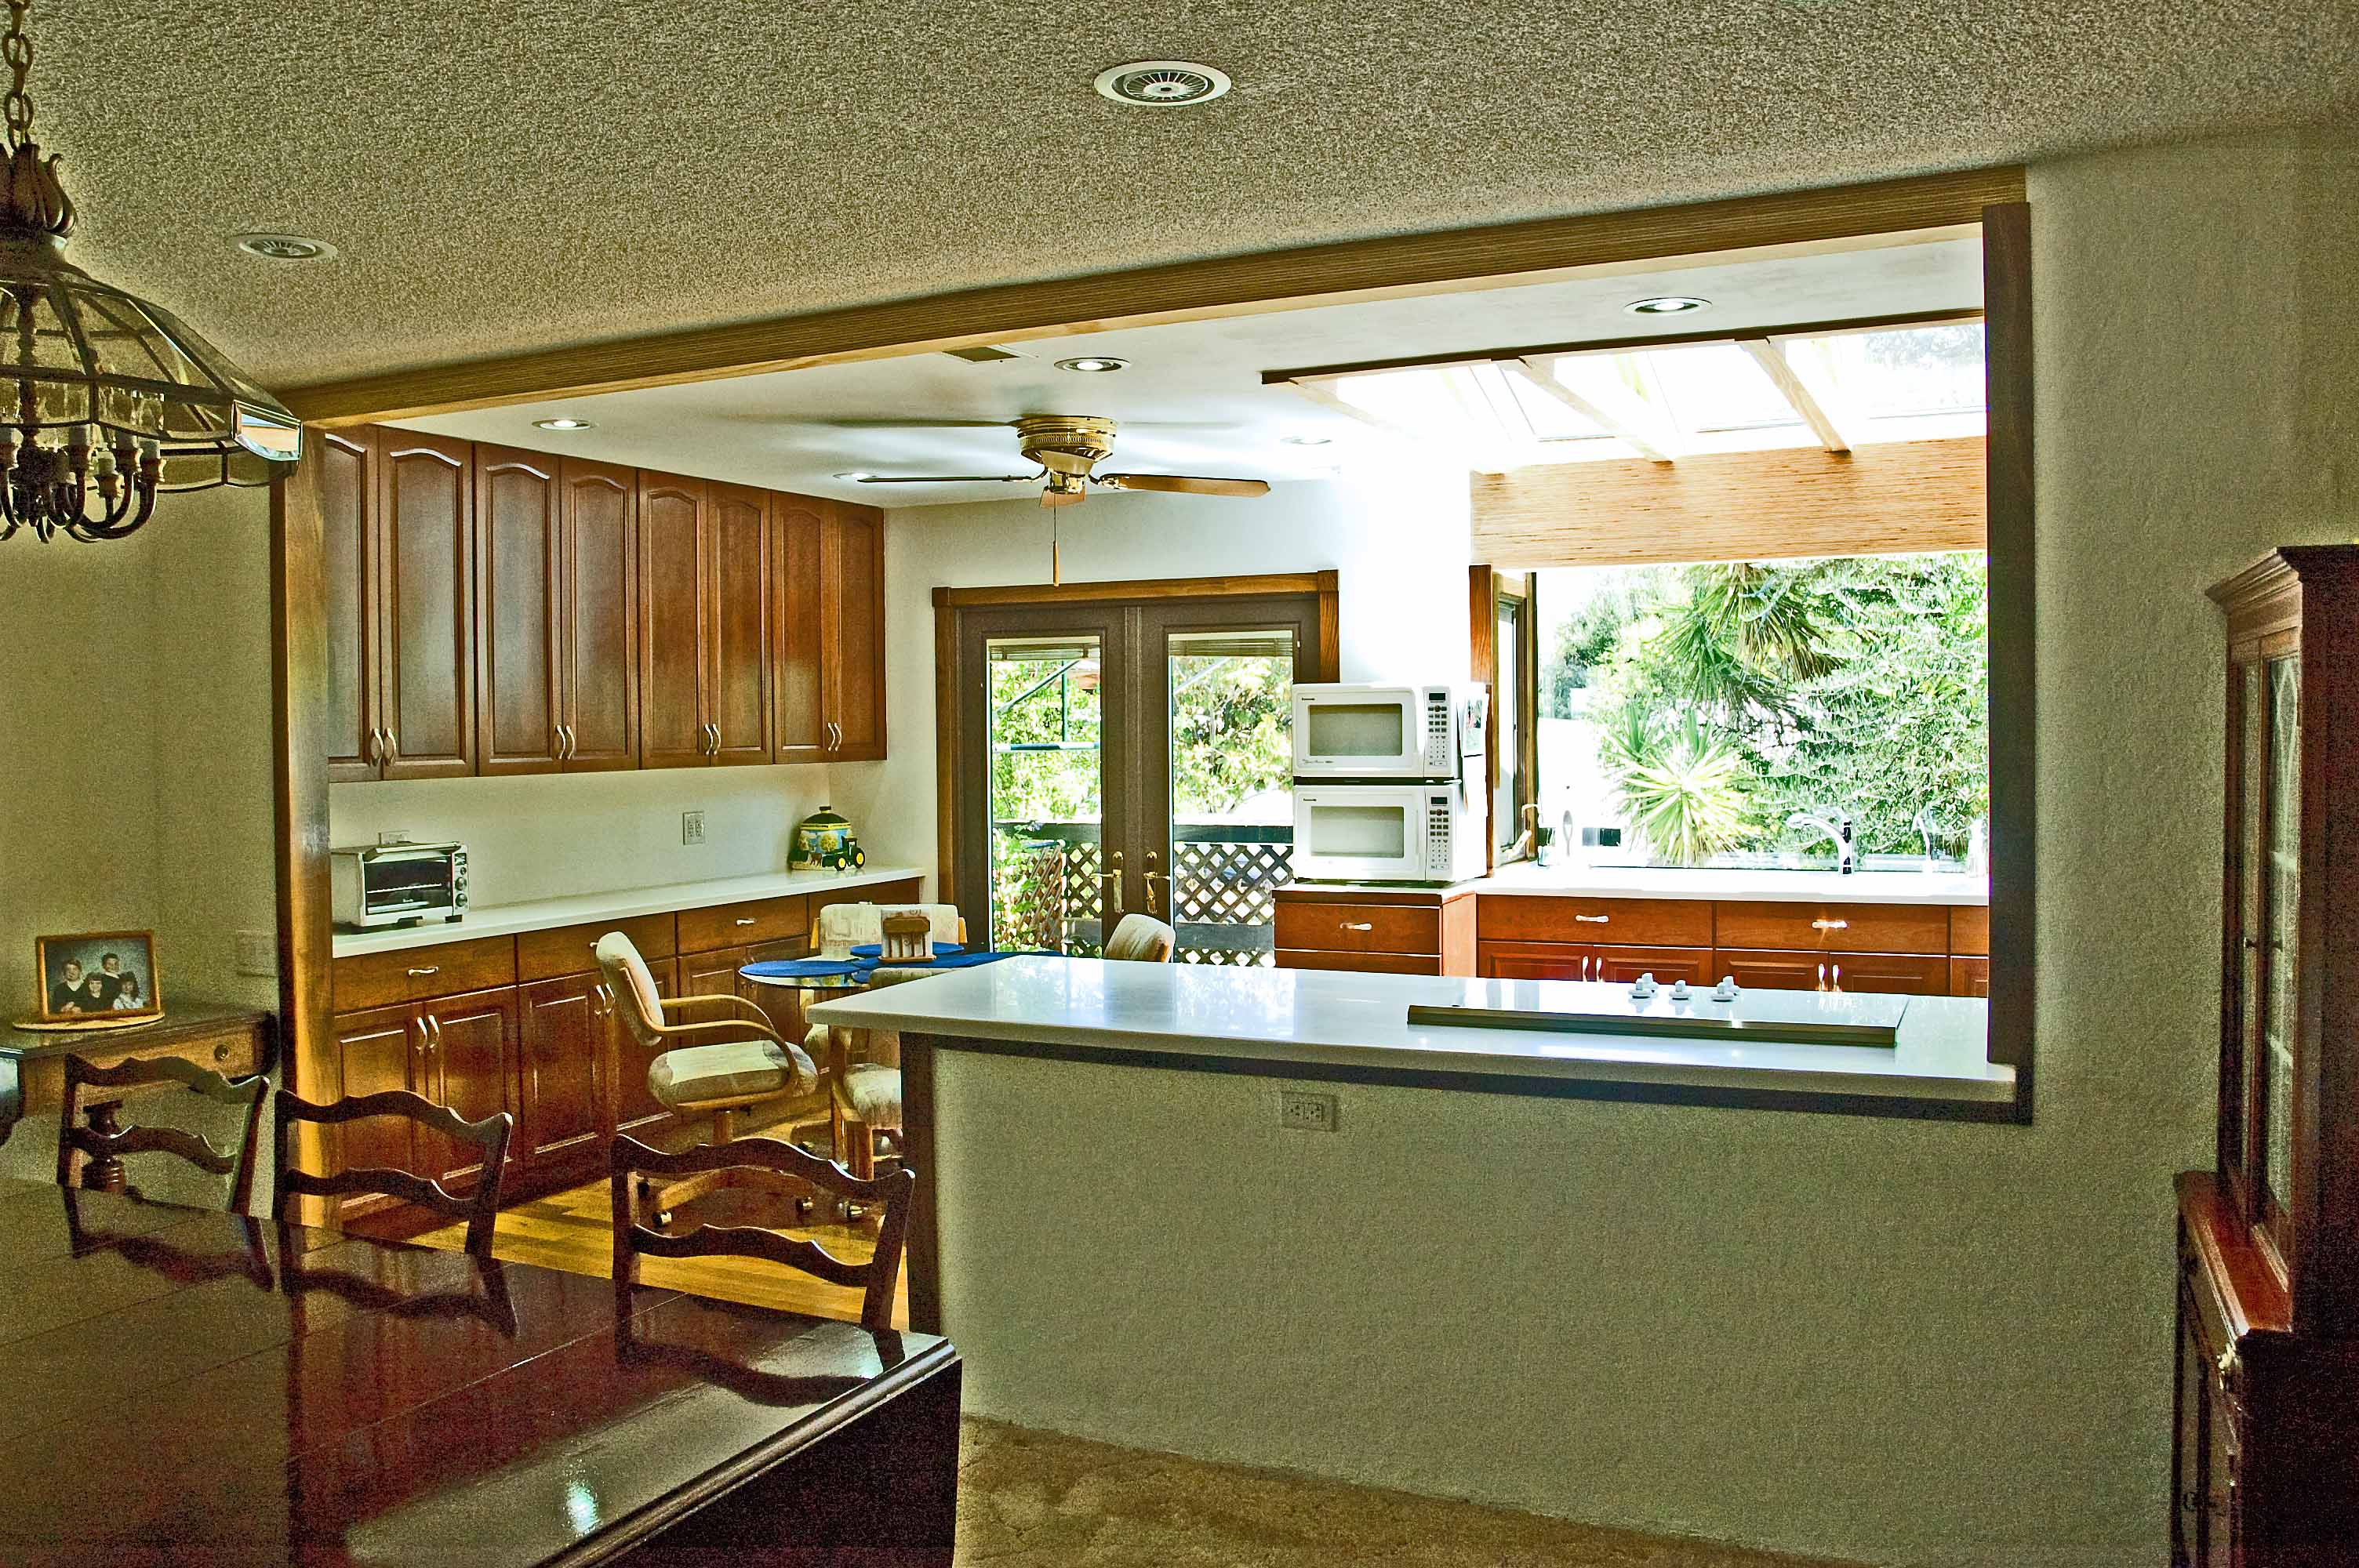
This home was purchased in 1976, and the Kitchen had never been modified at all. It still had our choices made when we purchased the home new... green floor, green Formica countertop, and the original green slide-in electric stove. We removed the wall between the Kitchen and the original Dining Room to make a larger Kitchen. We replaced the window in the original Dining Room with dual French doors that contain Venetian Blinds between the glass. The window behind the original Kitchen sink was removed and the wall was pushed out 18 inches, and a new 8 foot wide window was installed, with two small casement windows on each side to allow air to circulate. A new sink was placed where the old sink was located. The window where the large aviary was located was too low to place a counter in front of it so a smaller double casement window replaced the original. About four years ago we built and installed an eight foot by eight foot skylight over the Kitchen but never opened up the ceiling because grandma was here with us and we did not want to subject her to the mess. The dropped-ceiling lighting was removed and new LED lighting was installed. The wall between the Kitchen and the new Dining Room (original Living Room before previous remodel) was opened from the height of the counter to the ceiling. A new electric cook-top was placed where the old stove was and next to it is a pair of new electric ovens. The cooking vent is placed in the counter behind the cook-top and it pops up on command and exhausts out through the crawlspace to the outside. A second sink was added in front of the new double window, and that end of the Kitchen becomes the Preparation Area and also the Clean-up Area. It contains food storage, the mixer, spices, mixes, knives and a movable "island" cabinet that rolls freely and contains the four garbage cans we have to use now. It is covered by a cutting board we made from a block of hardwood our friends Ken and Sandy Hill gave us from their Lighthouse Christian Book Store they were not using. The entire plumbing system was completely replaced and we put solenoid-operated valves in both the hot and cold water supply lines that will shut off the water if there is a slight leak detected under either sink, the dish washer, or the refrigerator. Each unit using water has a sheet metal pan custom built to fit to trap any water that may drip. With the investment of a hardwood floor in the Kitchen, we did not want to test its ability to withstand water. Five additional new electrical lines were brought in from the service panels in the garage. There was also a new 50-ampere line just for the new ovens. All lighting in the Kitchen was added and lights were also placed in the newer Dining Room so we can finally see what we are eating. There were 22 new cabinets placed in the Kitchen, and the new floor is Brazilian Walnut hardwood floor. There are two Reverse Osmosis water units for cooking and drinking water and a garbage disposer in each sink. We finally have two circuits feeding the dual microwaves so we can actually run them both at the same time. A new deck is in the plans for next year possibly. The Kitchen project was finished in the Spring of 2012, just before the 12-month permit ran out. Whew! |
|
|
|
<<<< Before Images: After Images: >>>> |
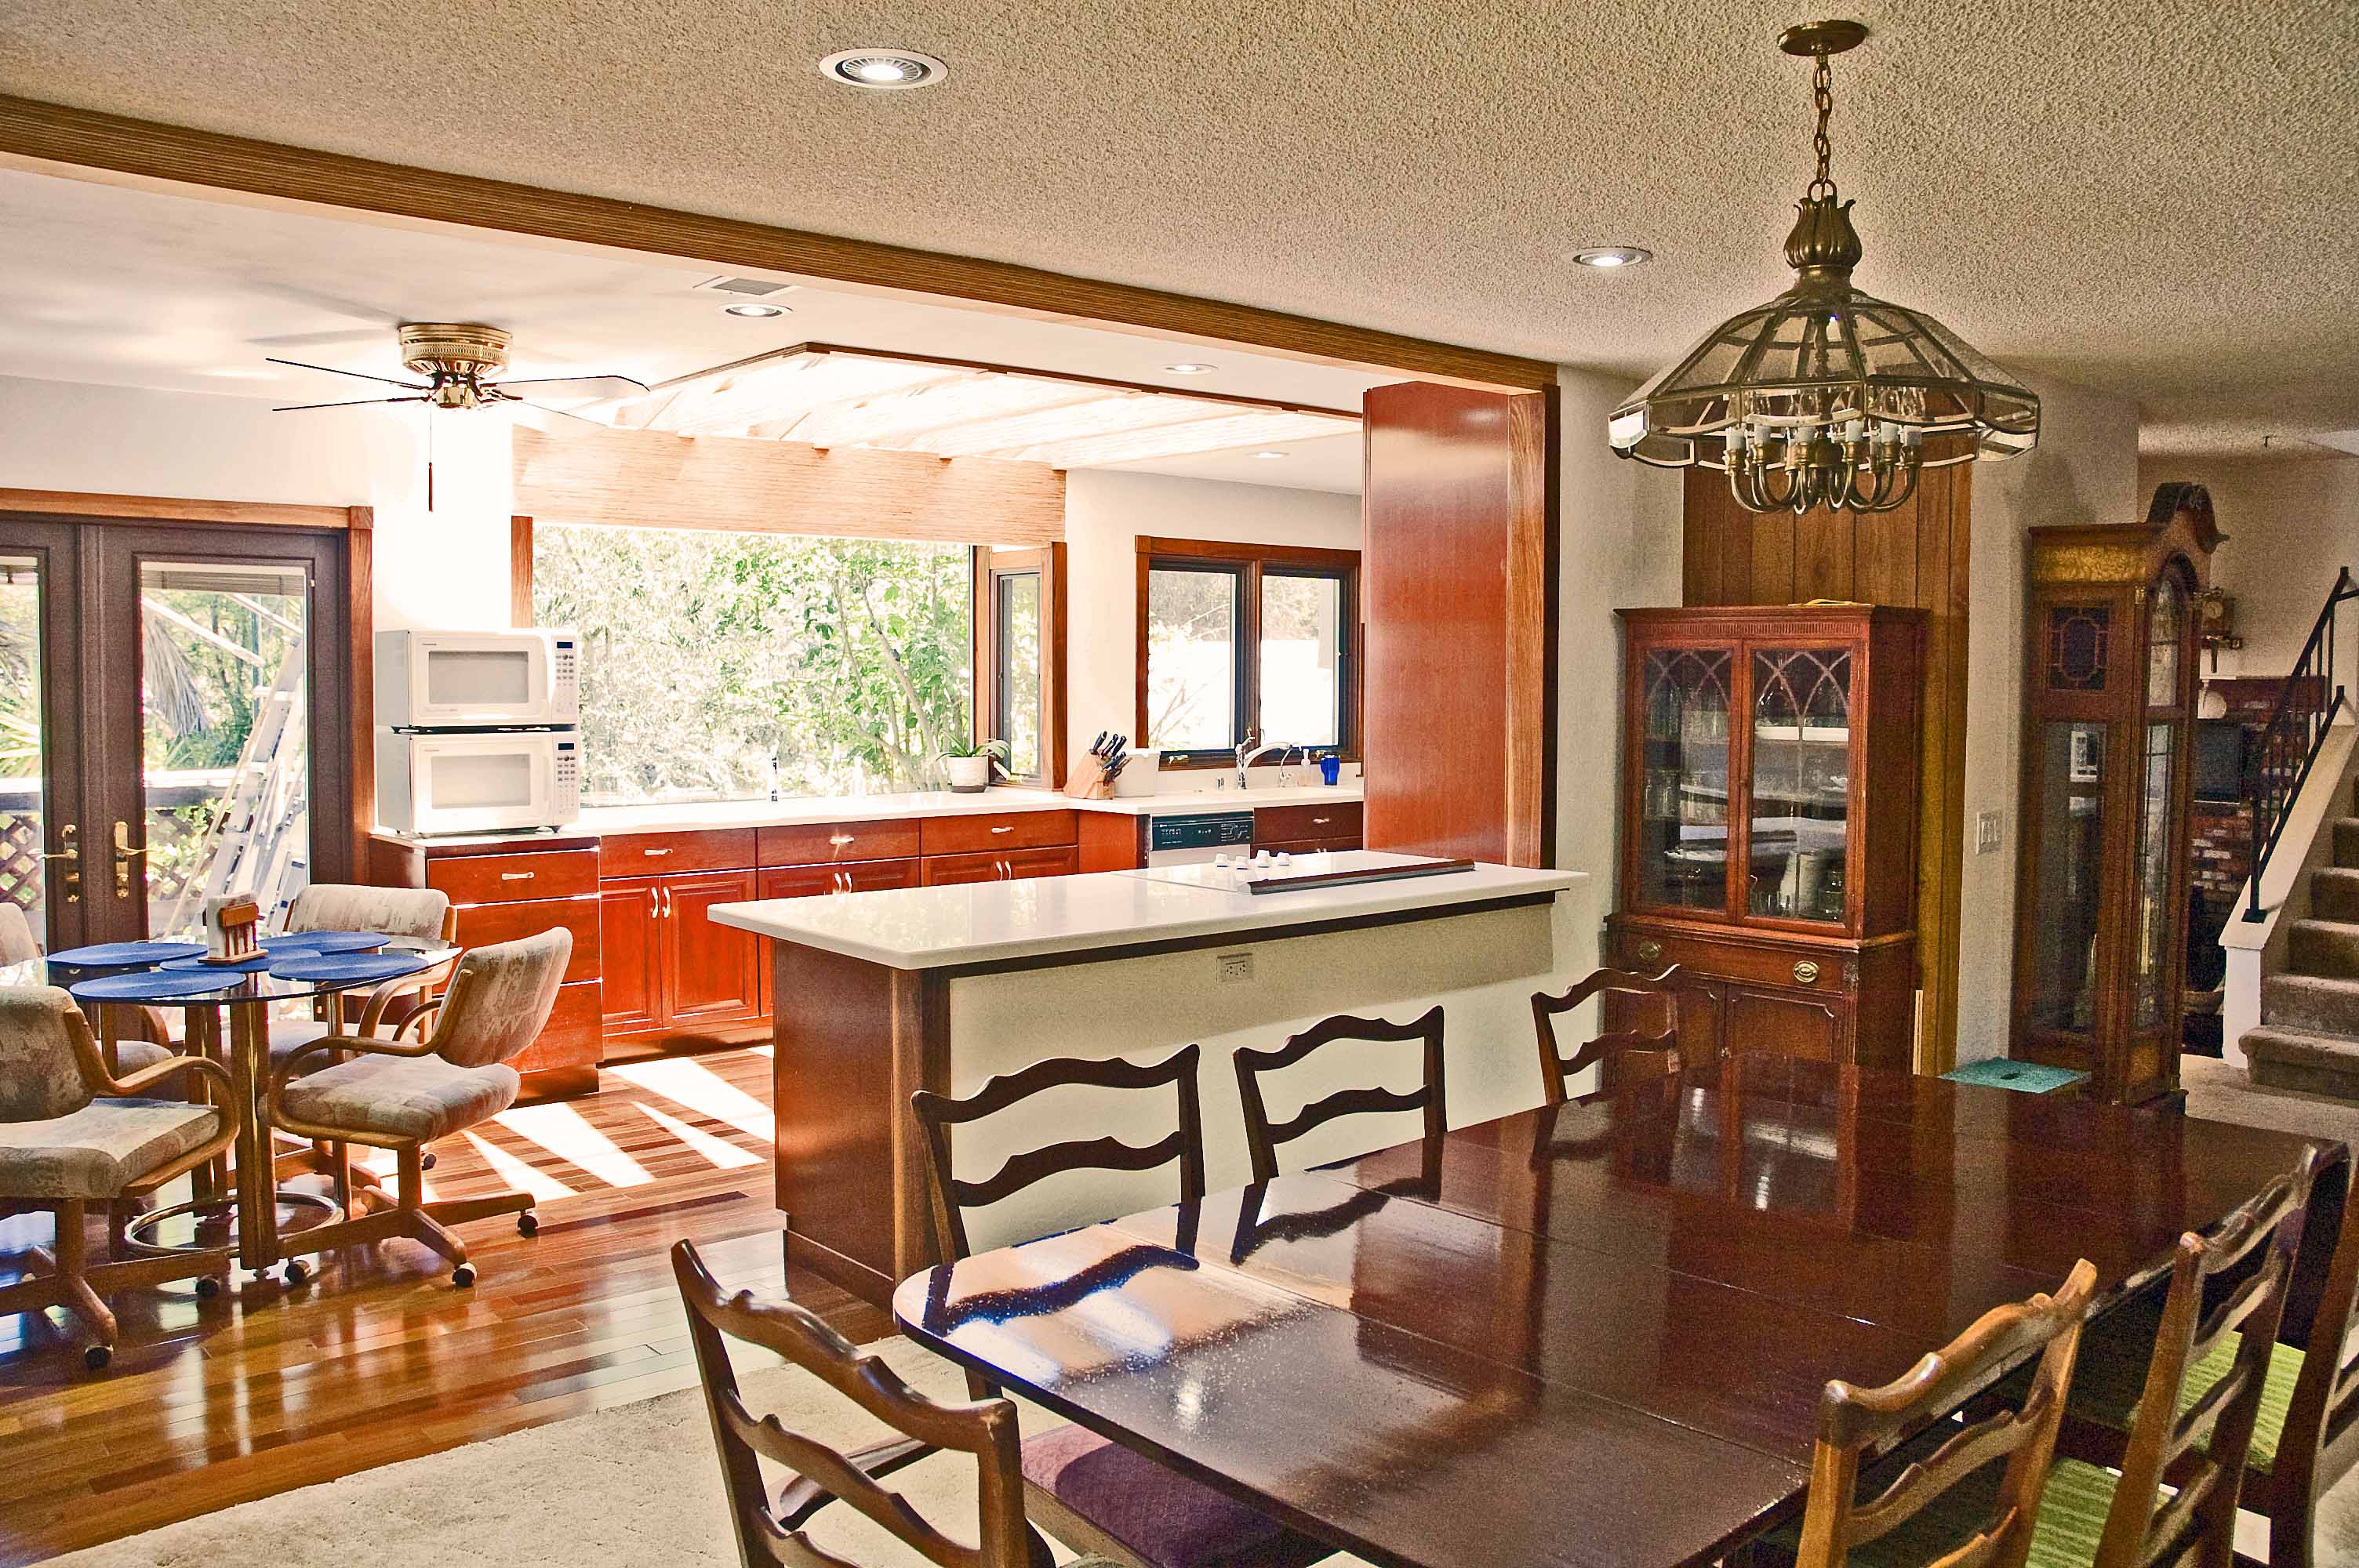
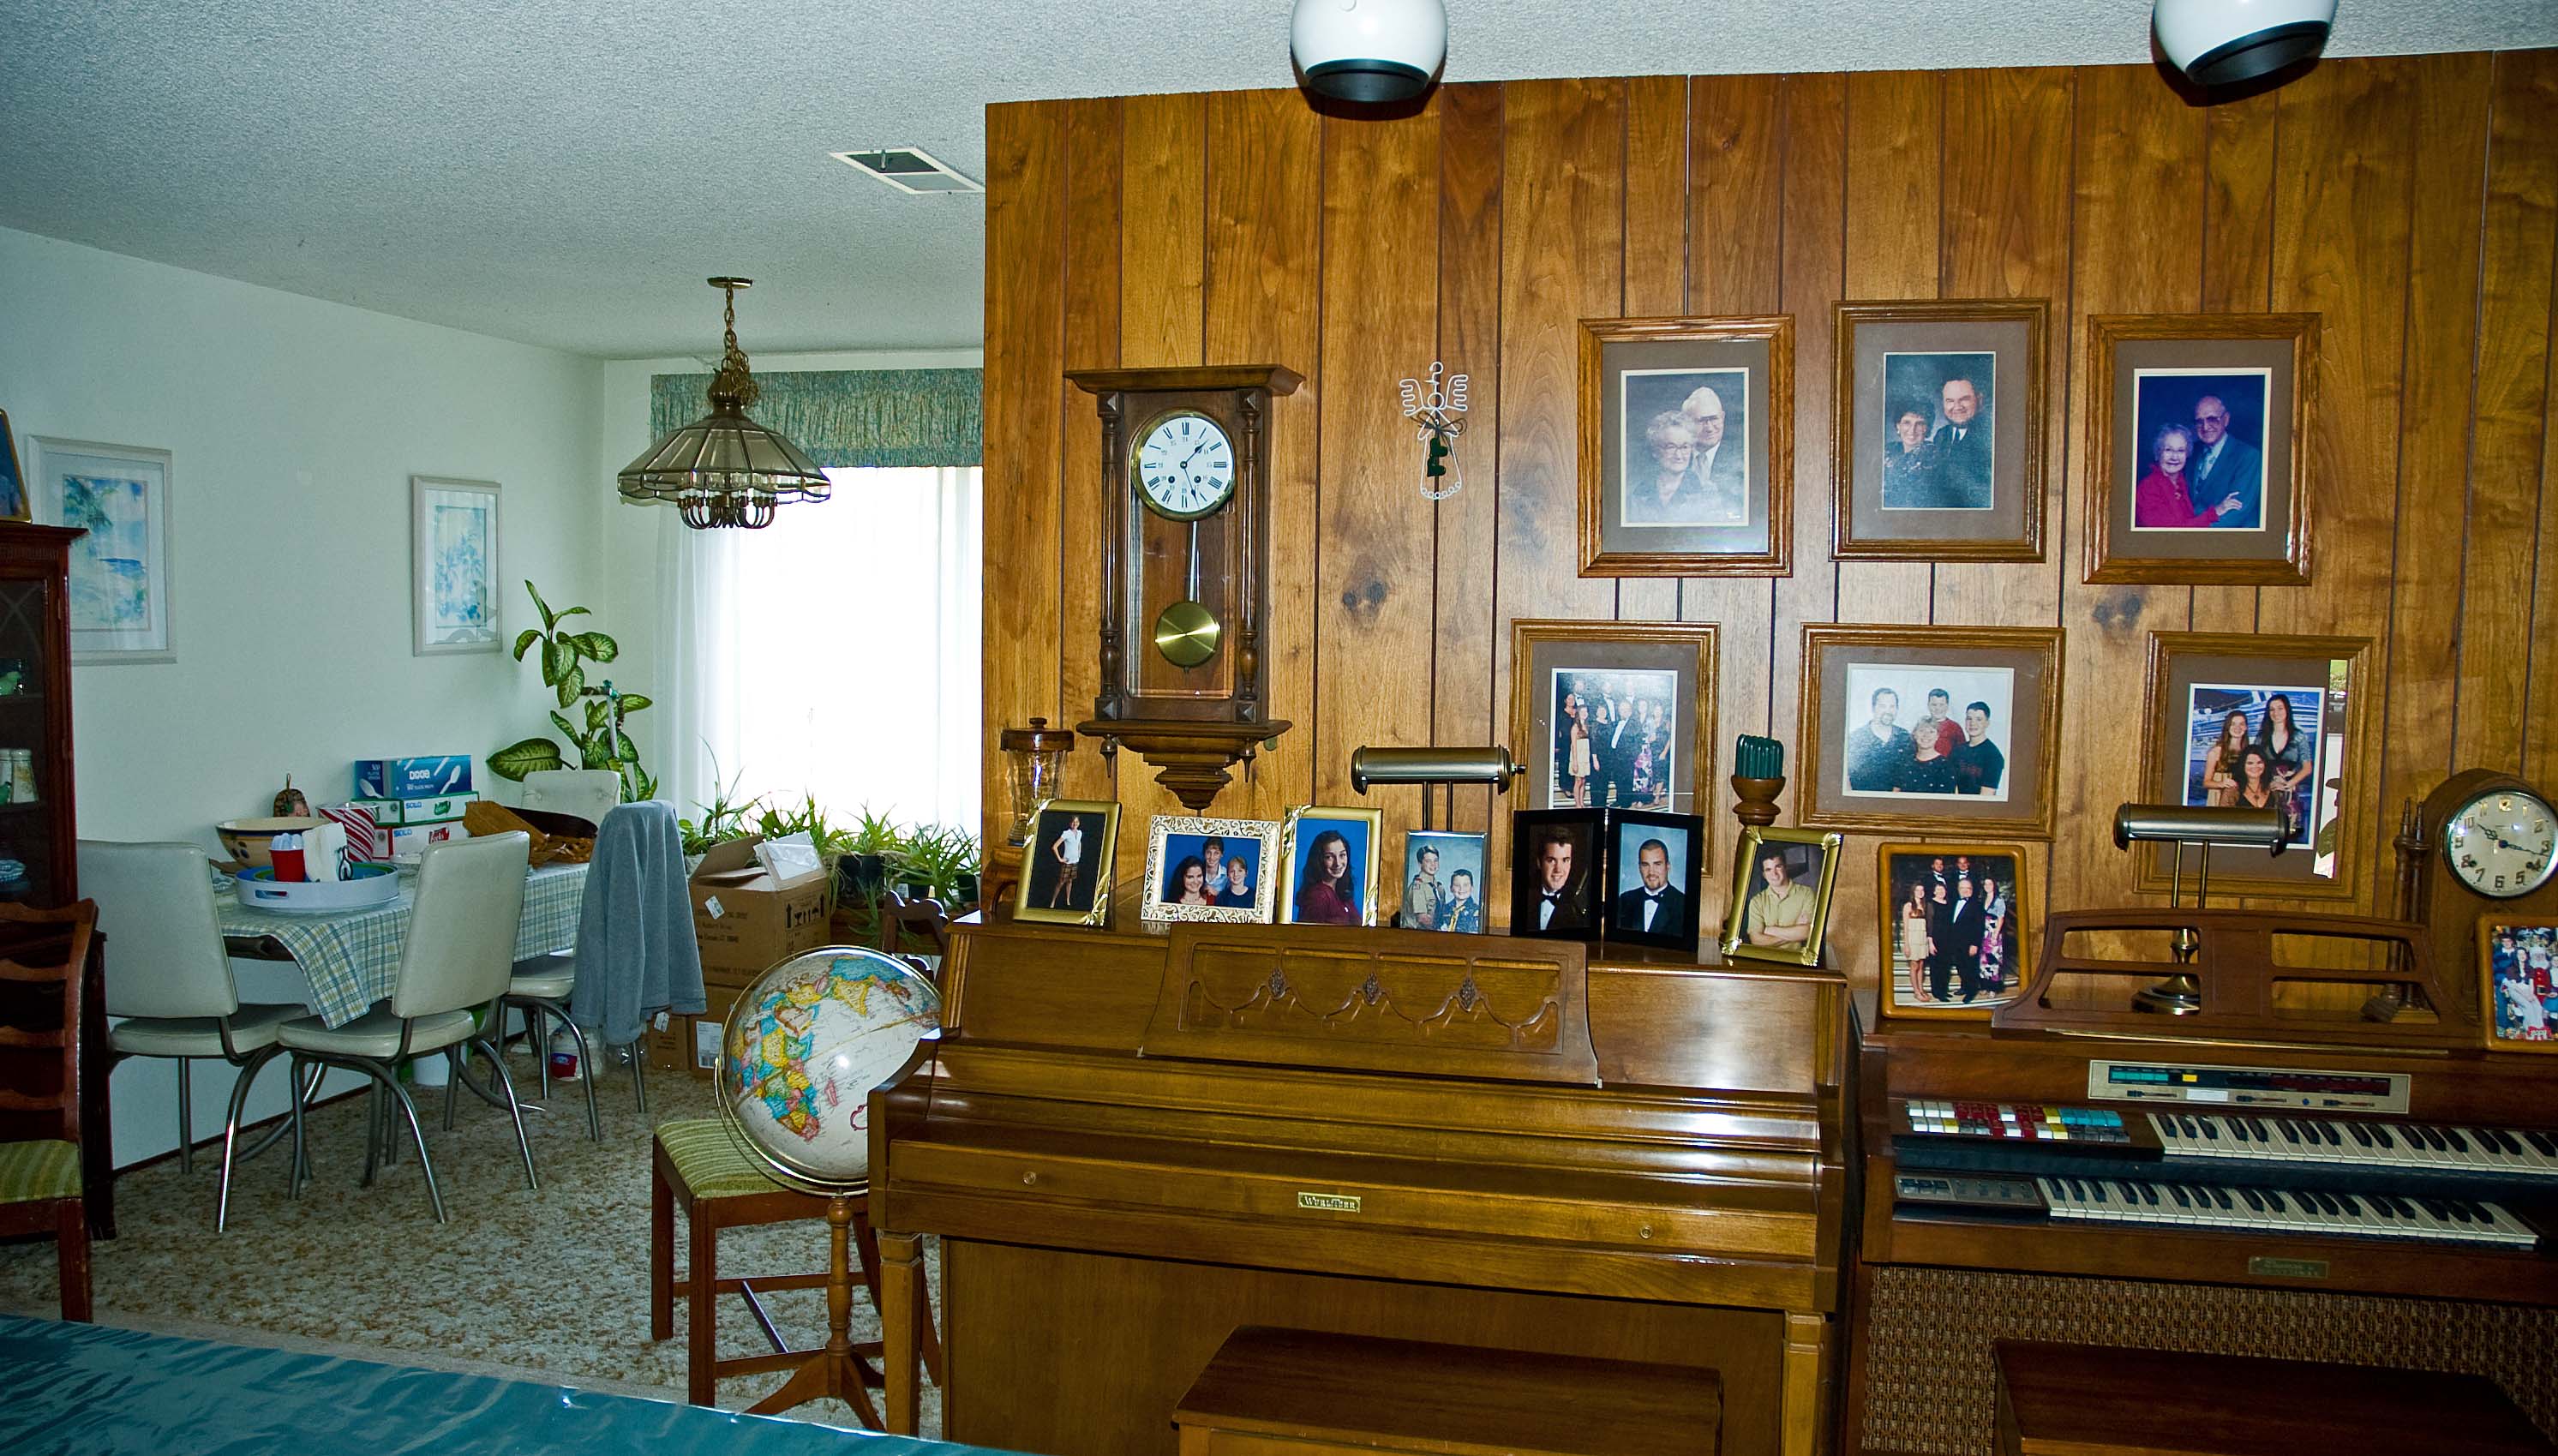 . .This wall divided the Kitchen from the Dining Room (originally Living Room) and was totally NON-load bearing, so we opened it up to allow the Kitchen crew to be involved with the dining guests. It also allows better light into the Dining Room with the skylight. The morning sun comes through the skylight and the large window. There was some electrical wiring in this wall but we were able to re-route it. We did not want to place a range hood over the cook top as it would block light coming into the Dining Room, so we used a pop-up vent fan that vents the smoke/heat/fumes down and under the floor, and out under the (future) rear deck. |
 |
.
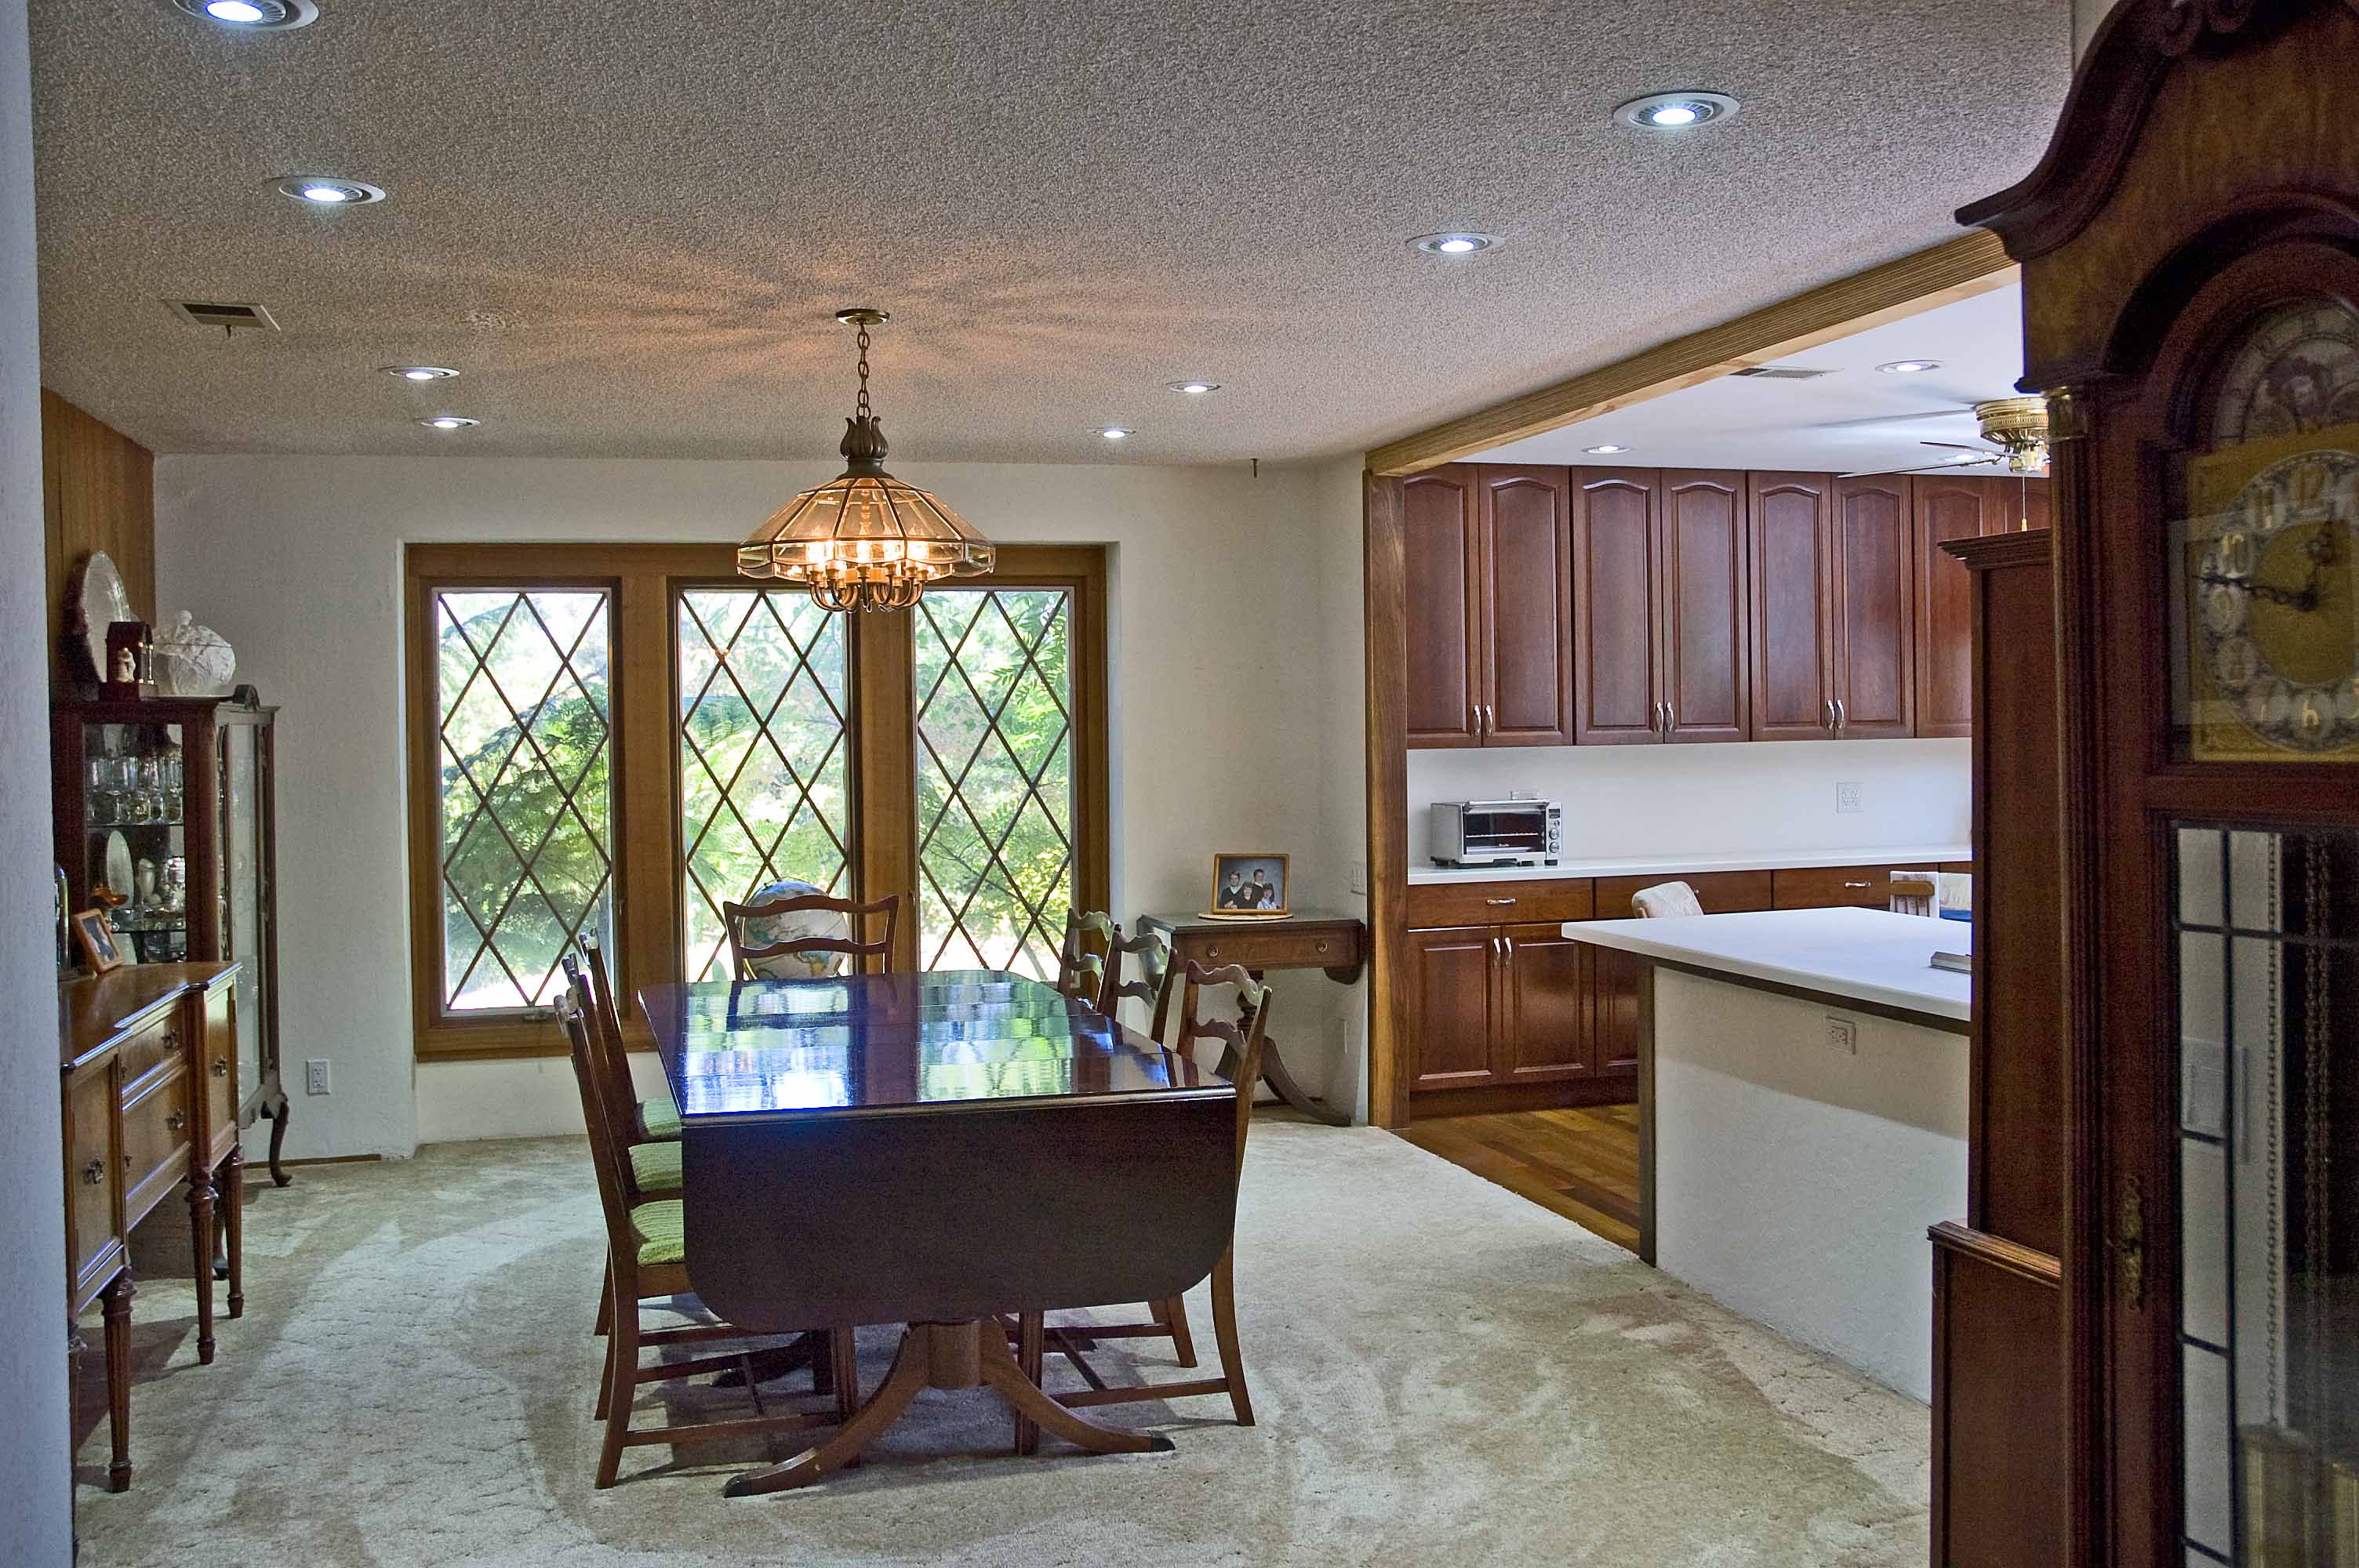
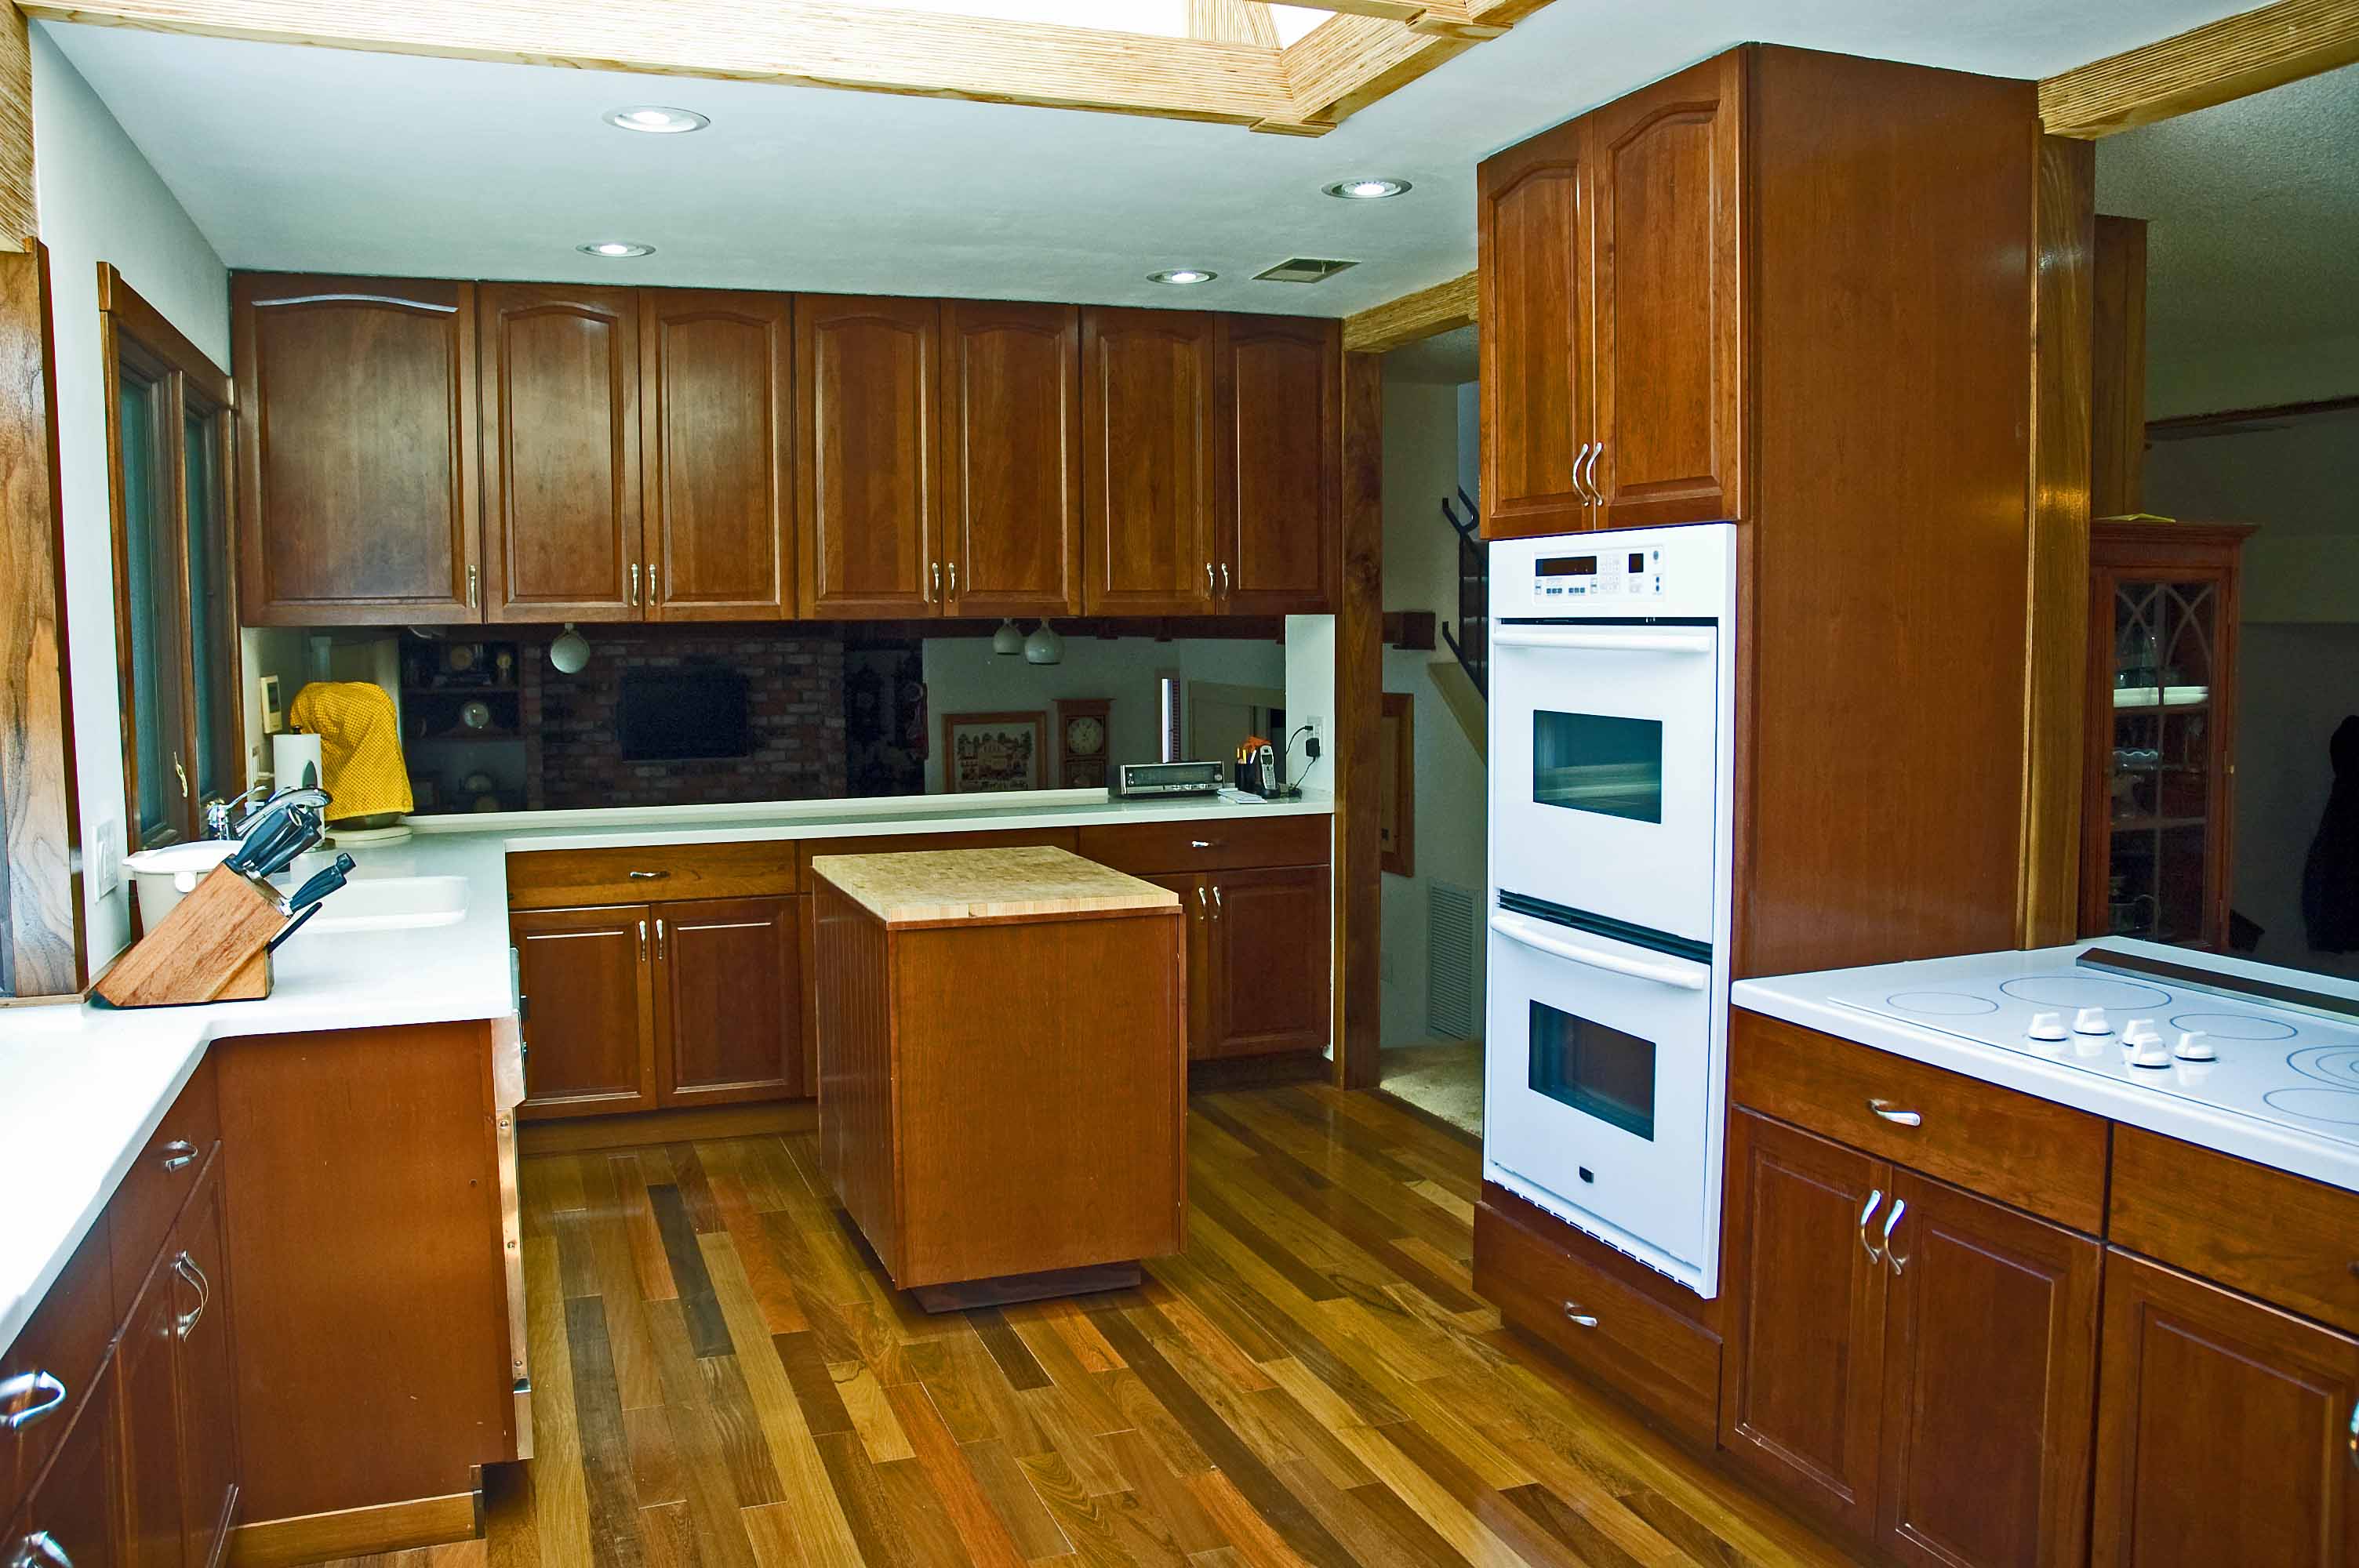
 . .The window was replaced with the French door from Pella, the wall with the small doorway was removed, and the picture wall was cut down to the cabinet/counter height. The chandelier was moved to the Dining Room and new 'can' lighting with LED bulbs were installed. None of these walls were load-bearing, and the 'beam' running overhead is for decoration only, to separate the smooth ceiling from the acoustical ceiling. The 'laminated beams' in the skylight are covering over the existing trusses which could not be removed. The flooring is 3/4" solid Brazilian Walnut from Lumber Liquidators. We made the decision to 'allow' a pro put that down and are we ever glad. It was not that much money to do that and it took him a lot of time and effort. The wood was extremely hard and he had the 'big tools'. He was the only work that we contracted out for the whole project. Rosalee said she never knew when she woke up if the guy next to her was the demolition man, electrician, plumber, carpenter, roofer, drywall expert, painter... etc... |
 |
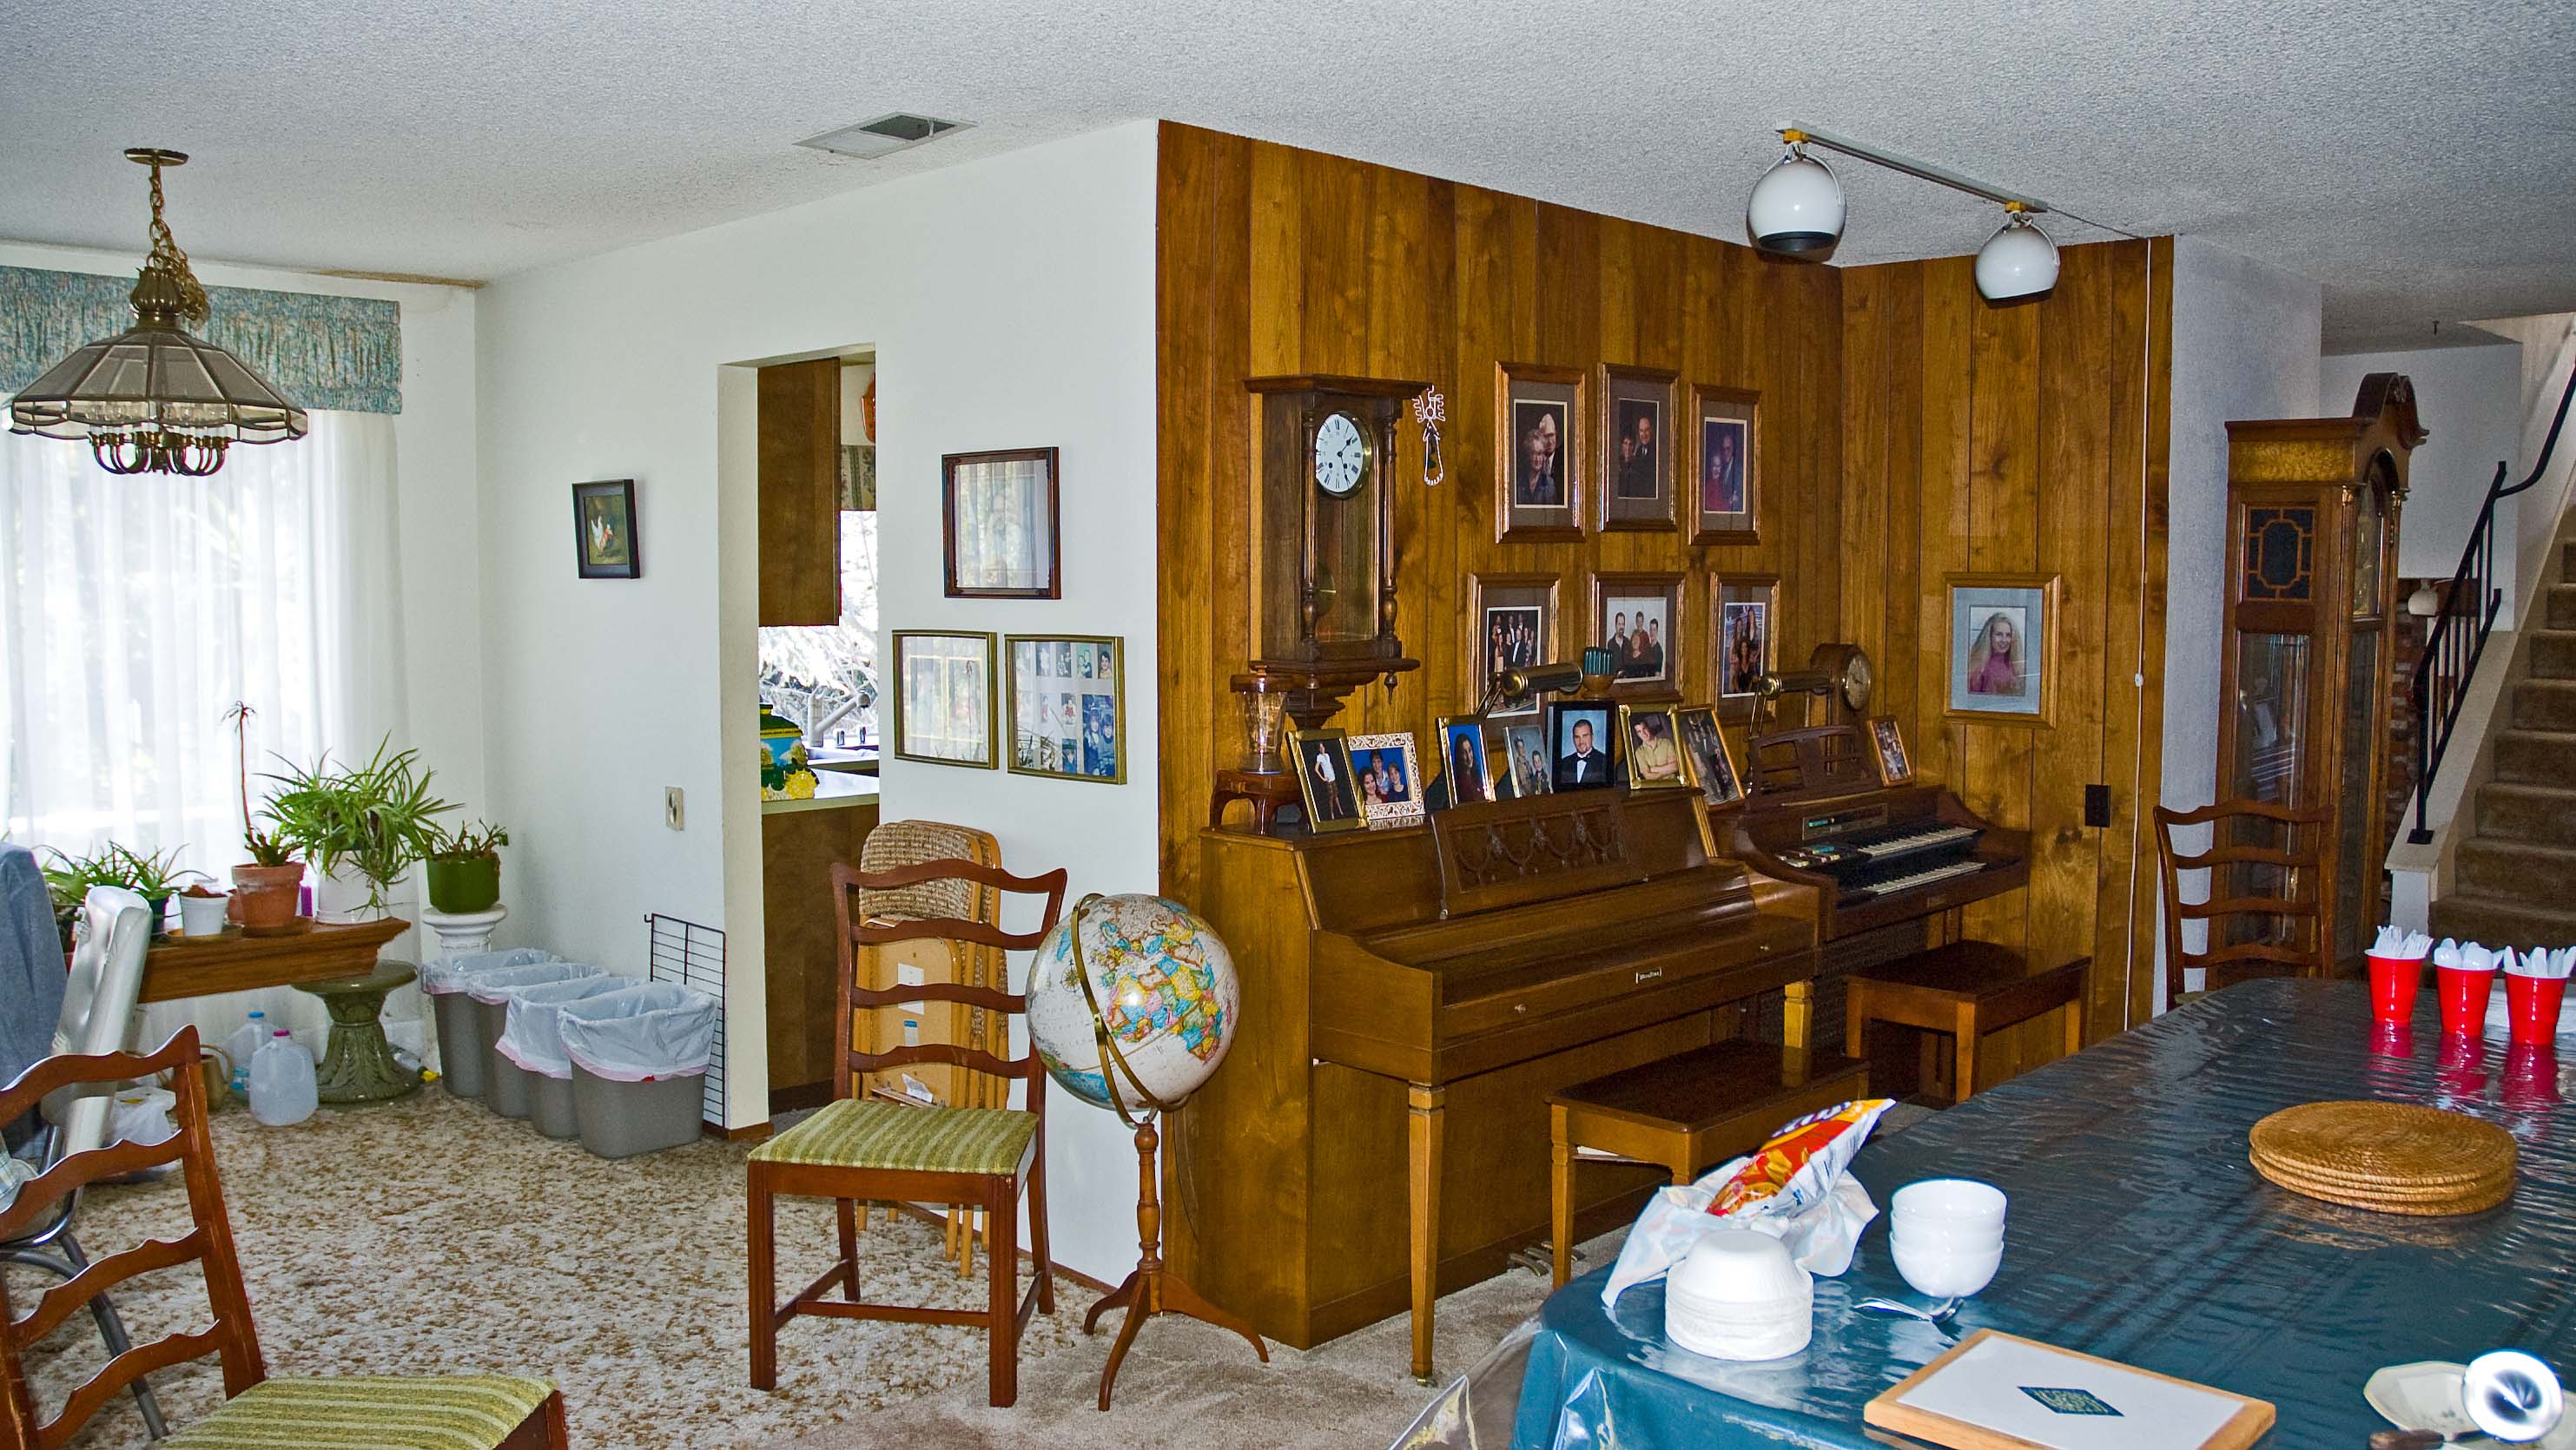
 . .This wall was also a non-load bearing wall. We removed it to extend the Kitchen into what originally was the Dining Room. |
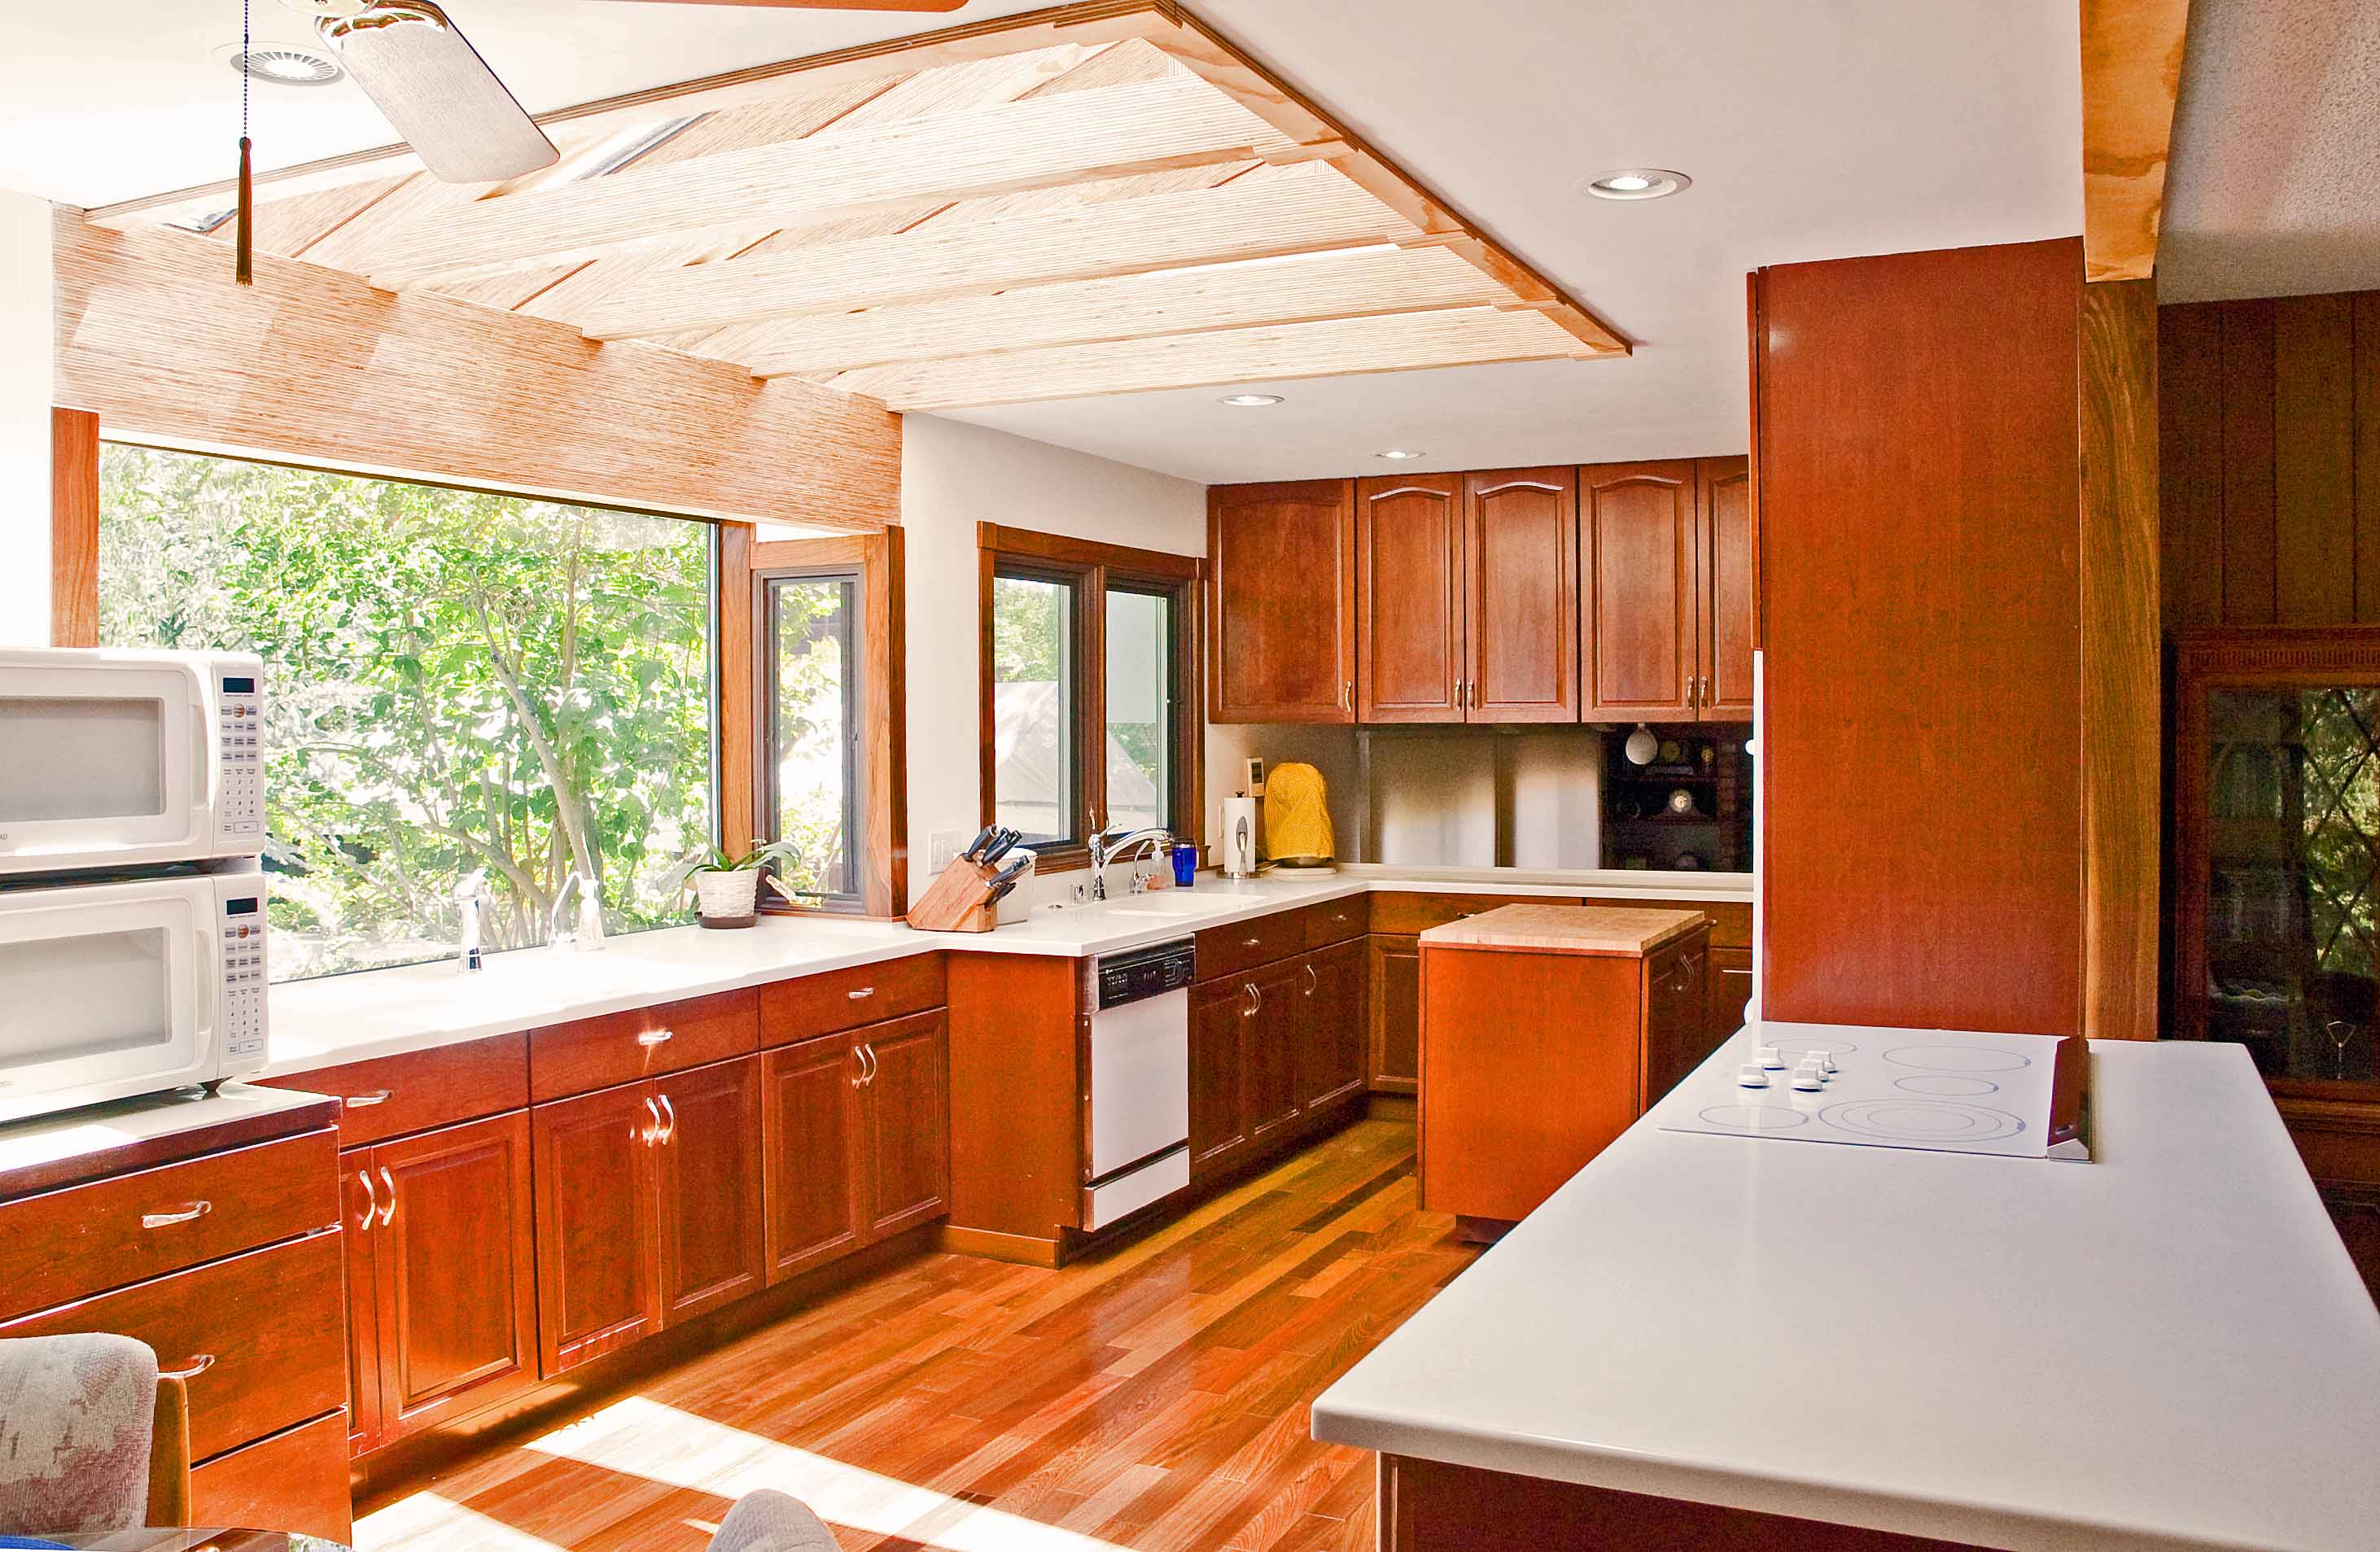 |
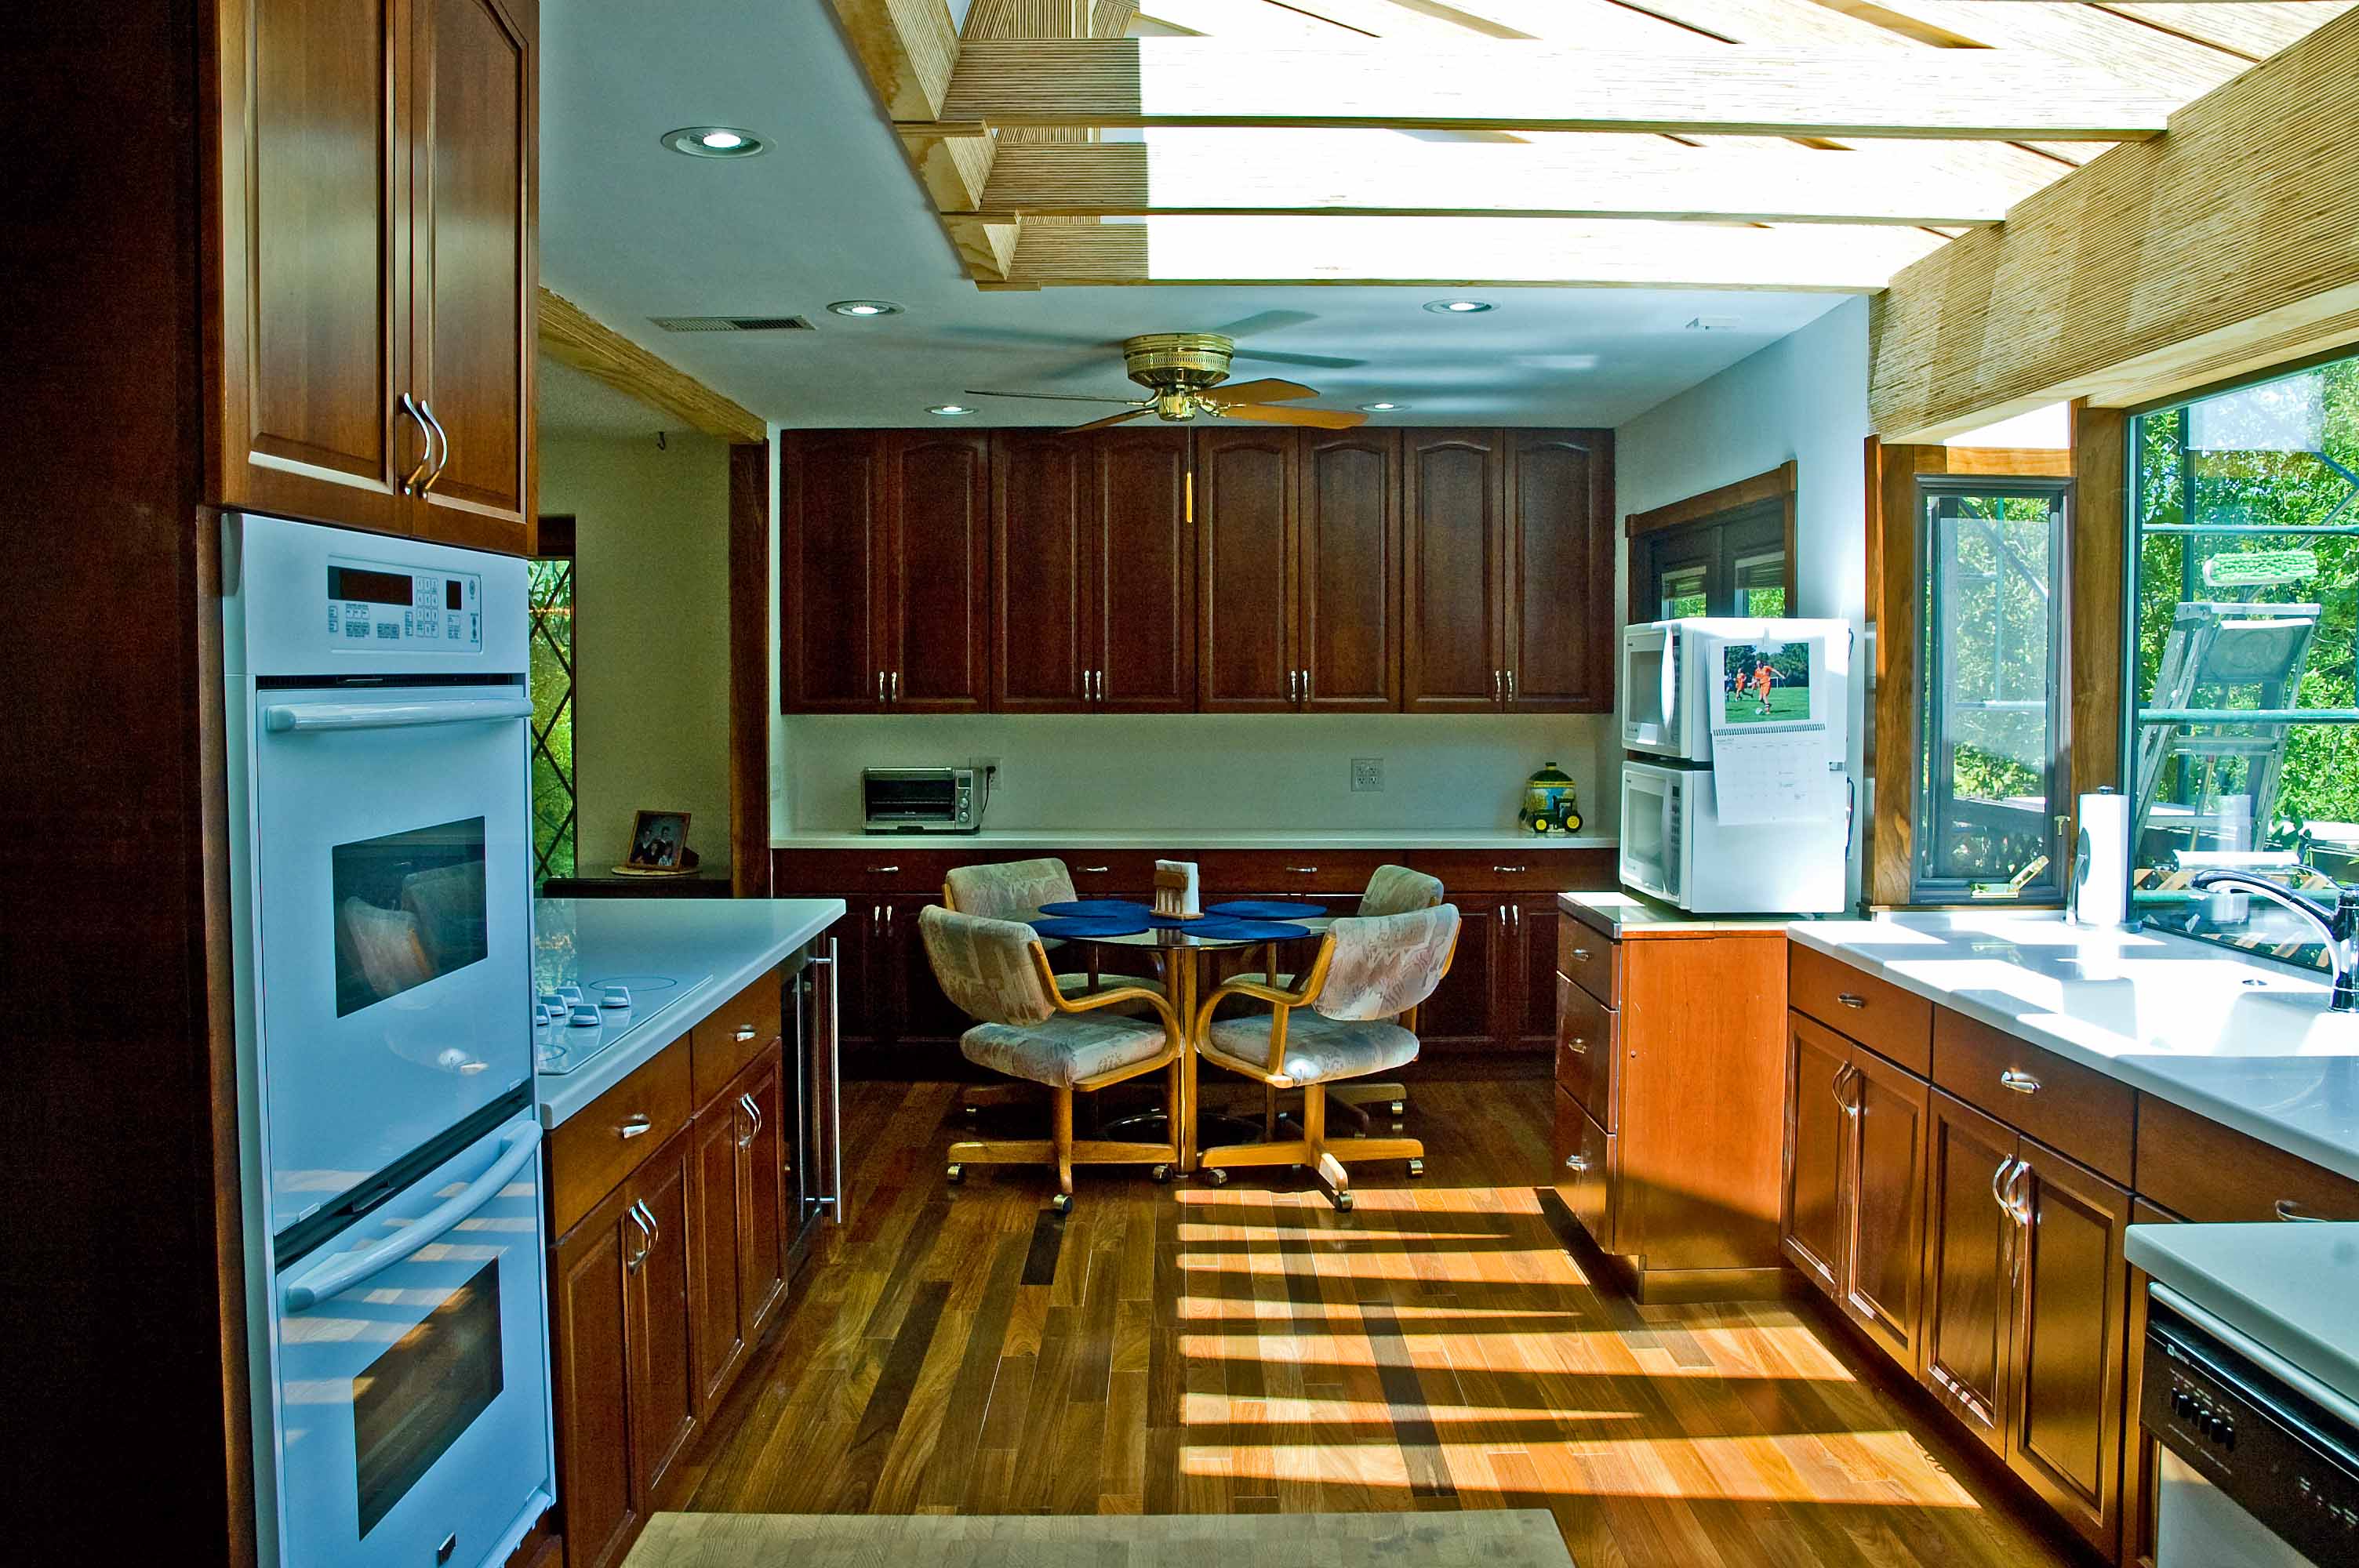
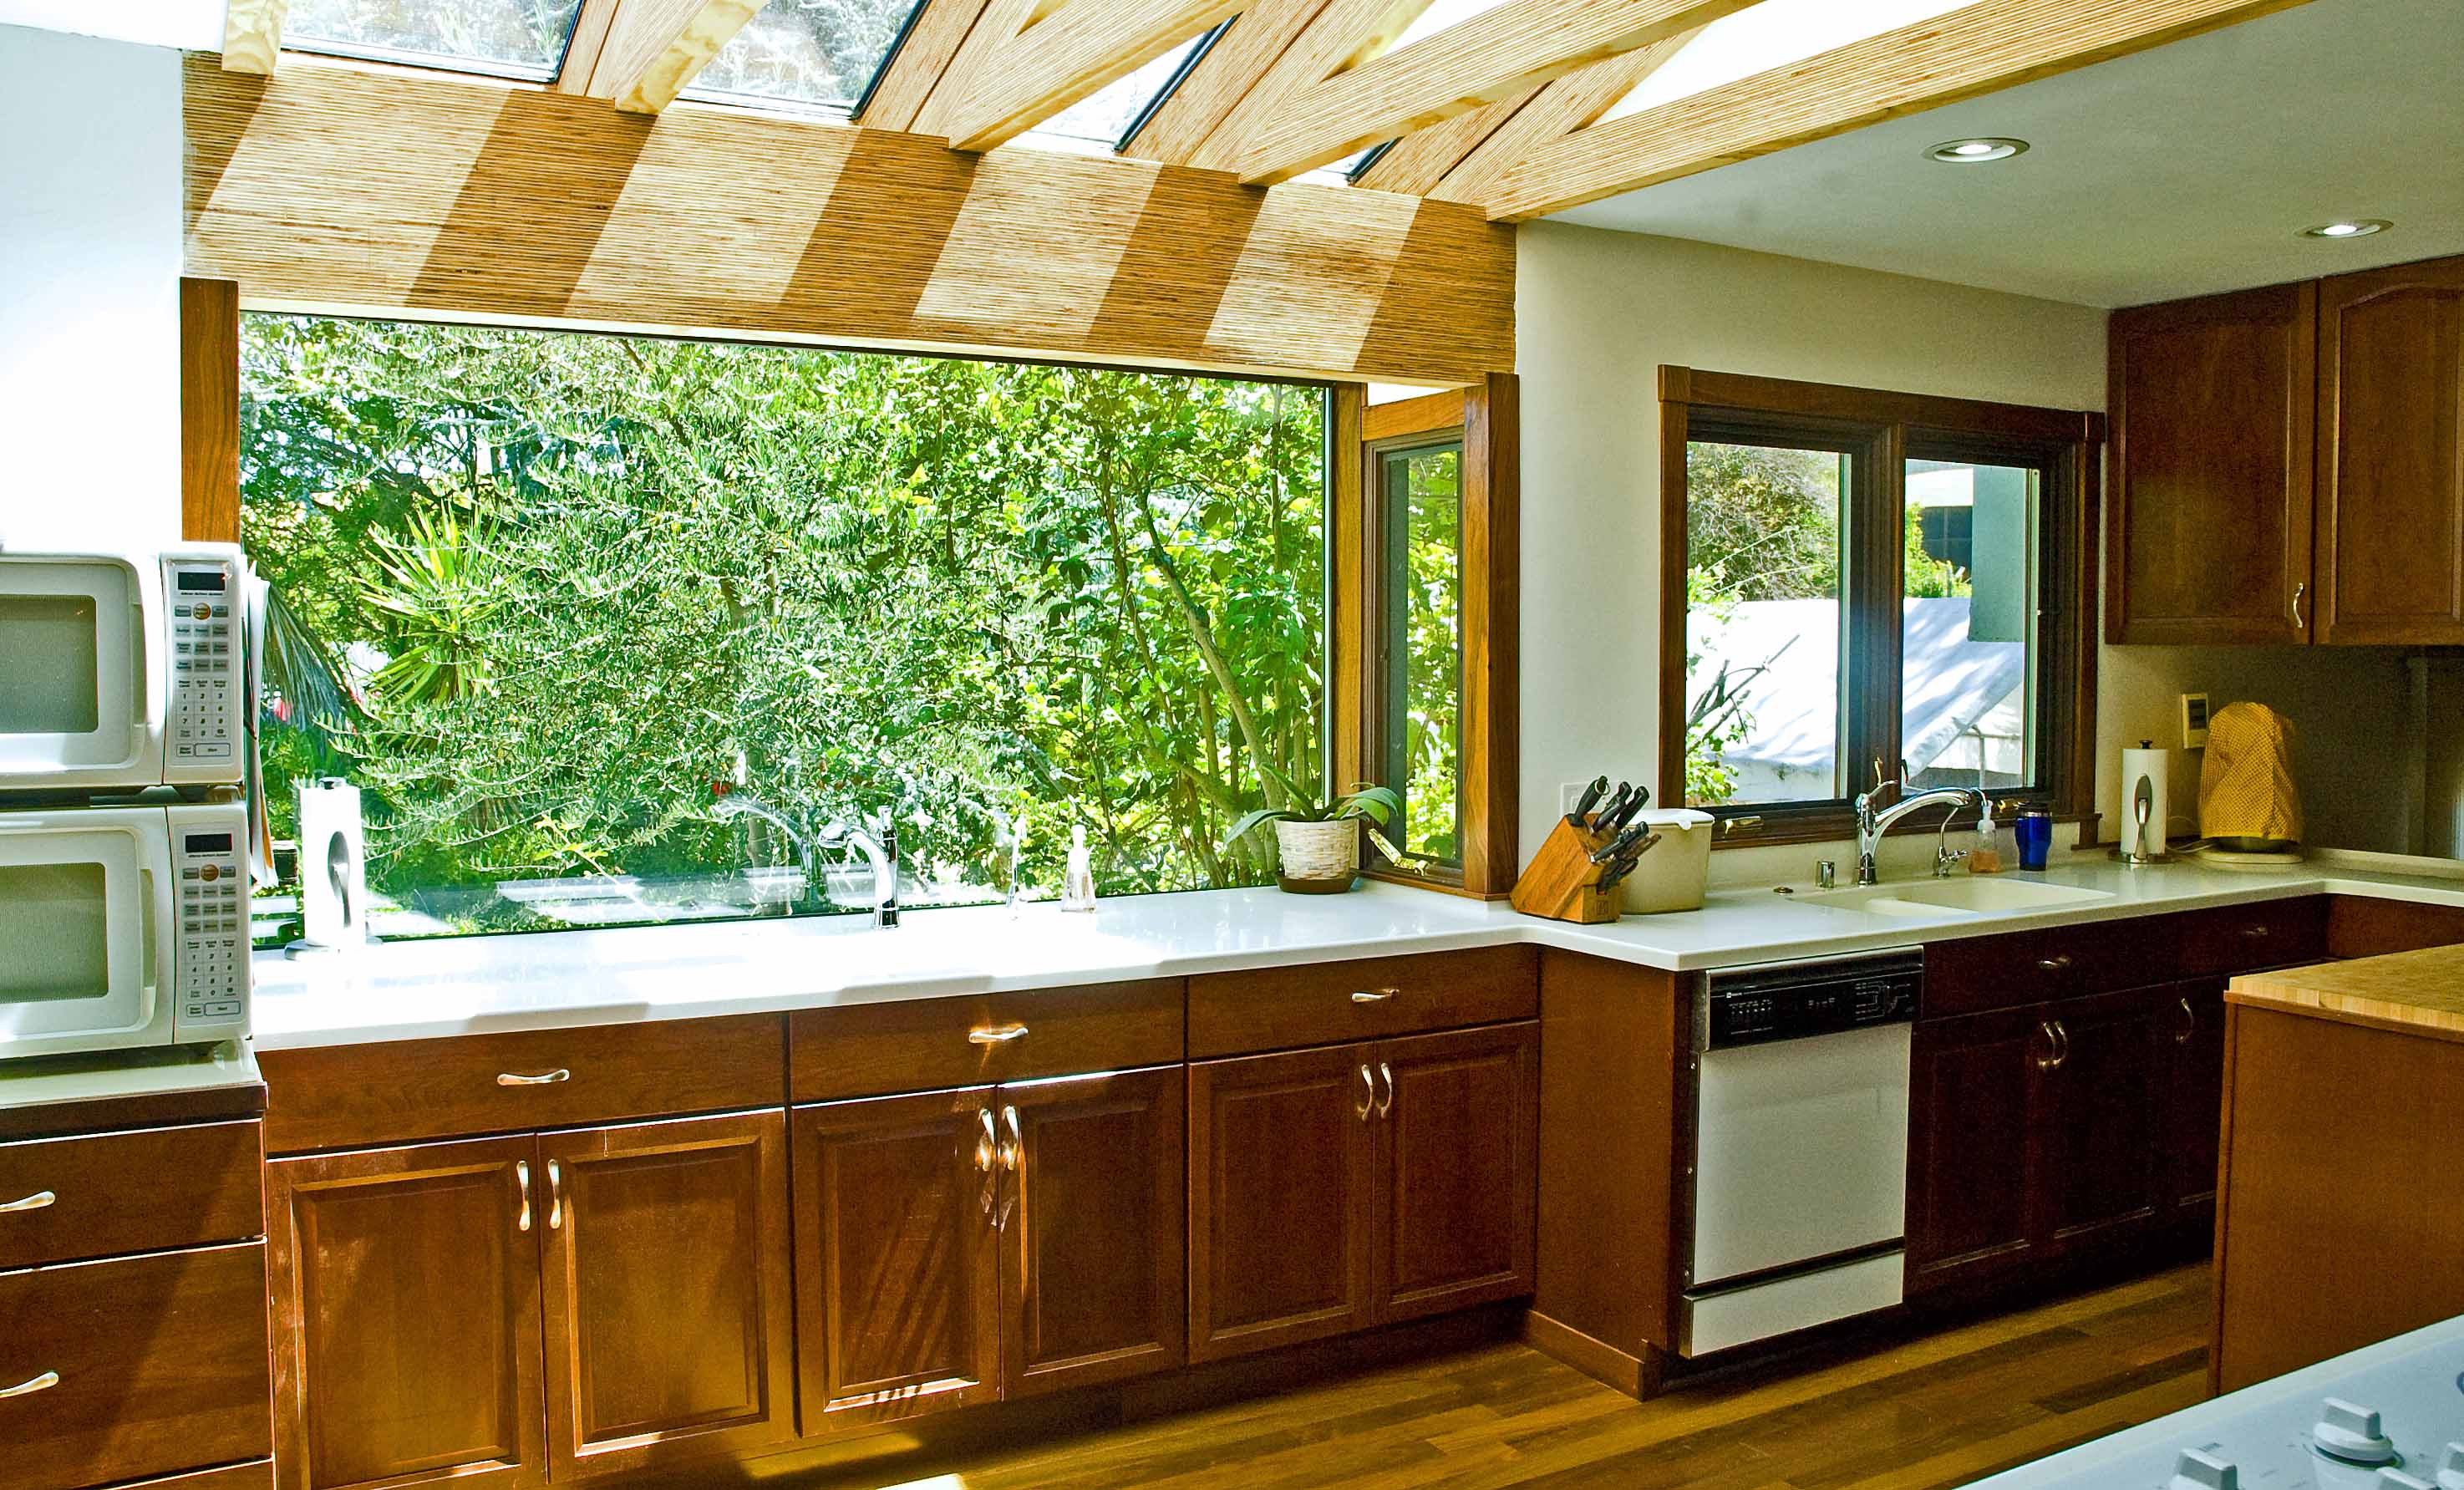
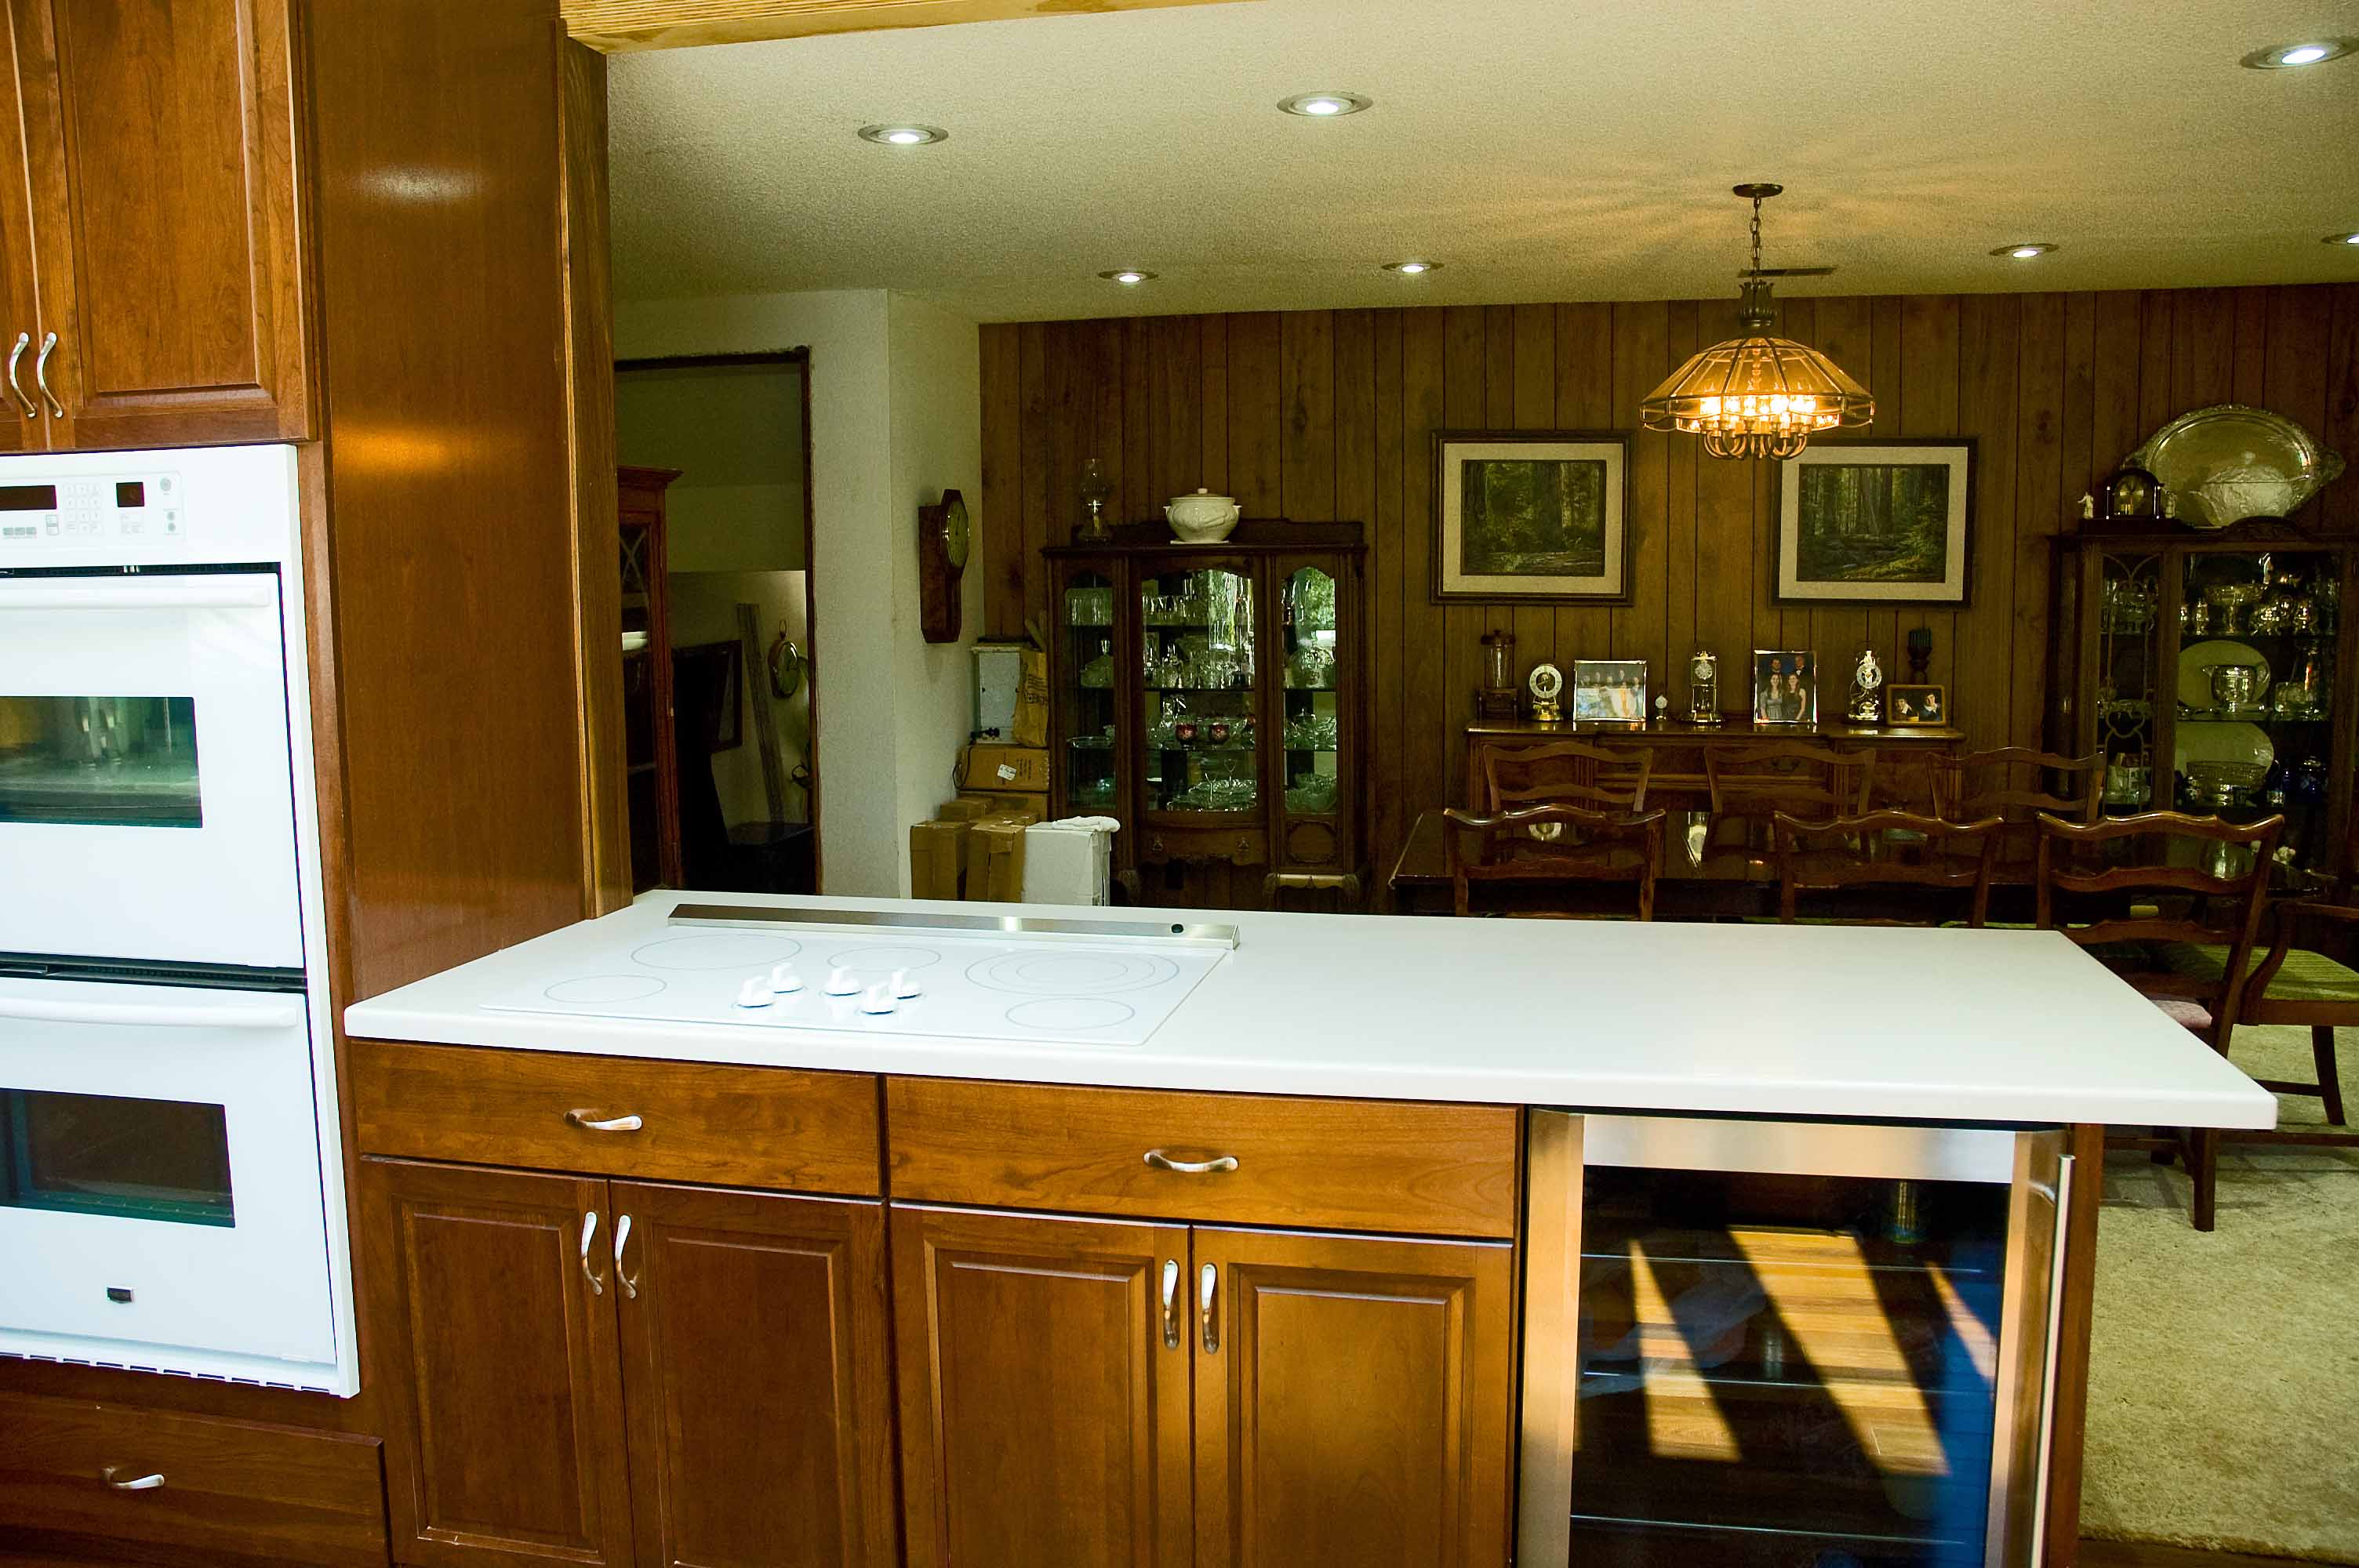
 . .Eight feet of the wall behind the sink was pushed out on a cantilevered floor section. That allowed more floor space between the sink and the cook top located to the right, out of the picture. That 'glue-lam' beam over the sink is actually the original 4 X 12 header that existed in the wall, but it is covered with strips of wood like a veneer, for appearance only. The two casement windows on either side of the closer sink open for ventilation. We have had the two microwave ovens for quite a while, so that we could warm up more food plates when "the gang" was visiting for several days over Thanksgiving and Christmas holidays. It's all about food, right? The only problem was that the two ovens drew too much power when used at the same time and they would blow the circuit breaker. In the new installation, they EACH have their own dedicated 20-Amp circuit. Now... let's eat! |
 |
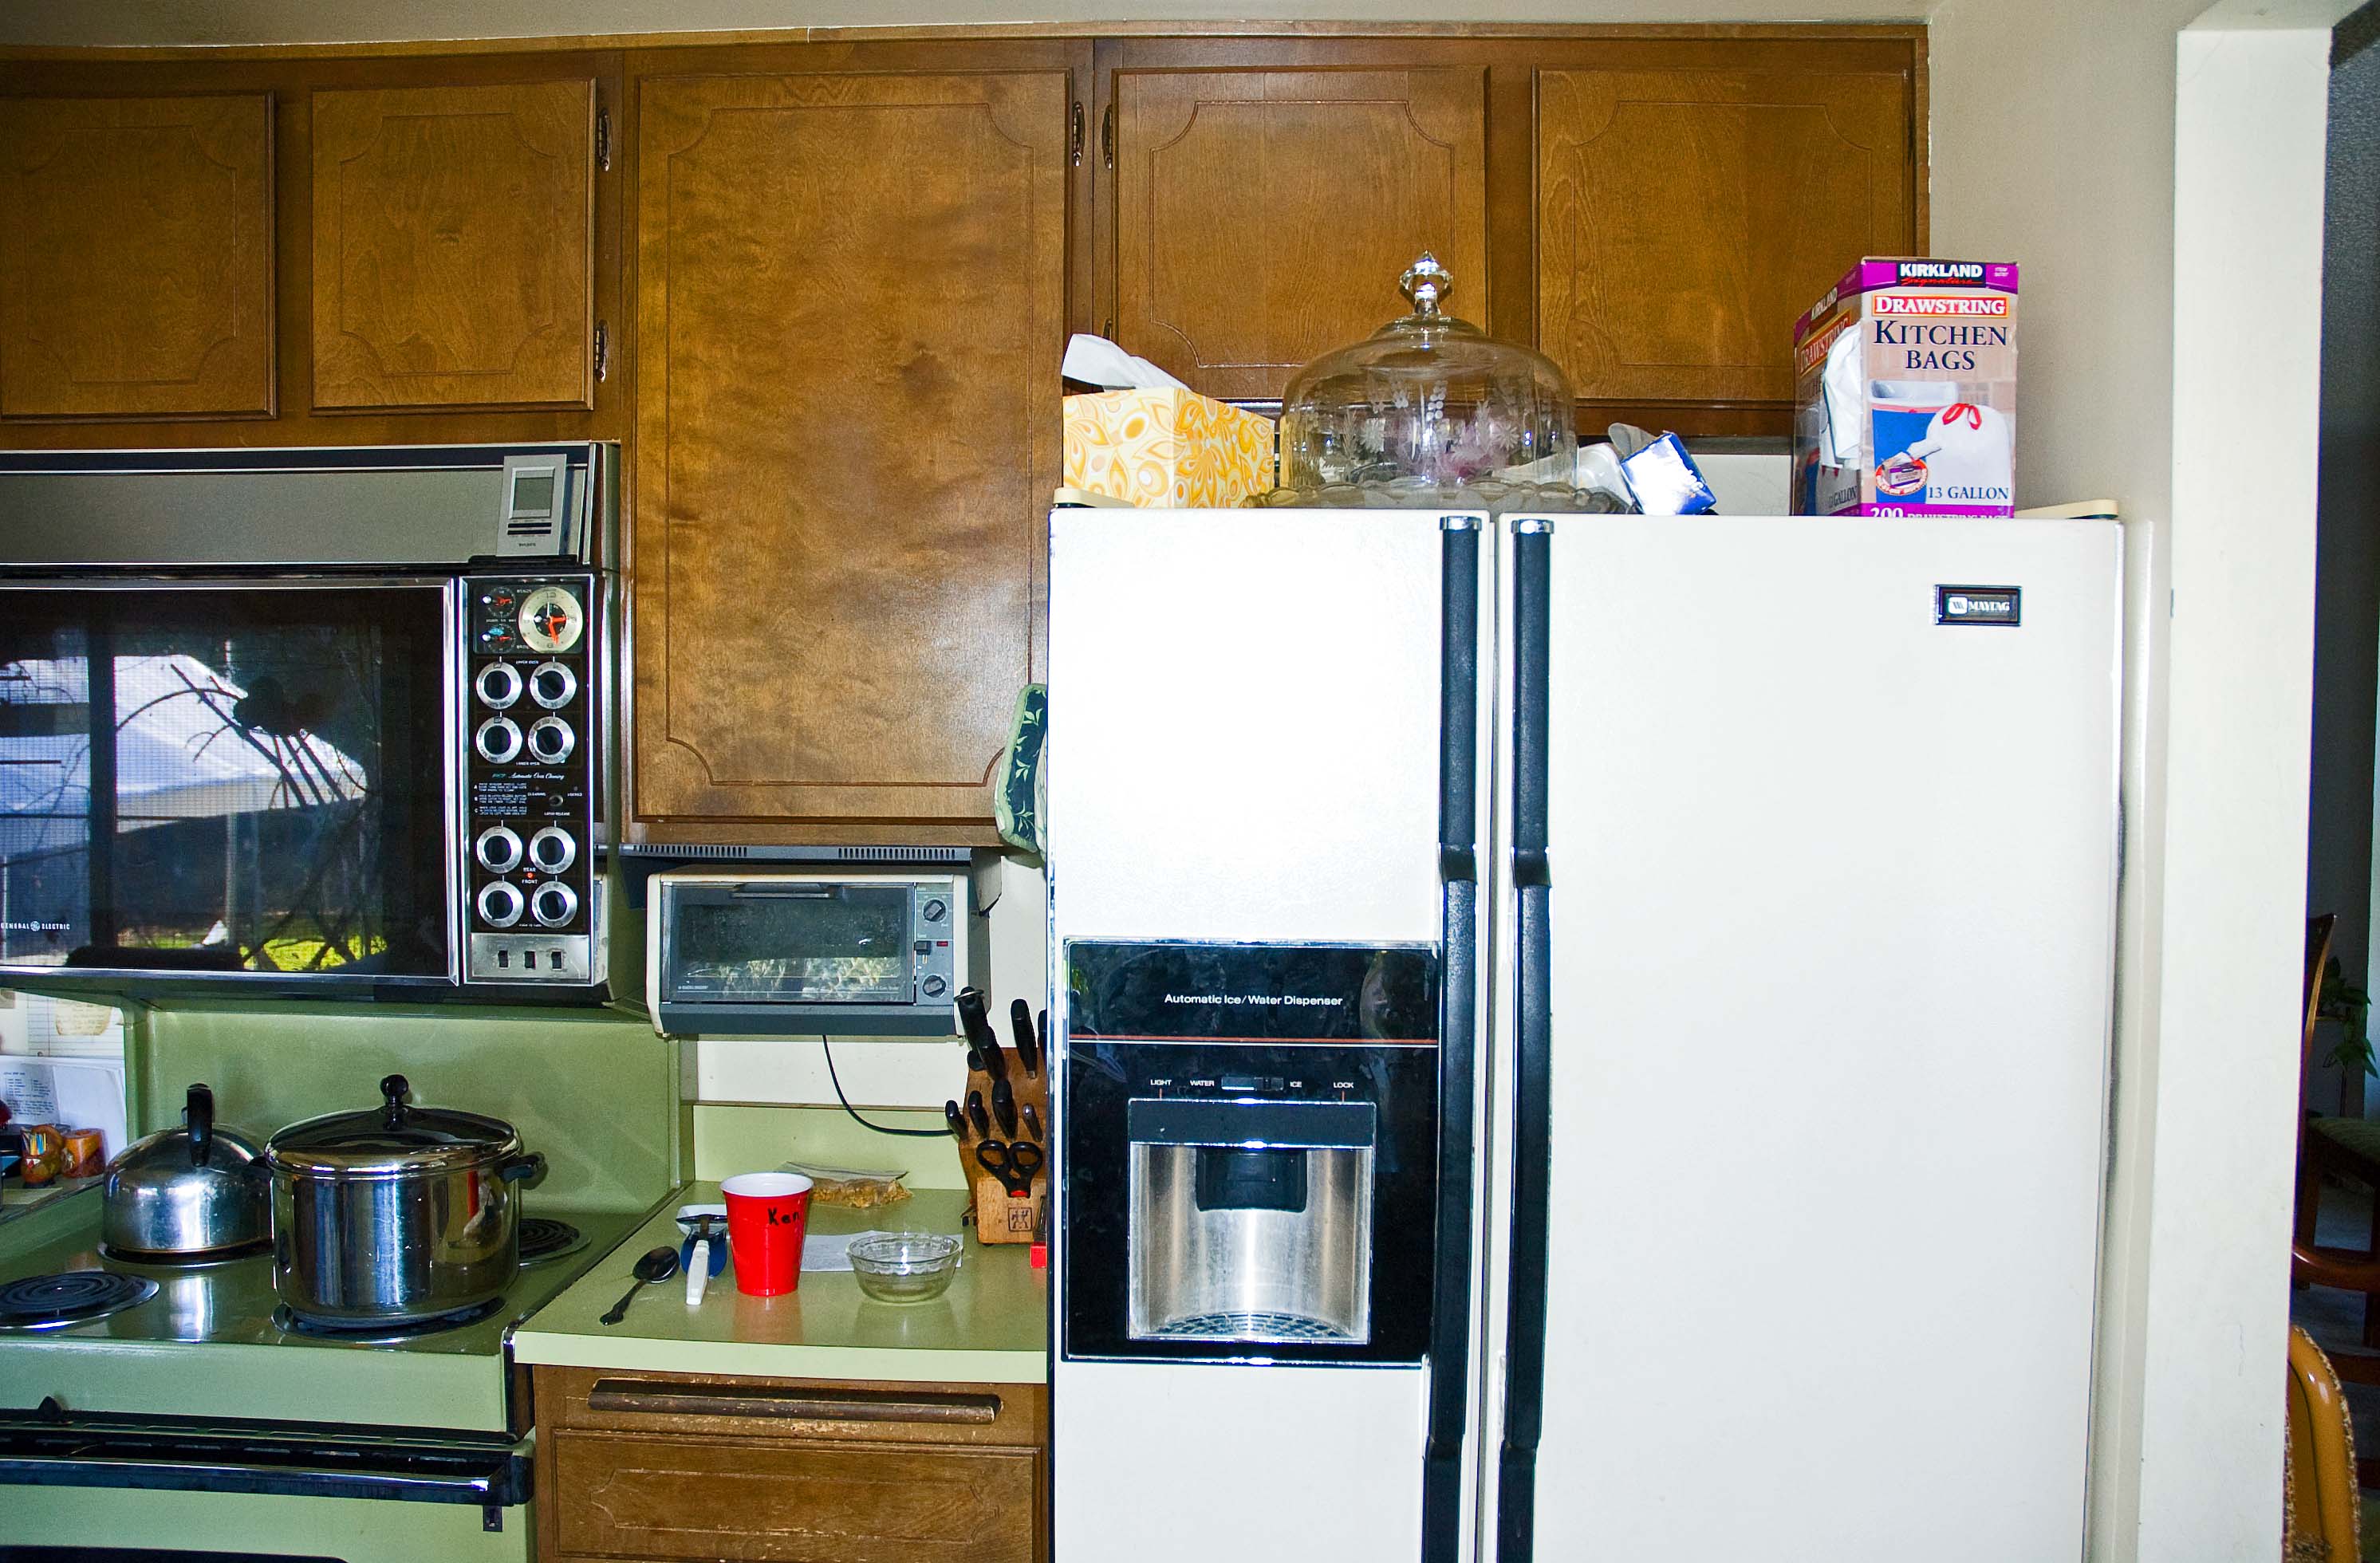 . .The old stove went to Old Stove Heaven, as well as the small toaster oven next to it. The refrigerator was moved to the left to where the pantry was located. This is the center wall that was removed. The small refrigerator under the counter is for keeping salads and dessert trays that are made up before 'the party' but takes up too much room in the regular refrigerator. The countertop is Corian, "Linen" color. The cabinets are the all hardwood option KitchenCraft in Cherry, from Lowe's. |
 |
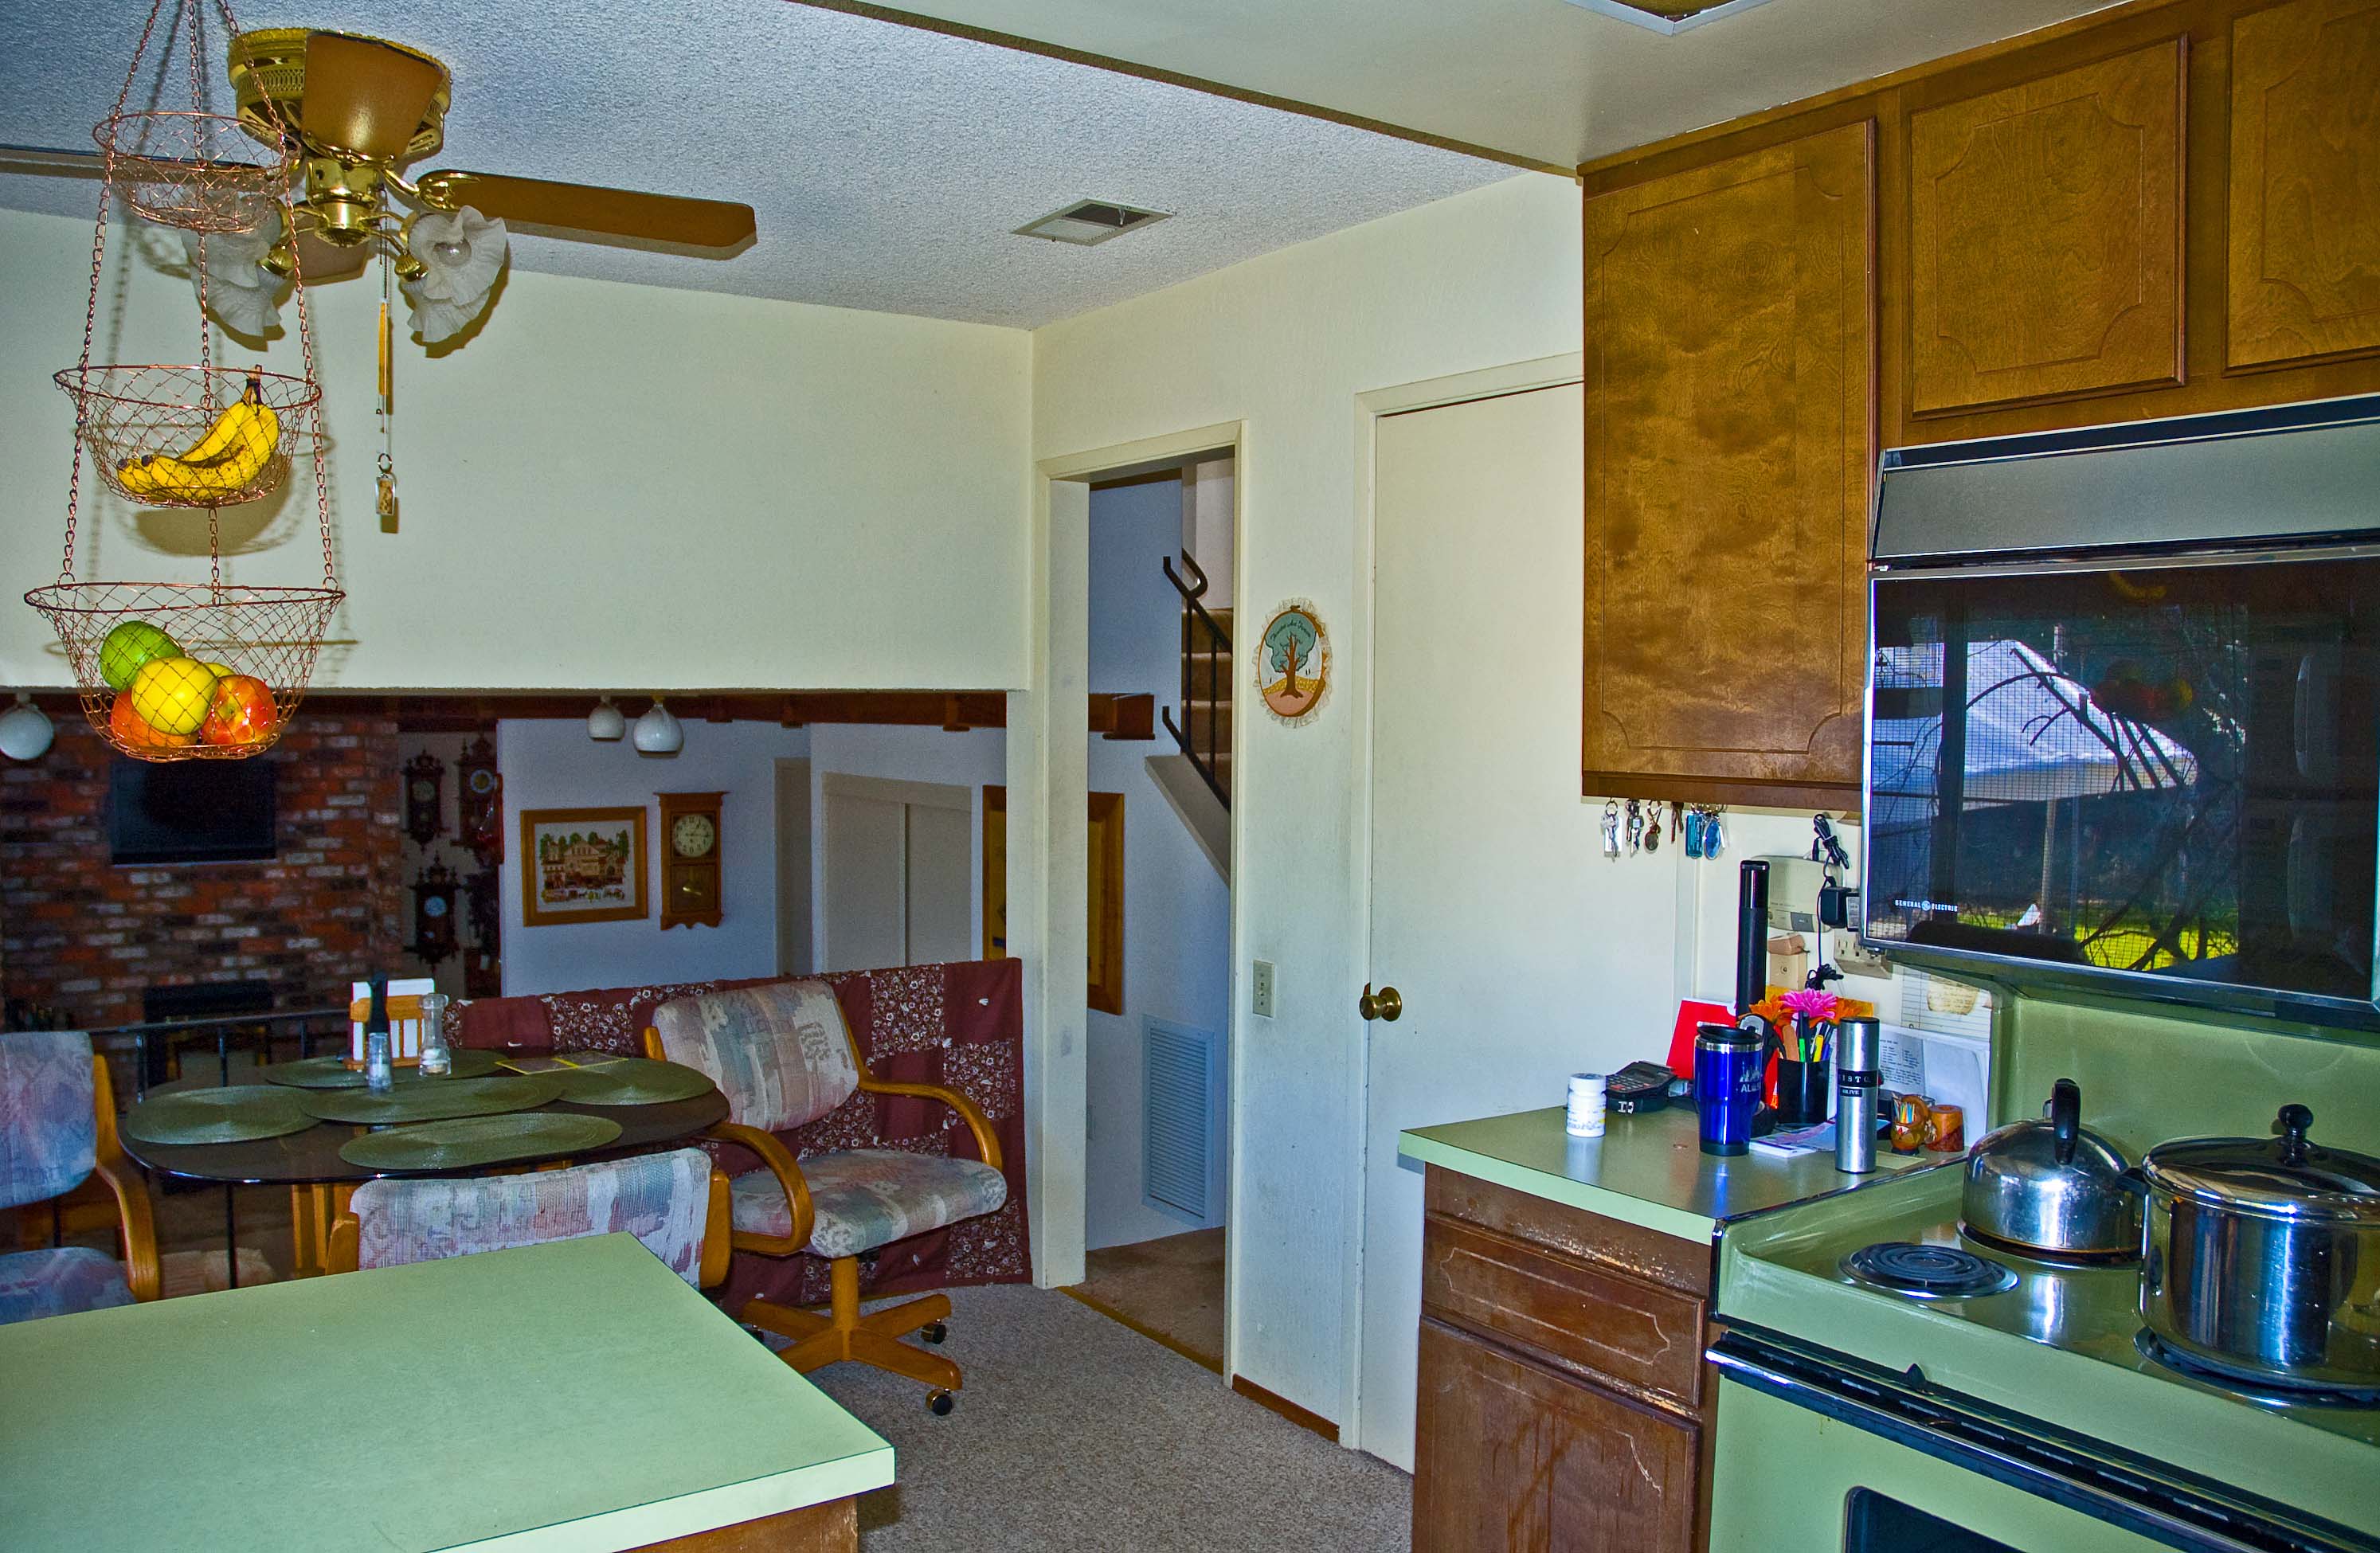 . .That closed door to the left of the stove is the pantry. That was opened up and the refrigerator went into that spot. The food that was stored in the pantry is now in the cabinets to the left, over the opening to the Family Room. The ceiling fan was moved to the other end of the Kitchen. The light fixture on the fan was put into a box. The mesh baskets with the fruit are in that same box. The metal railing (with a blanket hanging over it to keep cold air from dropping onto the chair in the Family Room, which is four feet lower than the Kitchen) is in the back yard and the cabinets replace the railing. The two ovens are Maytag, as is the cook top. We got the best price from www.Number1Direct.com. |
 |
|
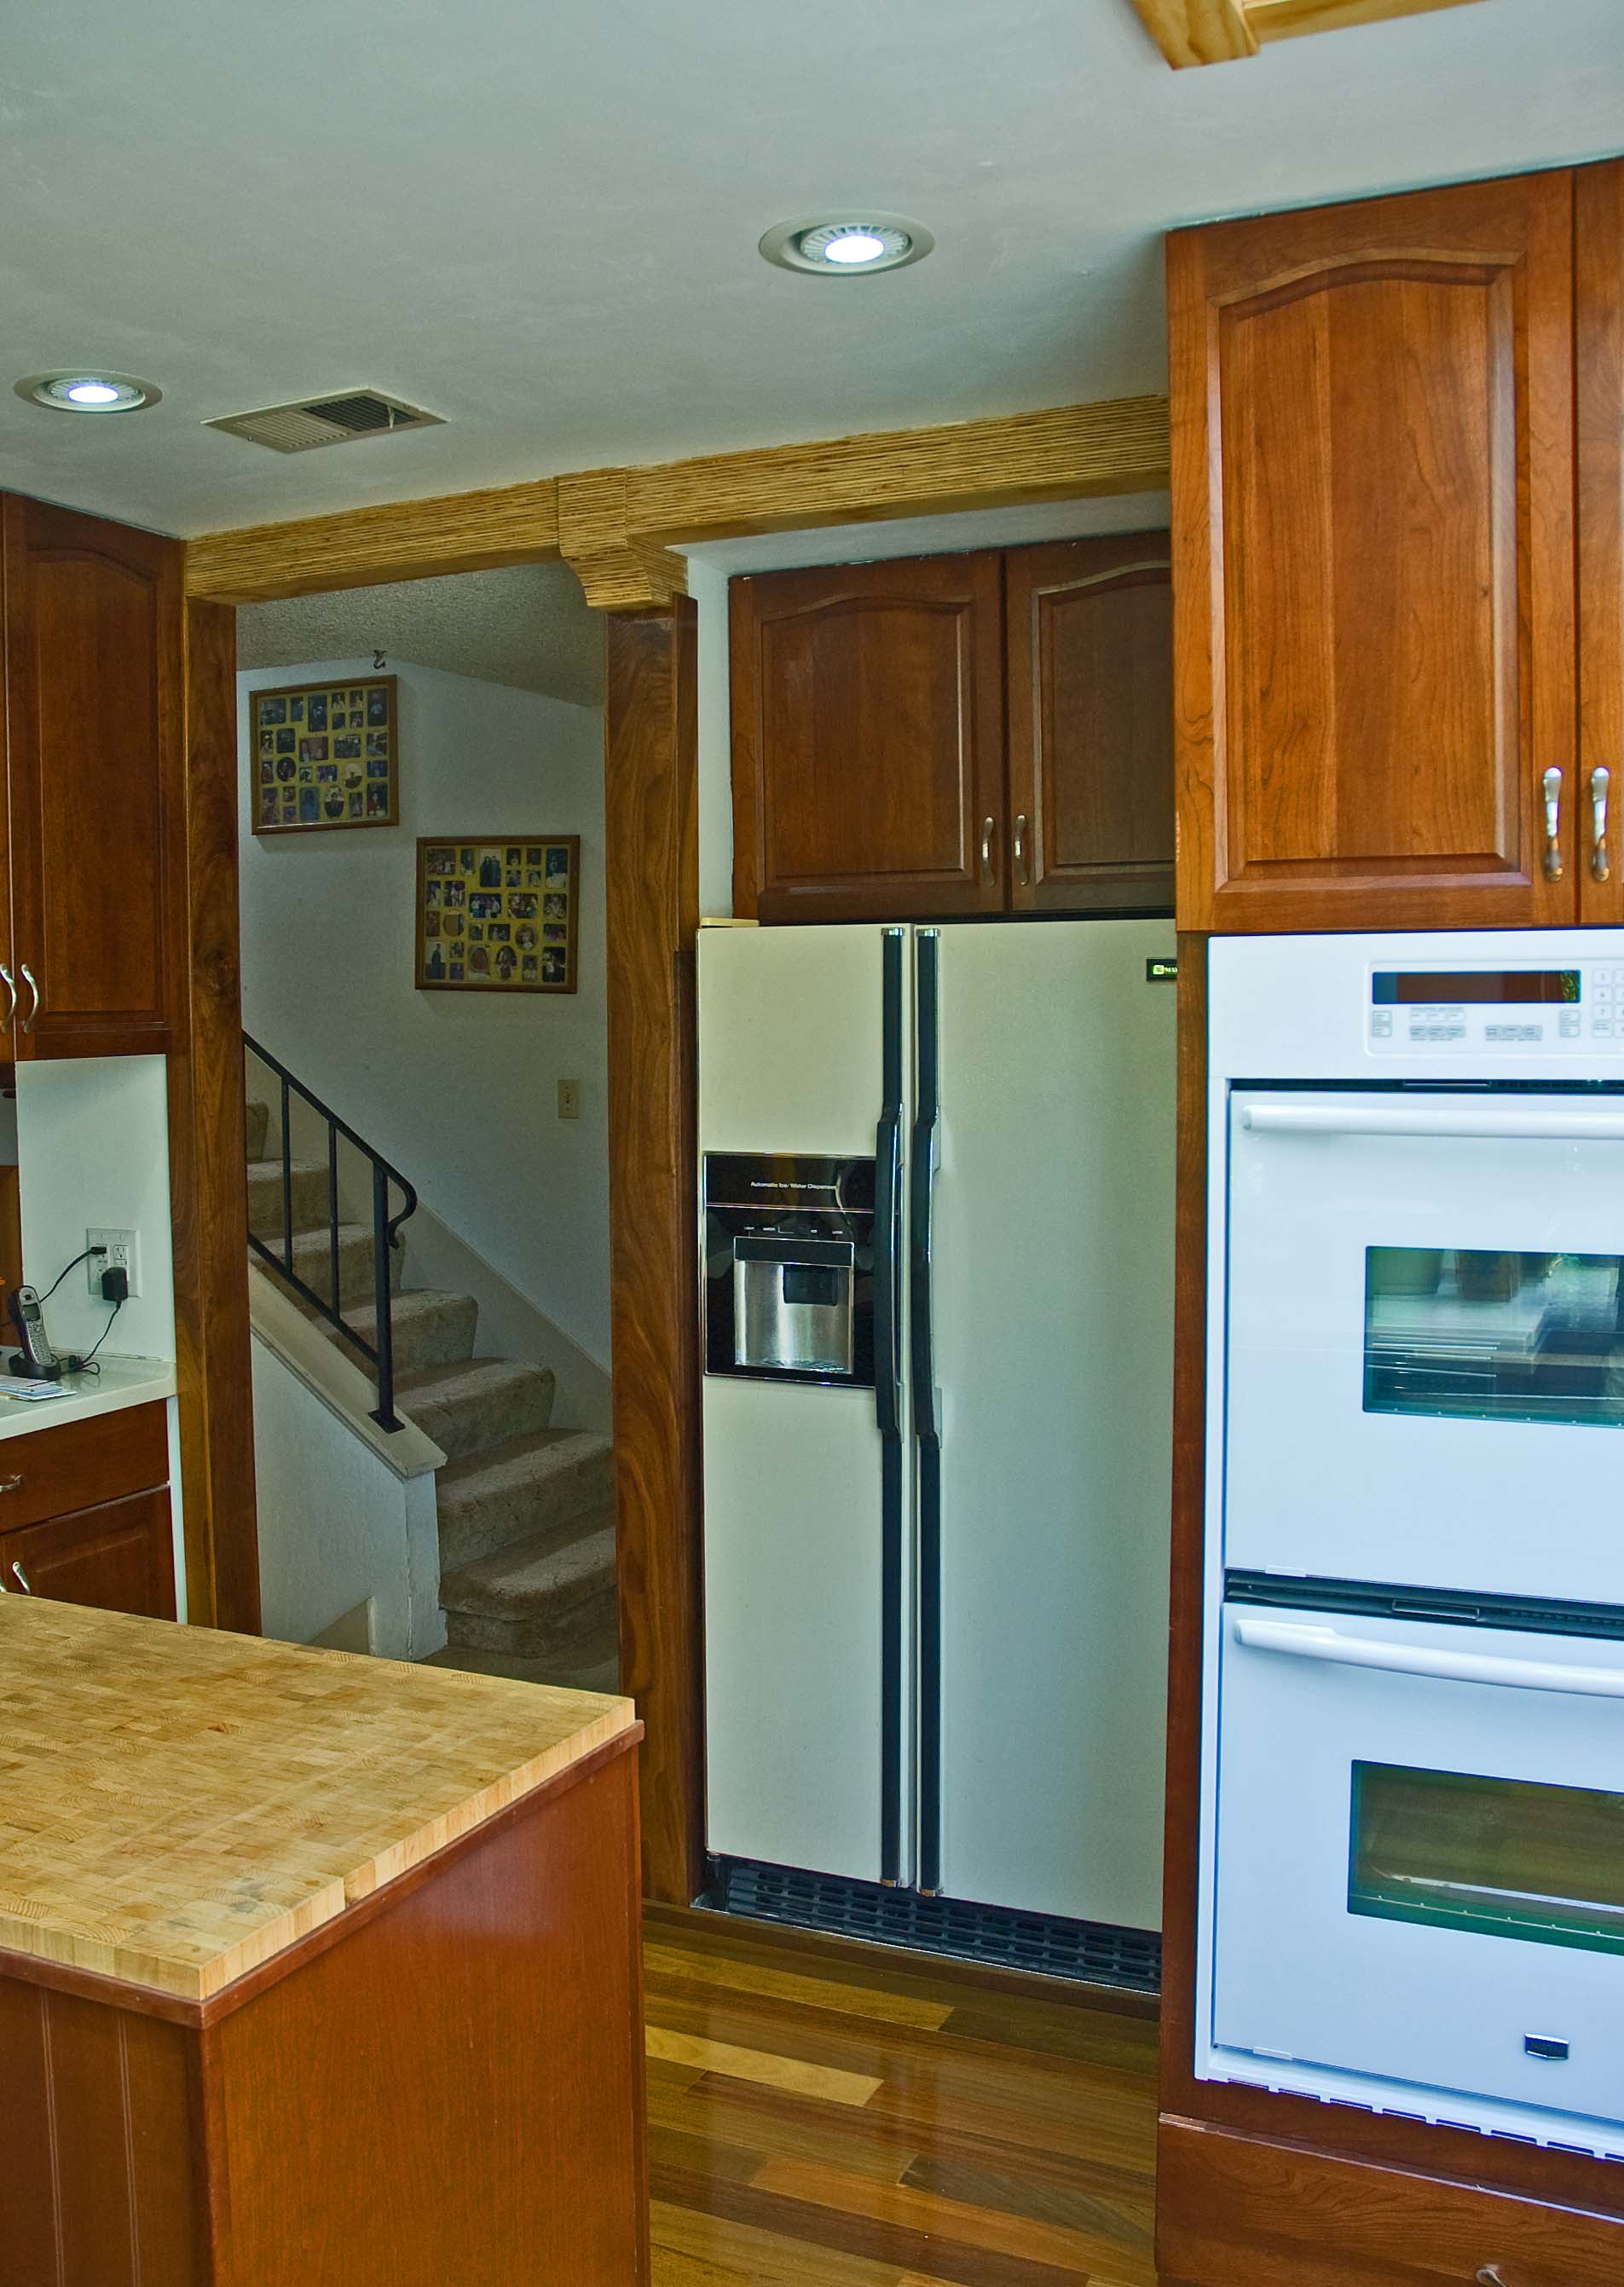
My cousin Karen asked me where we hid the refrigerator, and I realized that it was not in any of the views. So, an image similar to the one above but by shifting over slightly, the refrigerator becomes visible. That door in the BEFORE image was the pantry, which became the new resting place for the refrigerator and cabinet above. You might notice in the BEFORE image that there is no room to the left of the open door to place a cabinet. Therefore the door to the pantry is gone and the other door opening has been moved over closer to the refrigerator. The lower cabinets were able to fit in because we cantilevered the Kitchen floor six inches into the Family Room. |
 |
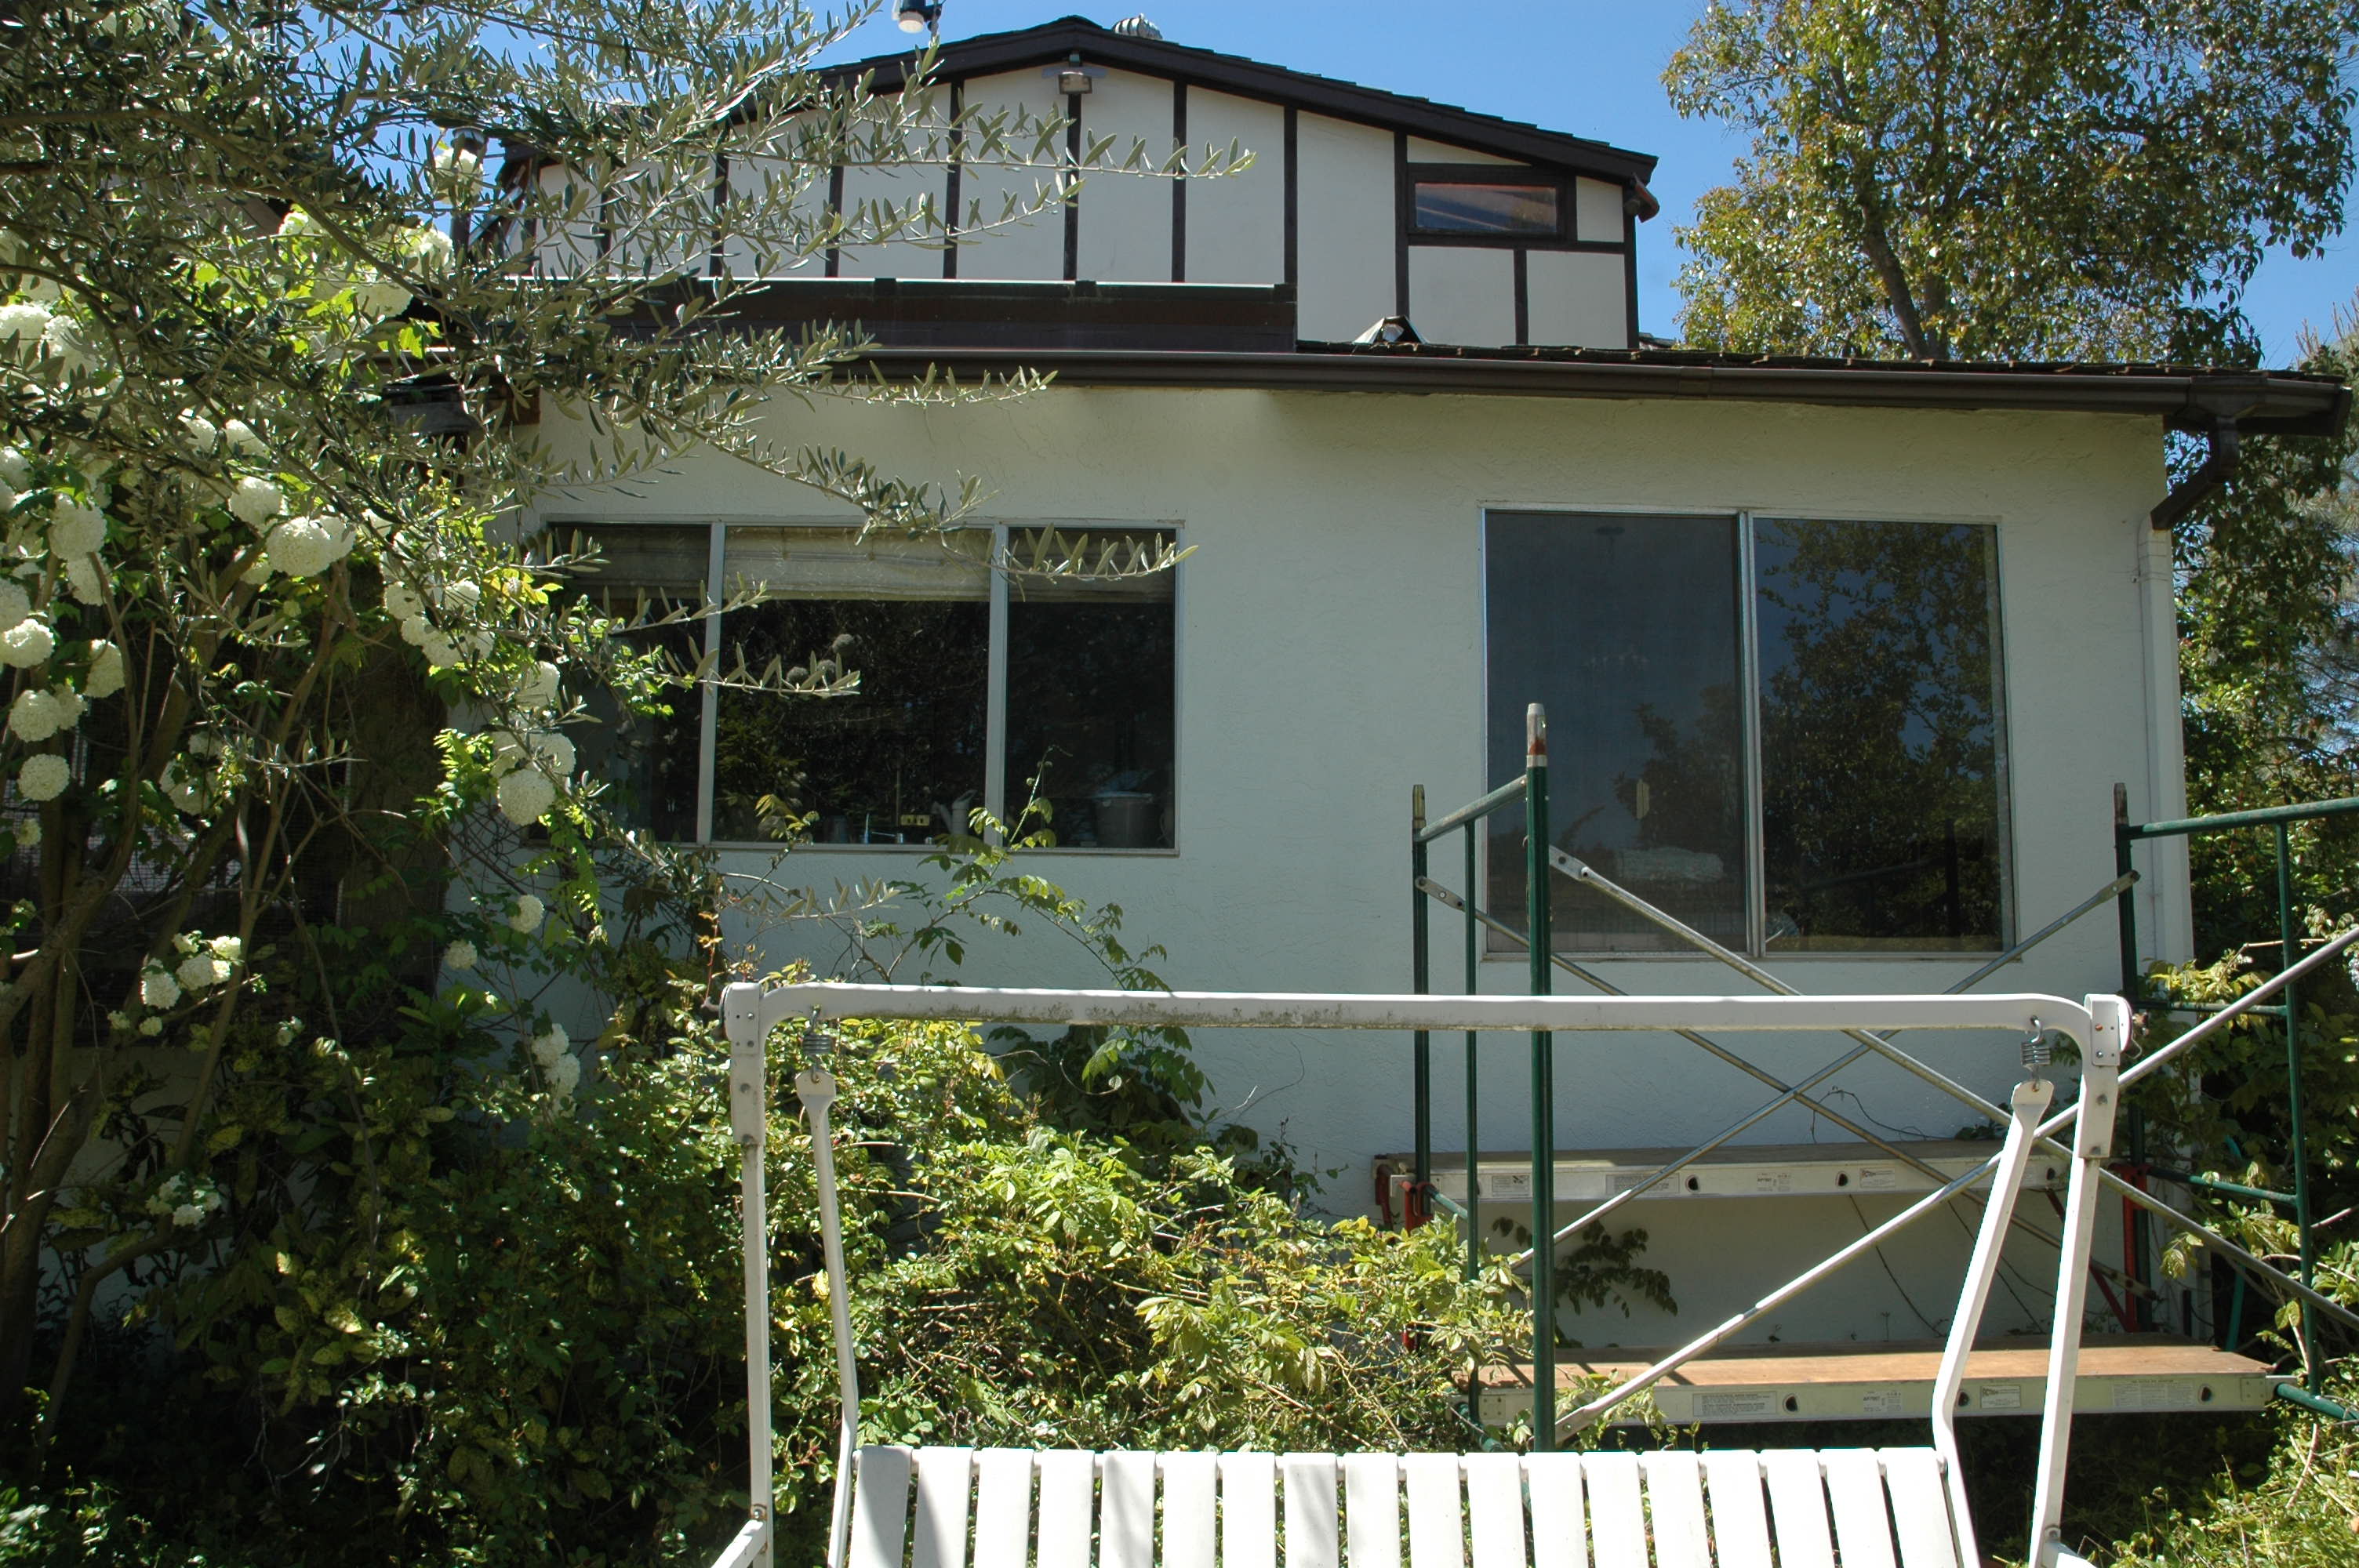 . .This is the original exterior, rear wall of the house. The single-pane glass slider on the right was replaced with the triple-pane French doors. The three-segmented single-pane glass slider is the one over the sink. The window on the right was replaced with double French doors and is out of sight in the "After" picture. The skylight above was built by us about five years ago and put into place when the new roof was installed, but we left the ceiling in place because Ken's mom was living with us and we wanted to avoid her dealing with the 'mess'. Possibly next year there will be a new deck here where the yard swing and trees on the left are now. It will be at the floor level of the house. That is an olive tree on the left that we are 'training' to be taller than usual, and it will pierce the deck and still offer clearance for walking under the limbs. It is a seedling from another seedling acquired from Walt Hughes in Fremont, and it is currently bearing olives. We also want to work in a Wisteria, but fix it so it will not outgrow the house and destroy the foundation. Stay tuned for that one. |
 |
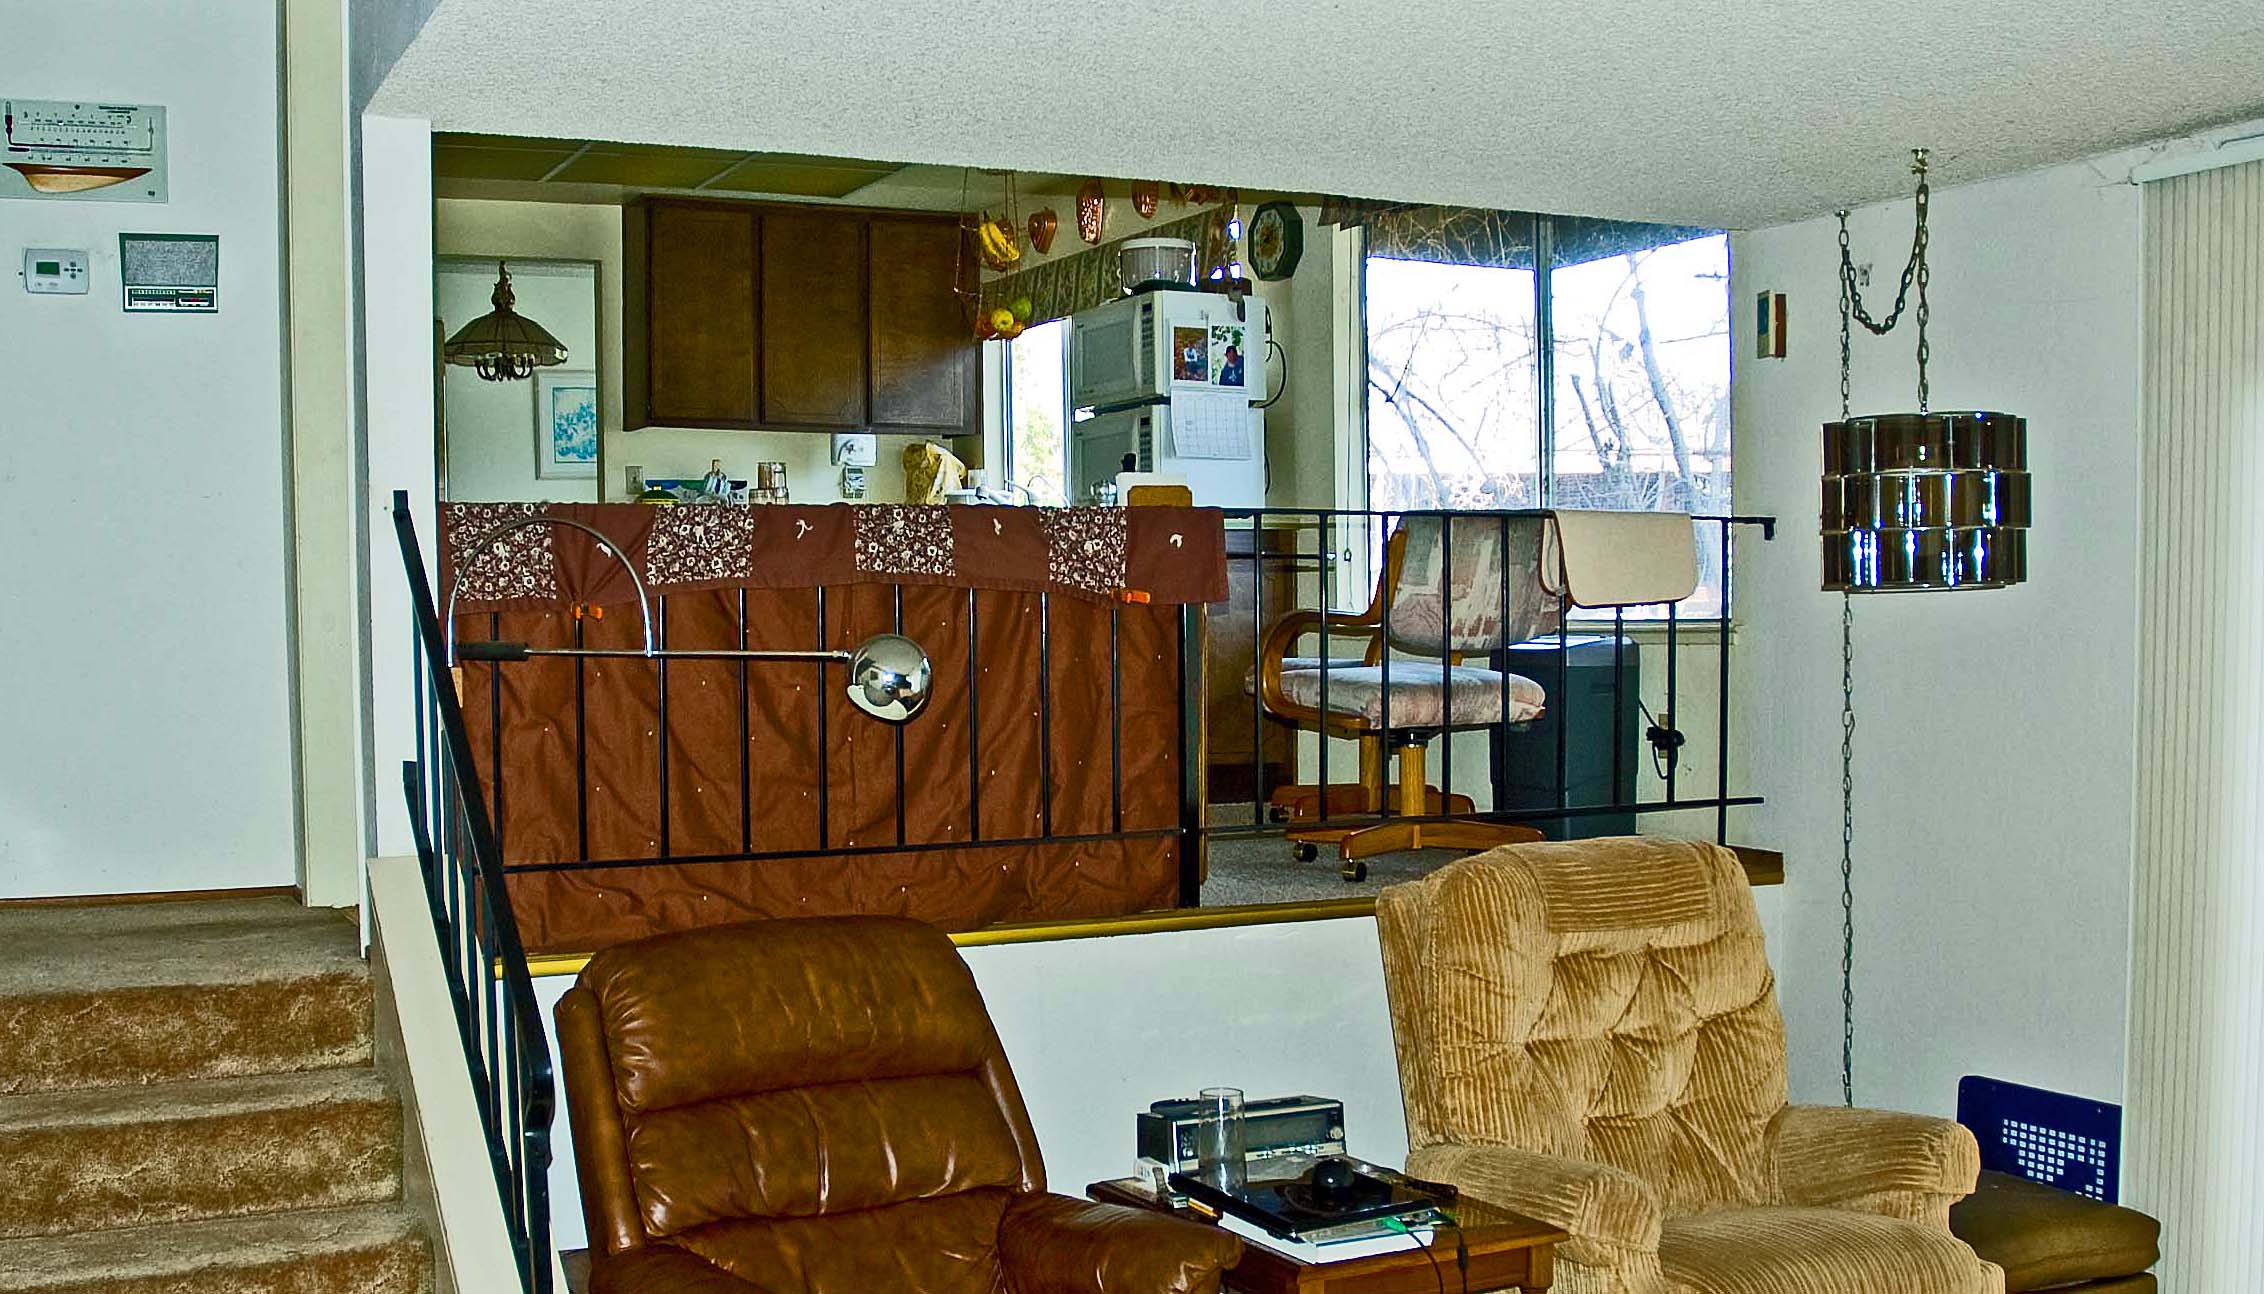
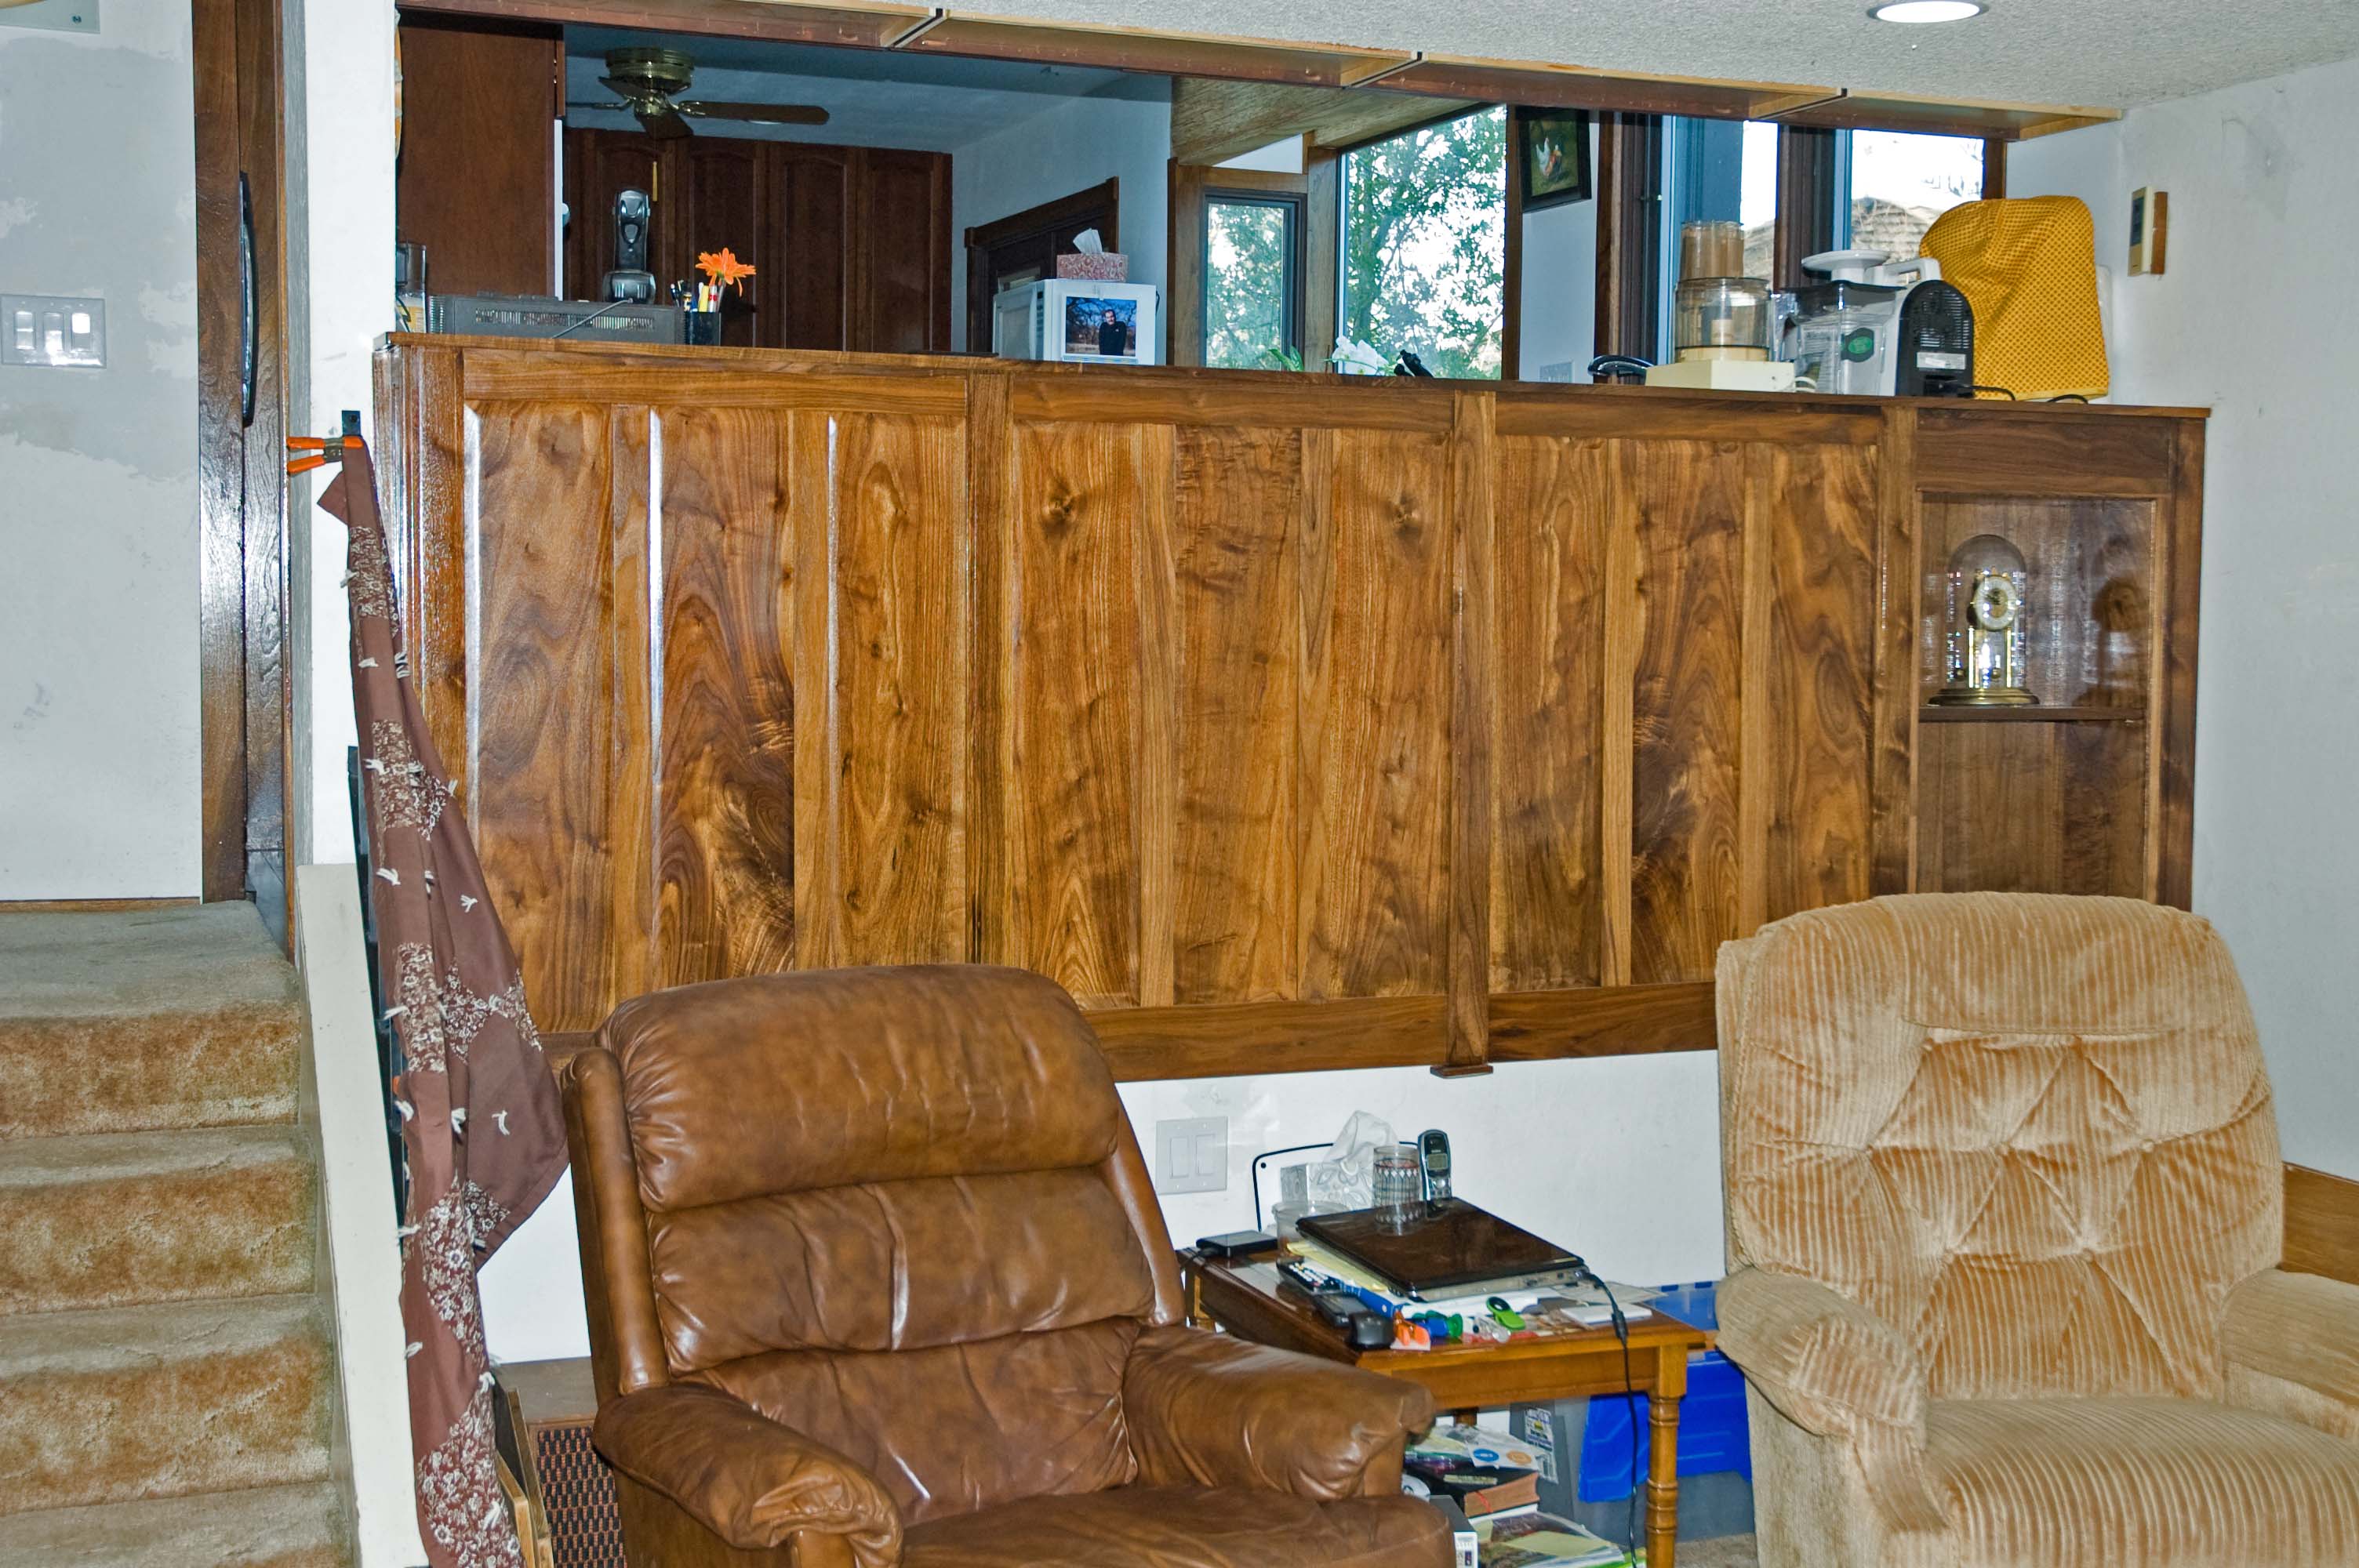
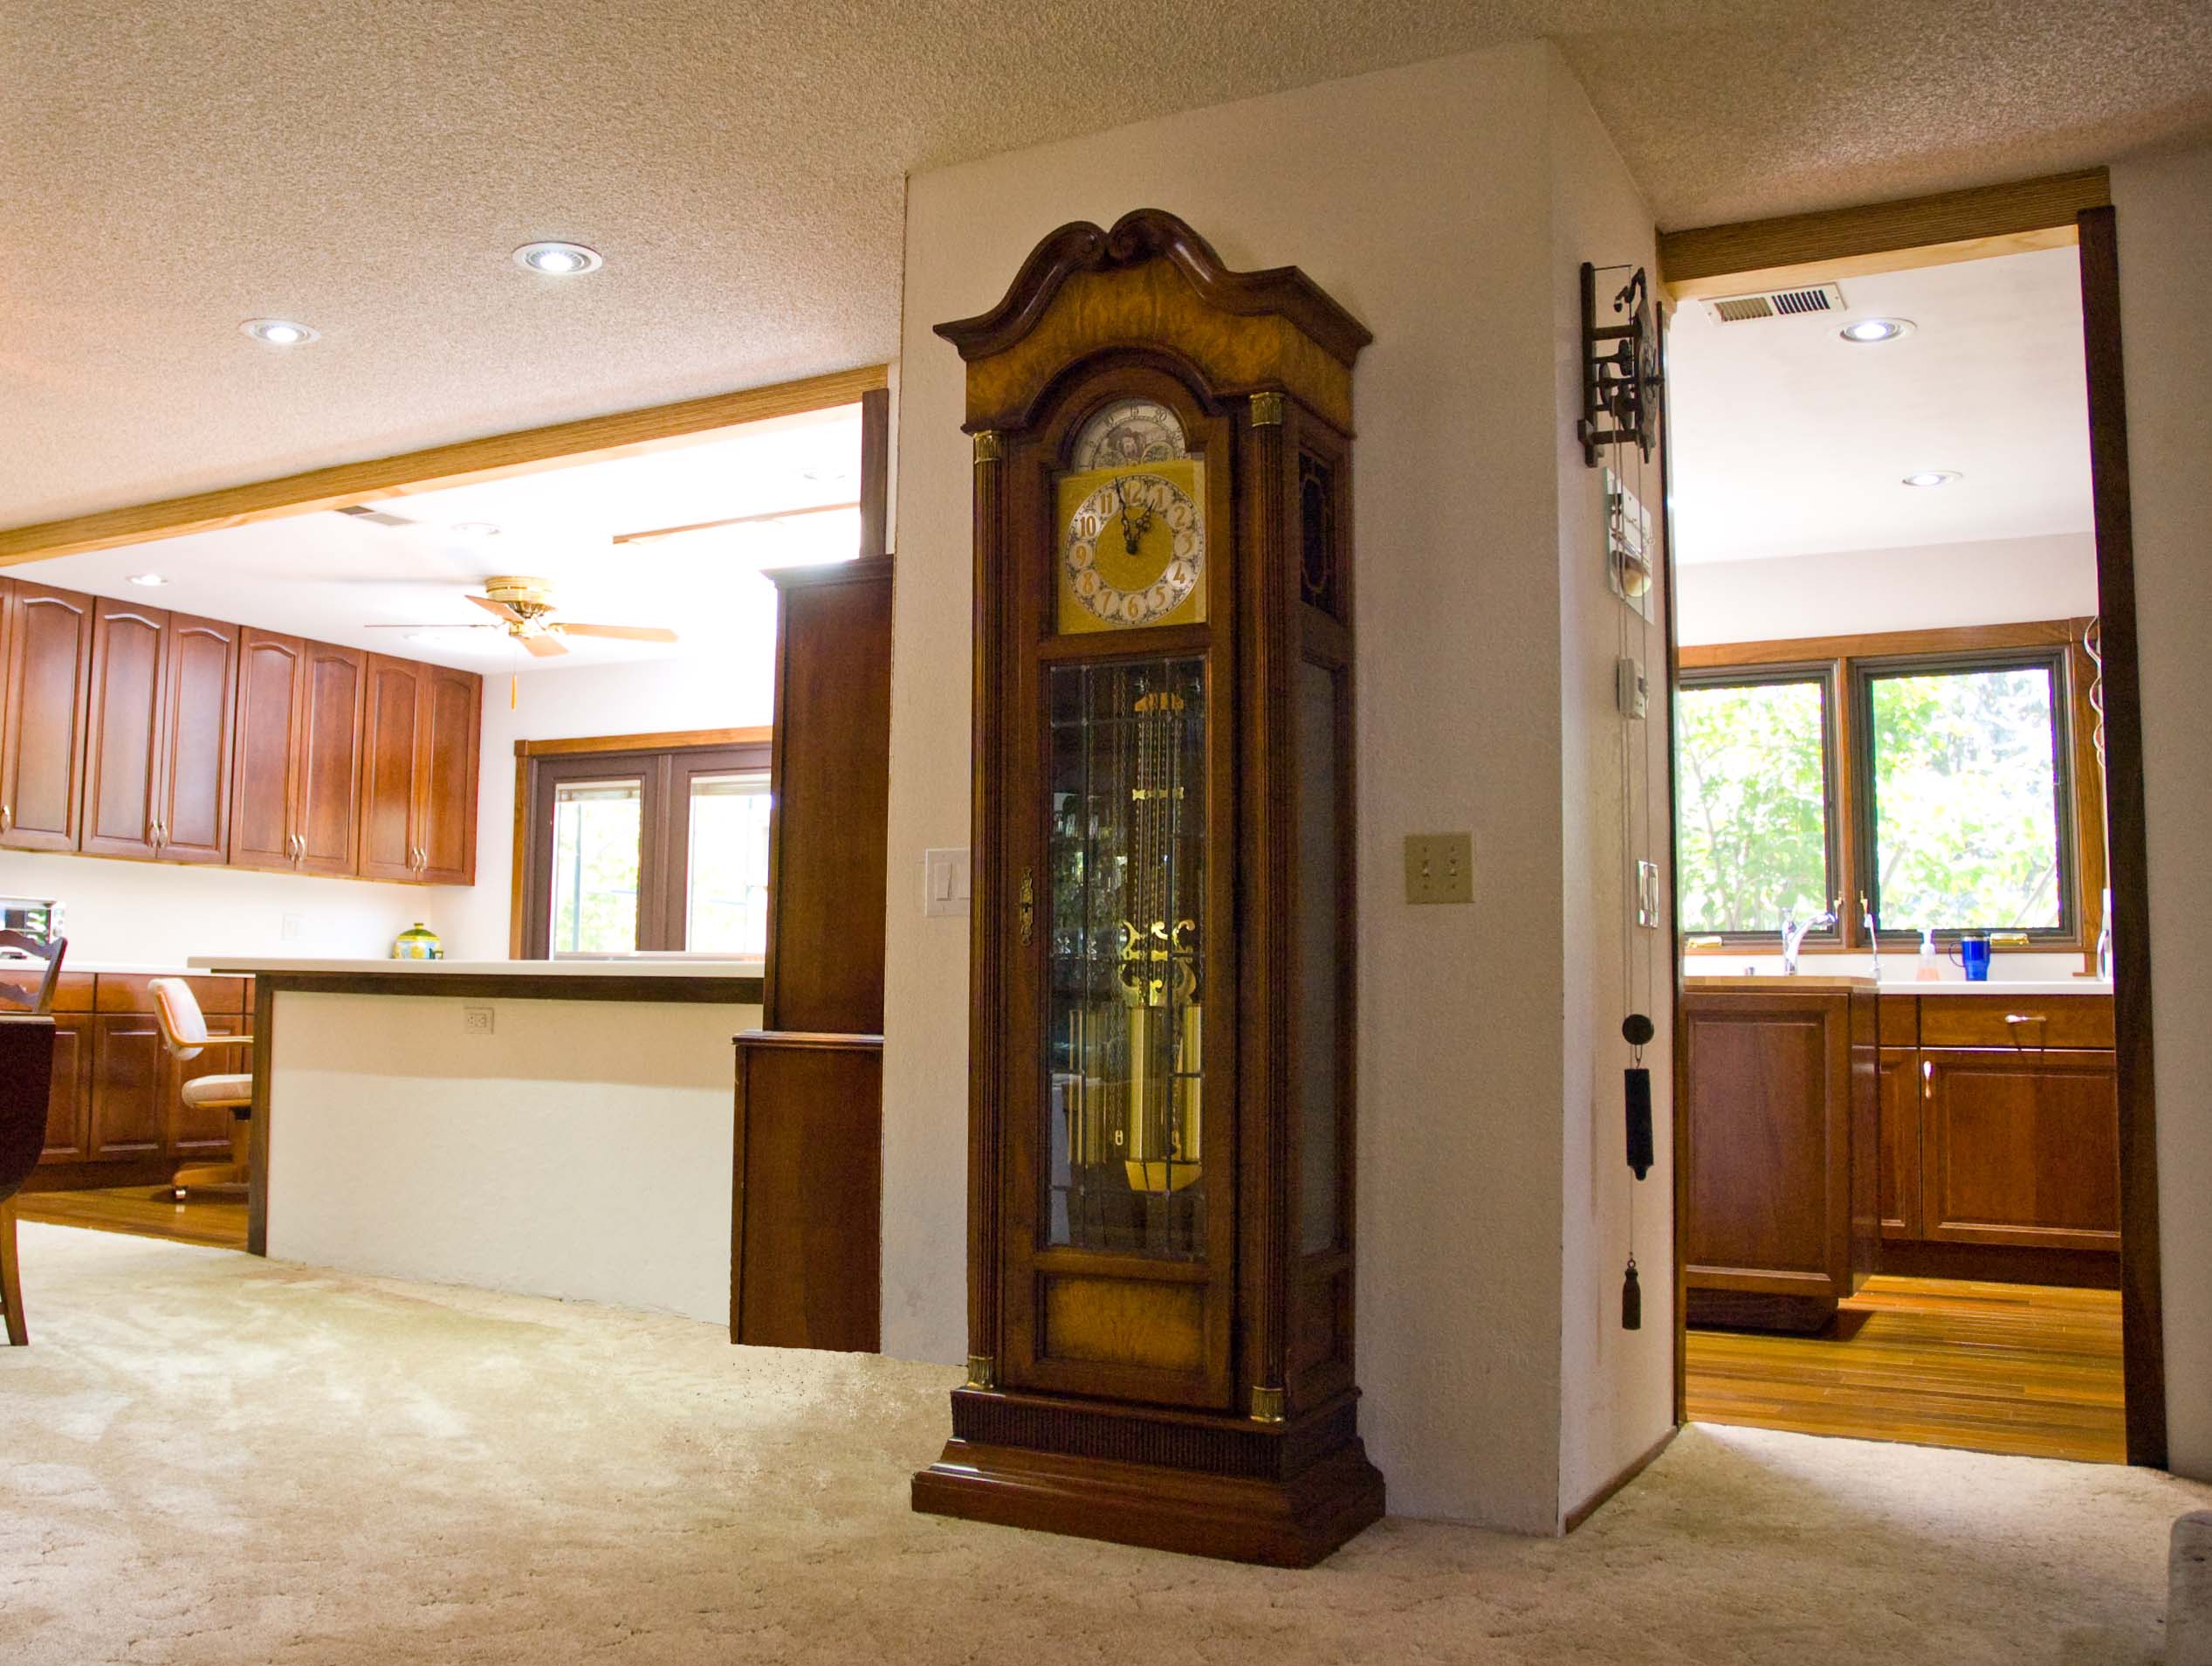
This view is from the entry, before coming up the five steps to the Dining/Kitchen level. The entrance into the Kitchen on the right is slightly wider than it was originally, and the 'bar' to the left used to be a full-height wall with the piano and organ standing in front of it. All of the lights are 'can' lights installed during this remodel, and they contain LED bulbs that use 20 watts of power to produce 1200 lumens of light... the equivalent of a 110 watt incandescent bulb. The Kitchen lights as well as the Dining Room lights are divided into three separate circuits with switches at both ends of the room to prevent having to walk the length of either room if a light is left on. |
 |